Key Takeaways
- Void Linux is a distro with lightweight software like the runit init system and a unique package manager.
- Void updates on a stable rolling release for up-to-date software and uses fewer computer resources than distros like Ubuntu or Fedora.
- Void is great for those looking for an efficient alternative operating system to Windows or macOS but has a somewhat limited app repository compared to more mainstream distros.
Most people interested in Linux know of the more popular distributions (or “distros”) like Ubuntu, Debian, Fedora, and Arch, but there are several other distros that are worth looking at. One is Void Linux, which aims to provide a clean and lightweight computing experience while maintaining the features expected of a modern Linux distro.
What Is Void Linux?
Void Linux is a Linux distribution that focuses on free and open-source software that is also trim and lightweight. Void emphasizes simple software that focuses on a single task. In essence, Void aims to “cut the fat” as much as possible while still providing a modern Linux experience. Hence, the name “Void.”
In practice, Void is very similar to most other Linux distros on the market, such as Ubuntu, Fedora, Mint, or Arch. Like these other distros, Void supports desktop environments and window managers, and it can install apps, manage files, browse the web, and do all the computing tasks most people need (e.g., writing emails, coding programs, creating documents, editing photos, and more).
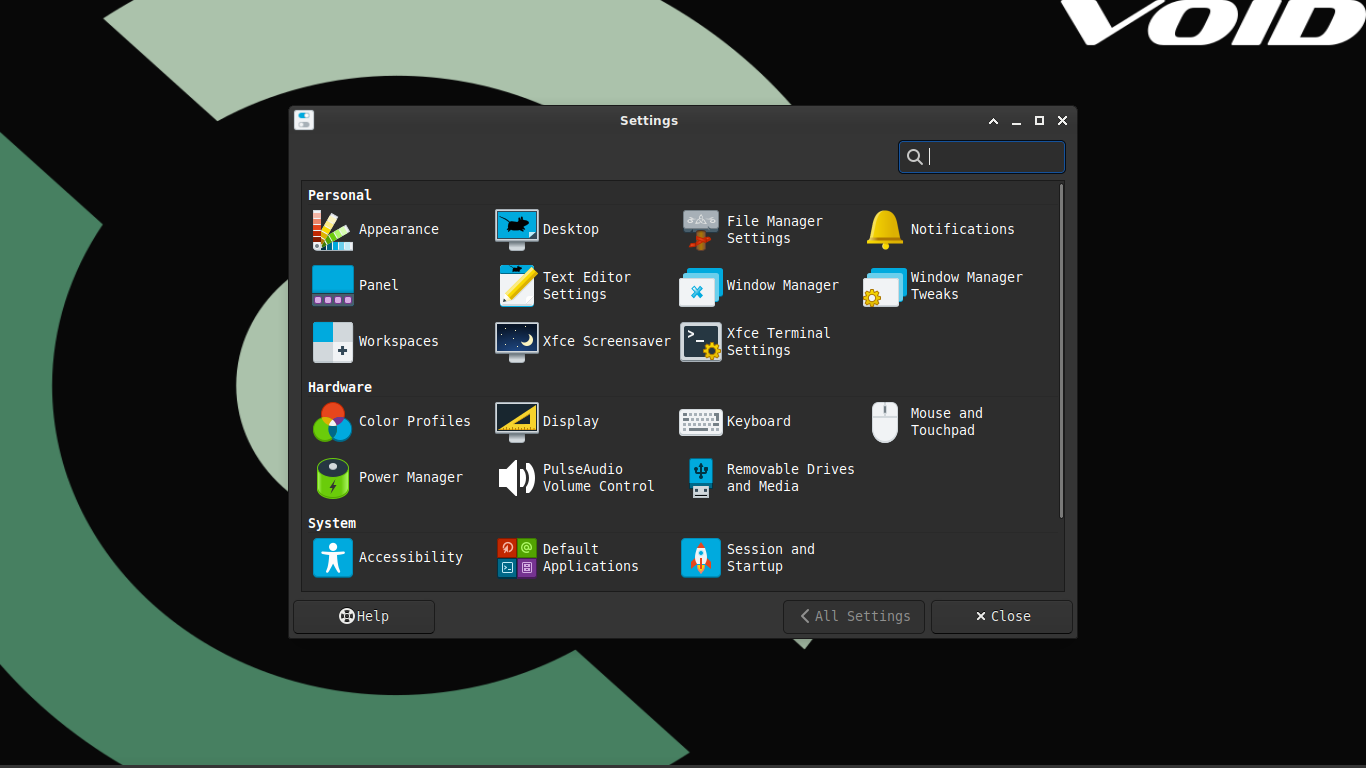
Void Linux opts for lightweight software, such as the XFCE4 desktop environment.
What Makes Void Different?
Void is an independent Linux distro, meaning it isn’t based on another existing distribution (e.g., Ubuntu is based on Debian). As such, it has a unique package manager (the X Binary Package System, or “XBPS”). XBPS is similar to other package managers in that it’s the way Void installs applications and software. Like most other tools in Void, XBPS is lightweight; as a result, it installs, updates, and deletes apps quickly and efficiently.
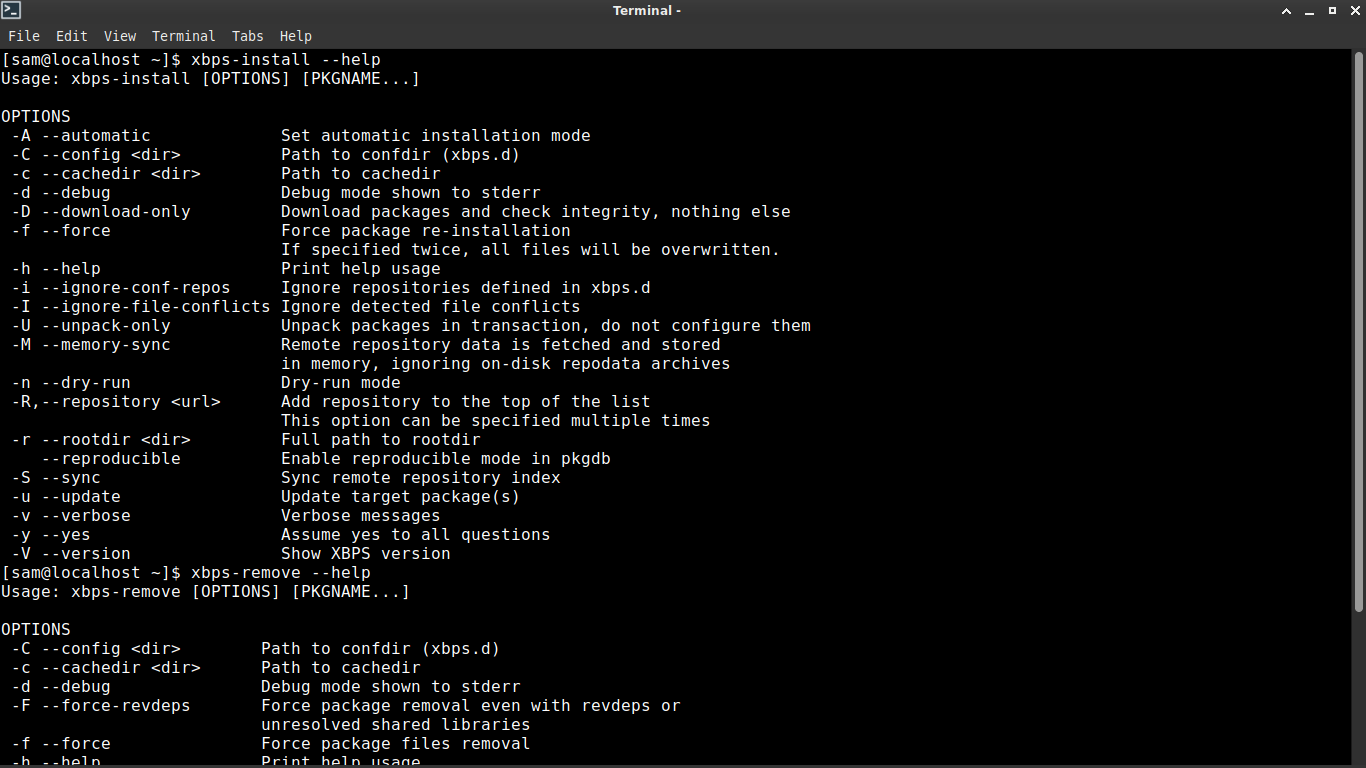
There are separate binaries for installing, removing, and finding software in Void Linux.
Void also uses a different “init” system (the first program an operating system runs to initialize other programs and services) than most other Linux distros; while systemd is commonly used by distros, Void uses runit, which is significantly smaller in scope and size. As such, Void boots very quickly and generally uses fewer computing resources than other distros like Ubuntu or Fedora.
Lastly, Void is a “stable rolling release,” which attempts to strike a balance between distros like Arch (which uses the latest software available, bugs and all) and Debian (which releases major updates every few years). Void and its packages are updated frequently with tested and “stable” versions, meaning Void provides up-to-date software without most of the pitfalls of a true rolling release. The end result for you as the user is access to the newest versions of apps that are tested and suitable for public release.
Why Should You Use Void?
You might like Void Linux if you’re looking for a distro that focuses on lightweight software without sacrificing many of the features modern Linux distros enjoy. Void ships out of the box with lighter software like runit and the XFCE4 desktop environment, which both focus on efficiency over features.
Void is also a good option for older machines; because it uses runit and lighter software, boot times are often faster with Void, and system overhead is typically much lighter without sacrificing too many niceties.
Lastly, Void provides a unique Linux experience apart from the smattering of Debian-, Arch-, and Fedora-based distributions. There’s a bit of clout to gain in the Linux community for running more esoteric distros like Void, and it’s not as labor-intensive to install as Arch. Void is a good “middle-tier” Linux distro that requires a bit more know-how than distros like Ubuntu without the steep learning curve of Arch or Gentoo. Void is a good distro to learn how Linux works “behind the curtain,” so to speak.
There are some drawbacks to Void. Primarily, its repository may not include some applications present in those of the more popular distros. This can often be circumvented by building apps from source or via Git, but these are extra steps that aren’t present in something with a more expansive repository. Also, because Void isn’t as popular as other distros, it is more difficult to find help for resolving some issues. Stack Overflow and Reddit aren’t replete with posts about solving issues in Void Linux (although the distro is growing in popularity).
Personally, I run Void on my laptop because it’s an older machine (a Dell Latitude E6430 from 2013 powered by an aging Intel Ivy Bridge CPU). Void boots in about 6 seconds and is light on hardware demands, resulting in a snappy and responsive system that sips battery power compared to heavier distros like Ubuntu or Fedora (which boot on my laptop in roughly 22 and 27 seconds, respectively). XBPS downloads and installs apps much faster than Fedora’s DNF or Debian’s APT package managers, and this is important to me since Internet speeds in my area are very slow (roughly 10 Mbit/s). Also, I like running a less-used distro for both the challenge and the sense of accomplishment.
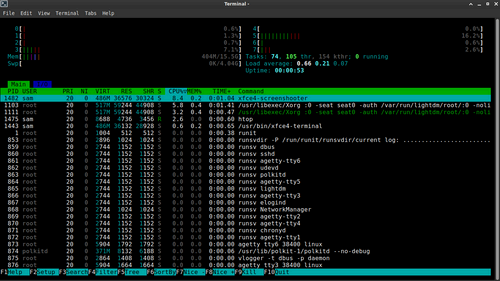
On an idle desktop, Void uses less than 1% of CPU and roughly 400-500MB of RAM.
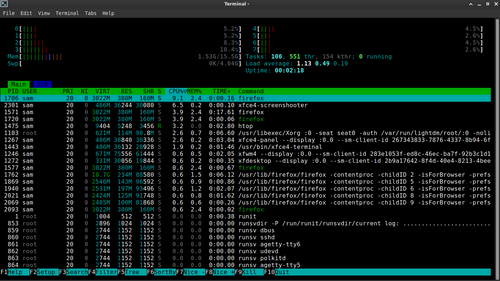
Even with 5 tabs in Firefox (including a YouTube video playing) and an image loaded in GIMP for editing, Void is light on demand.
How to Try Void Linux and Install It
To try Void Linux, download the latest ISO file from Void’s download page. If you’re not sure which ISO to download, select “void-live-x86_64-20230628-xfce.iso” (the file name may be slightly different based on the date, but it will have “void-live-x86_64” and “xfce” in it).
Flash this ISO to a USB drive using a tool like Balena Etcher and use the drive to boot into a Void live instance.
Here, you can try Void out and give it a whirl. By default, Void uses the XFCE4 desktop environment, so if you’ve used XFCE in the past (or any distro that ships with XFCE out of the box), it will feel familiar.
If you’d like to install Void, open a terminal and type sudo void-installer to launch the installation utility. This will look like an old-school installer, but the process is fairly straightforward. You’ll need to select each option with the arrow keys and hit enter to configure them.
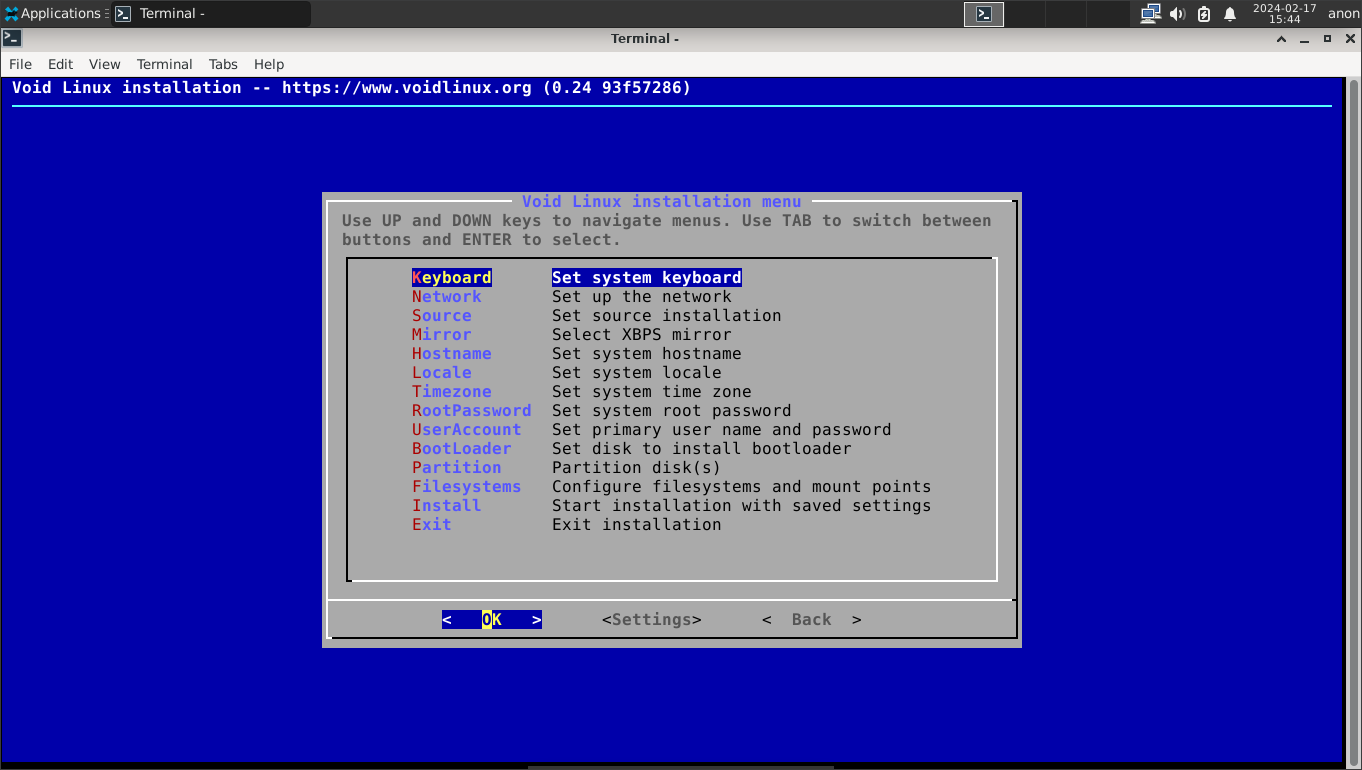
Here are my recommendations:
Keyboard: Set to “us” for United States English (standard QWERTY)
Network: If you’ve connected to WiFi (via the XFCE network options) or plugged in an Ethernet cable, this option should simply tell you the network is working properly.
Source: Select “local” to install Void from your USB drive. (Selecting “network” will download everything from Void’s repositories and result in a very basic install that may not include a desktop environment.)
Mirror: This is where Void will look for installable software through the package manager. You can either choose your region and then select the Tier 1 location nearest to you, or you can select “Default” and Void will automatically select a Tier 1 mirror for you. (If you live in the United States or Canada, the Chicago mirror is a good option.) If you are prompted to accept the change, select “Yes.”
Hostname: Select a name for your machine. This will be used to recognize it on a network.
Locale: Select the locale to configure the system’s language and region. If you live in the United States, select “en_US.UTF-8” for “English (United States of America).” If you live in Canada, select “en_CA.UTF-8” for “English (Canada).” Otherwise, find your preferred locale and hit Enter to select it.
Timezone: Select “America,” and then select a city in your preferred time zone. For example, select “Chicago” for Central Time, “New York” for Eastern Time, etc.
Root Password: Set a memorable and secure password for the root account. Make sure that you remember this, as the root account is used to make system-wide changes.
User Account: Set a user account name. Remember that it cannot start with a capital letter. Then enter the display name for this user account (what will show up on the login screen and in menus). Choose a password for this user account. This should be different from the root password for security purposes. Then select the groups this user should be added to. If you are uncertain, you can leave the defaults set and hit “OK.” You can always add users to or remove users from groups later.
Boot Loader: Select the disk you want to install the Grub bootloader to. This should be on the disk “/dev/sda.” When asked to use a graphical terminal for the bootloader, select “Yes.”
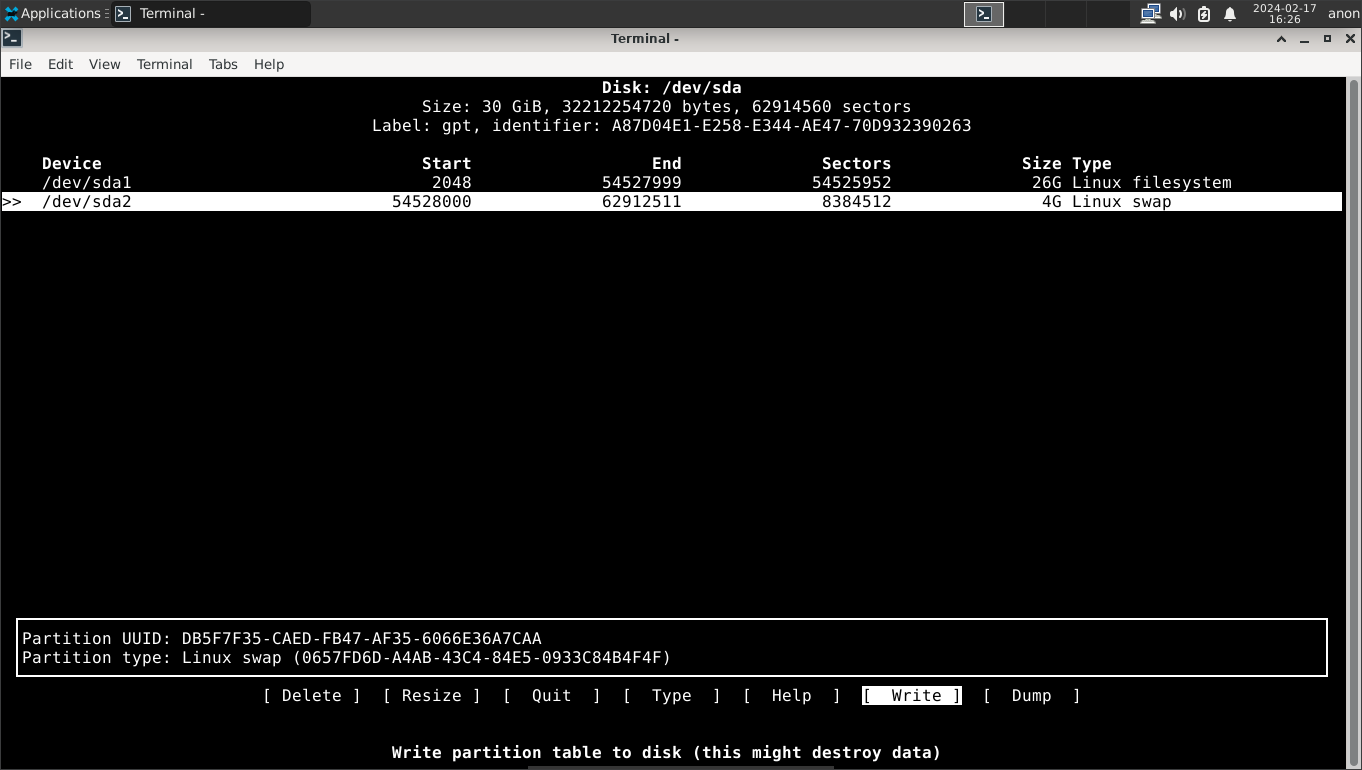
Partition: If you are installing Void Linux as the only operating system on your machine, this process is fairly straightforward. (If you are dual-booting Void Linux with another OS like Windows, refer to our guide on dual-booting to correctly partition your hard drive.) Select your disk to partition for Linux (which should be /dev/sda). Select “cfdisk.”
If you are on a UEFI system, select “gpt” for the partition table. Using the options, create a partition of 200MB by selecting “New” and typing “200M.” If you want a swap partition (recommended), create a new partition and choose its size (recommended 4GB). Select the remaining free space and create a new partition with the remaining space on the disk (which should be input by default). Now, use the “Type” option to change your 200MB partition to “EFI System,” the swap partition to “Linux swap,” and the remaining space to “Linux filesystem.” Once your disk is partitioned, select “Write,” type “yes”, and then select “Quit.”
If you are on a BIOS system, select “mbr” for the partition table. If you want a swap partition (which we recommend), create a new partition and choose its size (at least 4GB is a good idea). Select the remaining free space and create a new partition with the remaining space on the disk (which should be input by default). Now, use the “Type” option to change the swap partition to “Linux swap” and the remaining space to “Linux filesystem.” Once your disk is partitioned, select “Write,” type “yes”, and then select “Quit.”
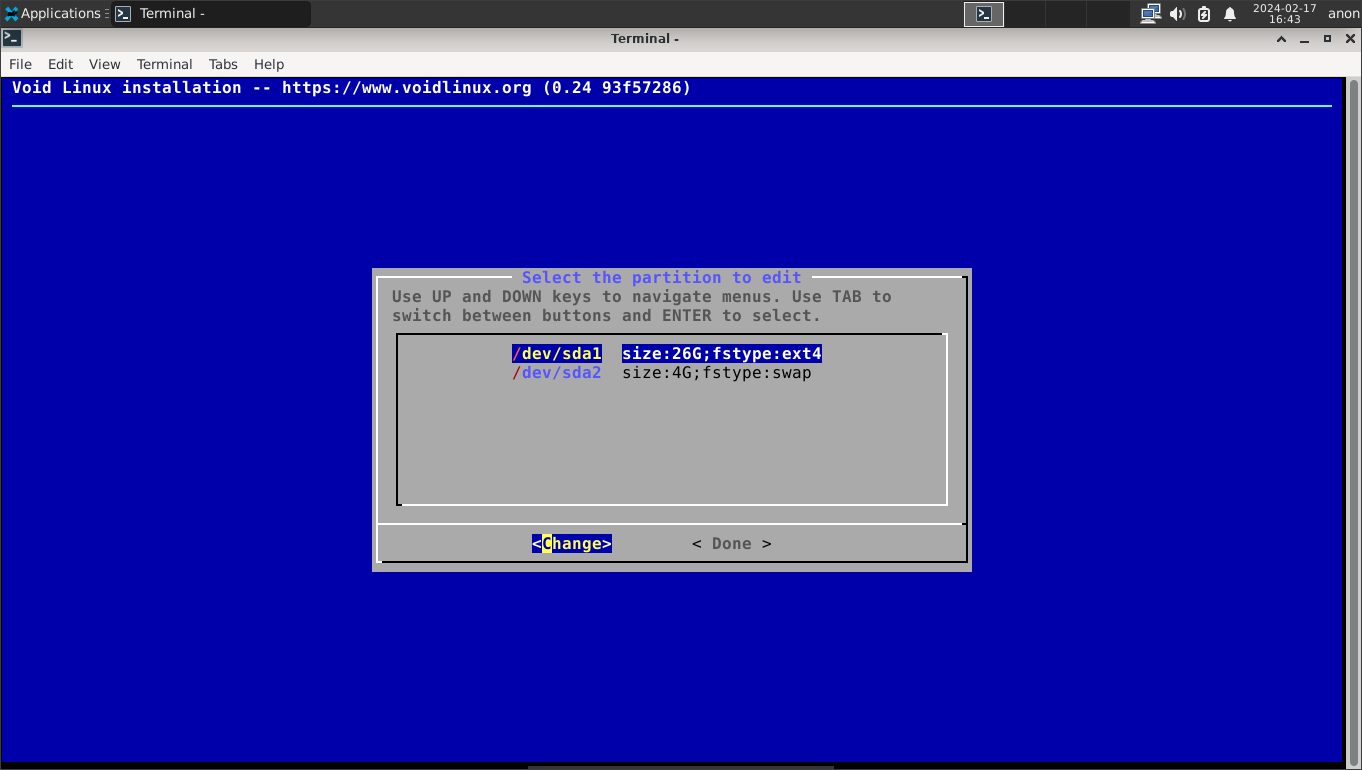
Filesystems: If you are on a UEFI system, select your 200MB boot partition, then select “vfat” for FAT32. When prompted to specify a mount point, enter “/boot/efi” and hit enter, then select “Yes.”
If you created a swap partition, select it and select “swap” and then “Yes.” Now select your main partition (the largest one) and select “ext4.” For the mount point, type “/” in the field, hit enter, and select “Yes.” Once you’re finished configuring the filesystems, select “Done.”
If you are on a BIOS system, set your swap partition to the “swap” filesystem type and your remaining partition to “ext4” with “/” as the mount point.
Install: Select “Yes” and let the installer run. Once it is finished, you’ll be asked to reboot your system. Select “Yes” to boot into your Void Linux install.
Congratulations! You’ve installed Void Linux! Welcome to the Void!