Key Takeaways
- Conky is a powerful system monitor software for Linux that allows you to customize widgets on your desktop for displaying various types of information.
- You can show system information, display custom information, choose information sources, and tweak the appearance of the widgets.
- Installing Conky Manager provides a user-friendly interface for managing and activating widgets, and you can download stylish Conky themes to enhance your desktop experience.
Want to give your Linux desktop a personal touch? With Conky, you’re just a few steps away from transforming it into a visually stunning and highly functional space that reflects your personal style and meets your needs. Let’s explore how you can make your Linux experience uniquely yours!
Conky is a light-weight system monitor software for Linux. With it, you can set up multiple, highly-customizable widgets on your desktop and showcase various types of information. Think Rainmeter, but a lot more powerful. Here’s a quick overview of what you can do using Conky:
- Show system information: CPU and GPU temps, running processes, disk usage, network stats, system messages, currently playing song, app notifications, etc.
- Display custom information: Set up calendar view, to-do list, weather, etc.
- Choose information source: Embed information from any third-party sources and show it on your desktop.
- Tweak appearance: Complete control over the fonts, colors, and layouts of each widget.
Installation and Set Up
For the purpose of this tutorial, I’ll install Conky on Ubuntu 22.04. If you aren’t running Ubuntu, check out the official Conky documentation for help with installation.
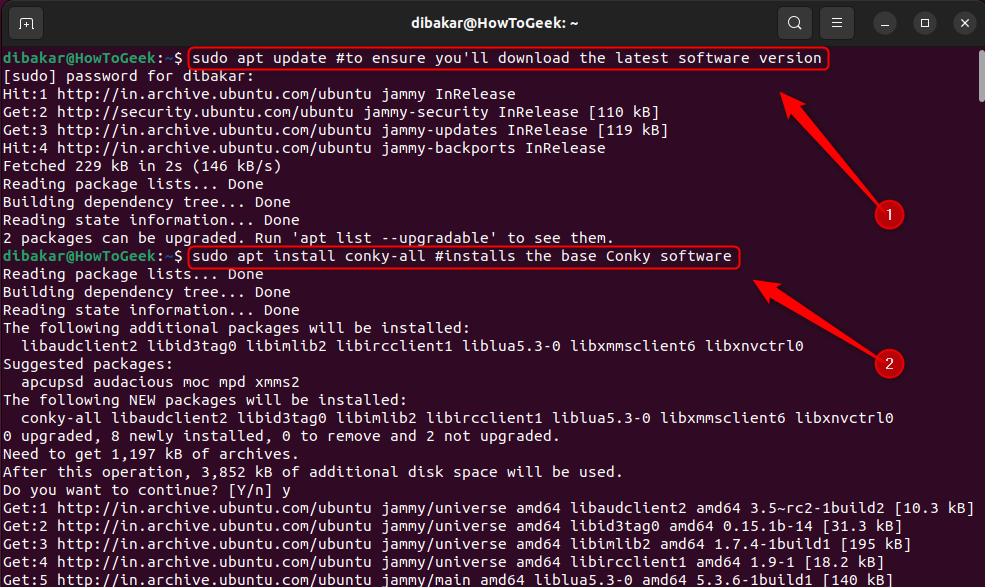
To install Conky, open your terminal and enter the following commands, one by one:
First, ensure you’ll download the latest software version.
sudo apt update
Next, we’ll install the base Conky software.
sudo apt install conky-all
To make things easy for ourselves, we’ll add the repository for Conky Manager.
sudo add-apt-repository ppa:teejee2008/foss
Let’s ensure you’re downloading the latest version of Conky Manager by again updating our packages.
sudo apt update
Now, install version 2 of Conky Manager.
sudo apt install conky-manager2
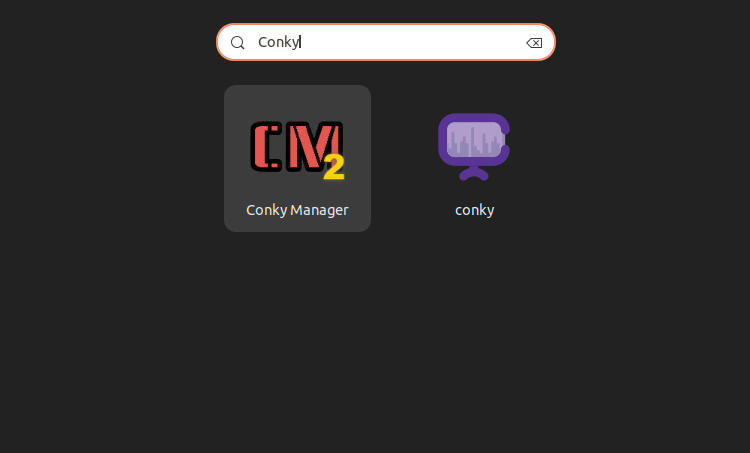
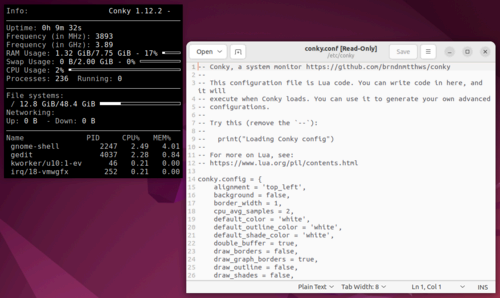
You’ve successfully installed Conky and Conky Manager on your system. Now, you can technically run the Conky app directly, and you’ll get the following widget on your desktop. It’s a barebone experience where you’ll have to write scripts to tweak the appearance, behavior, and functionality of this widget.
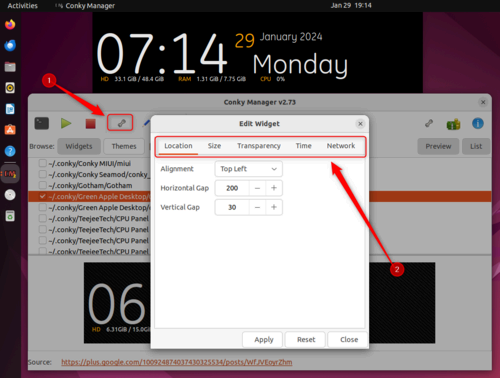
A more streamlined and user-friendly approach is using Conky Manager. It gives you a GUI interface with a list of all installed Conky widgets and themes on your PC. The names appear as complete paths to the specific file. So, instead of saying the “Network panel”, it’ll show you the entire path “~/.conky/TeejeeTech/Network Panel.”
Essentially, the name at the end is the name of the Conky widget and the name before it is the containing folder. You can activate or deactivate the widgets by clicking on the checkboxes for each widget. It also lets you tweak the layout and alignment of the widgets without needing to mess around with any code.
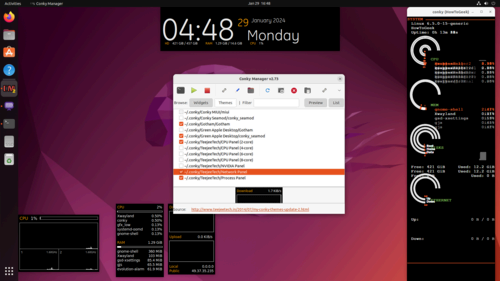
By default, the Conky Manager comes with a number of widgets, but they aren’t eye-catching enough. Not to worry though, as there are talented folks who have developed dedicated Conky themes with stylish widgets that you can simply download and start using on your system, no code necessary.
Installing Conky Themes
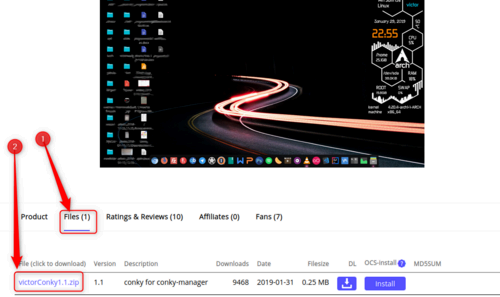
For this demonstration, I’ll install the victorConky Theme. To do this, visit its download page, click on “Files,” and download the .zip file. Once downloaded, visit the containing folder and extract the file.

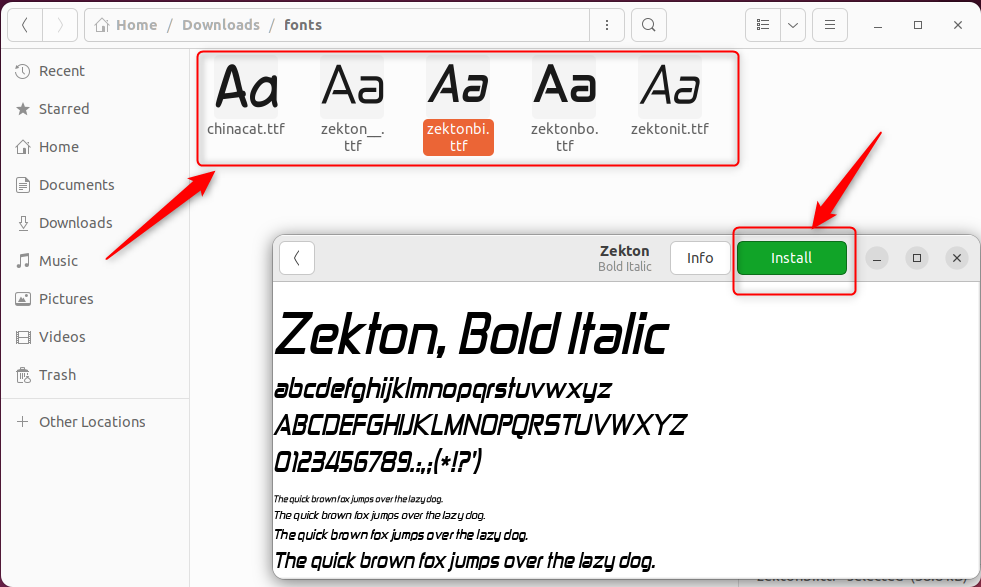
For the Conky widget to work, you’ll first need to install the provided fonts. Simply enter the “fonts” folders, open each of the five fonts one by one and click on the “Install” button.
Once done, you’ll need to move the victorConky file to the “.conky” folder in the home directory, so that it becomes accessible via the Conky Manager. To do this, open the terminal in the download directory (or wherever you extracted the file to) and enter the following command:
mv victorConky ~/.conky

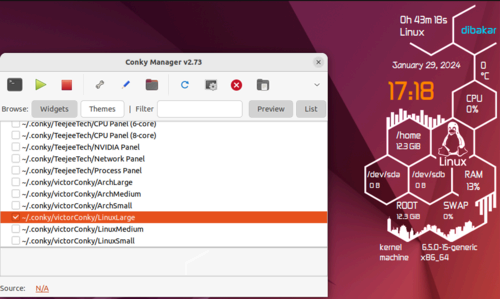
Now, the victorConky widgets should be accessible from the Conky Manager. Open it, and you should see a list of new widgets added. I personally liked the LinuxLarge widget and use it on my system. You can enable it by clicking the checkbox beside it.
Useful Resources
Here’s a list of my top 10 favorite Conky themes ranked by ease of installation (1=easiest and 10=most complex). For more Conky themes, you can visit the Pling Store or Deviant Art.
- Conky Deer
- Conky Rock-Roll
- Victor Conky
- Octupi Conky
- Denebola
- Mimosa
- Botein
- Muscida
- Auva
- GoogleIntegratedSystemConky
Conky themes come in all shapes, sizes, and functionality. Simpler Conky themes, like a stylized clock, only require you to move it to the “.conky” directory, and you’re good to go. More complex themes, like the ones that show current weather info, or Gmail notifications, will require you to set up the information channels and also install additional software packages.
Complex Conky Themes from good developers will have a detailed installation guide. Simply follow the instructions specific to the theme to install it on your system.
And that’s it! You’re all set to start your journey to a more personalized and functional Linux desktop experience. Whether it’s for monitoring your system’s health, keeping track of your daily tasks, or just adding a touch of personal flair, Conky is your go-to tool. So go ahead, experiment, and make your desktop truly your own!

