The Apple Watch is one of the most popular and feature-packed wearables out there. A godsend for iOS users, the Apple Watch pairs to your iPhone to keep you up-to-date on everything from text message and notifications to health monitoring. Once in a while though, your Apple Watch may run into glitches and bugs that complicate your user experience.
Whether you’re having issues connecting to your iPhone, receiving notifications, or you can’t seem to transact with Apple Pay, we’ve put together this list of some of the most common Apple Watch problems, with solutions and troubleshooting tips provided for each debacle.
Jesse Hollington / Digital Trends / Digital Trends
Restart your Apple Watch
Before we get into the list of more specific Apple Watch problems and their possible solutions, there are a couple of things you should try right off the bat. Firstly, restart your Apple Watch. It may sound like a cliché, but many odd behaviors are indeed solved by a simple reboot. Here’s how to do that.
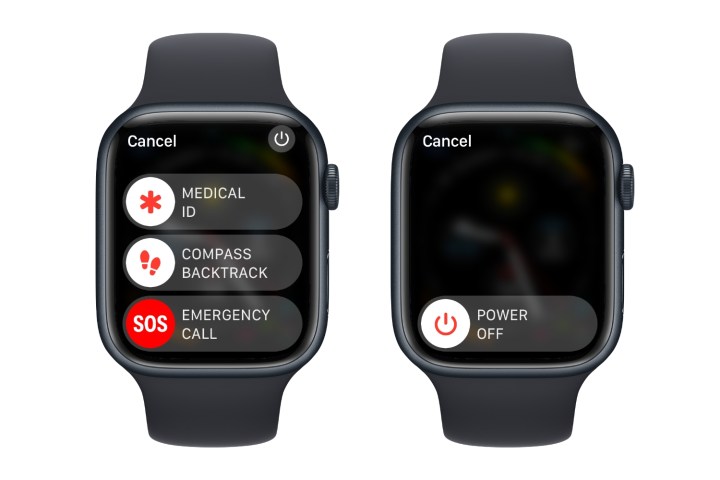
Step 1: Ensure your Apple Watch is not on its charger, and hold down the side button until a screen appears with the Medical ID and Emergency SOS sliders.
Step 2: If your device is using watchOS 10 or newer, you should see a power button in the top-right corner. Select this, and a Power Off slider should appear.
If your device is using watchOS 8 or older, you’ll see the Power Off slider on the first screen above the Medical ID slider.
Step 3: Select the white button to the left of Power Off and drag it to the right. Your Apple Watch should power off.
Step 4: Wait at least 10 seconds to ensure your watch has fully shut down, and then press and hold the side button again until the Apple logo appears. Then release it and wait for your Apple Watch to finish starting back up.
If your Apple Watch fails to start up or won’t turn on, you can force-restart it by holding the side and Digital Crown buttons down together for 10 seconds until the Apple logo appears. This also works to reboot your watch in the event that an app is hung or it’s otherwise become unresponsive.
Jesse Hollington / Digital Trends / Digital Trends
Ensure your Apple Watch software is up to date
The second common step is to make sure that your Apple Watch is running the latest official release of watchOS. Apple routinely fixes problems in even the most seemingly minor updates, so it’s possible that whatever problem you’re running into has already been fixed, and you just need to apply the update to take advantage of that.
While it’s true that your Apple Watch should install updates automatically (unless you’ve explicitly turned this setting off), those automatic updates can sometimes take days or even weeks to appear. Checking manually is the surefire way to get the latest updates as soon as possible. You can do this from your Apple Watch or your iPhone. Here’s how.
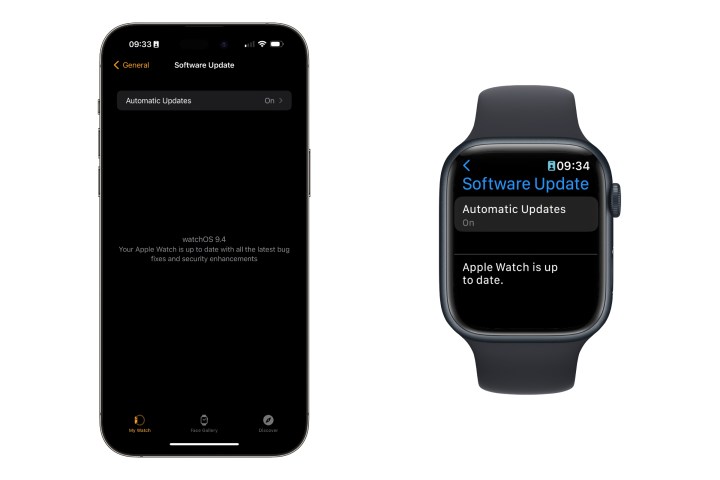
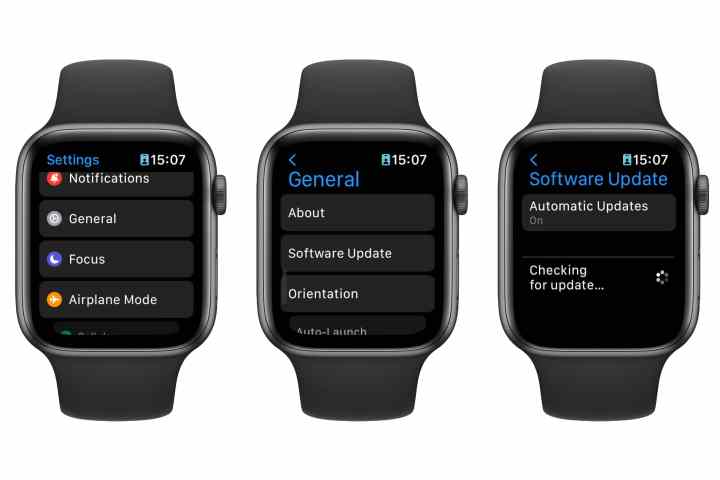
Step 1: To check for watchOS updates from your Apple Watch, open the Settings app and select General > Software Update.
To check for watchOS updates from your iPhone, open the Watch app and select General > Software Update.
Step 2: Your device will reach out to Apple’s servers to see if any updates are pending. If one is found, you can install it by selecting Download & Install. Otherwise, you’ll be advised that your Apple Watch is up to date.
Jesse Hollington / Digital Trends / Digital Trends
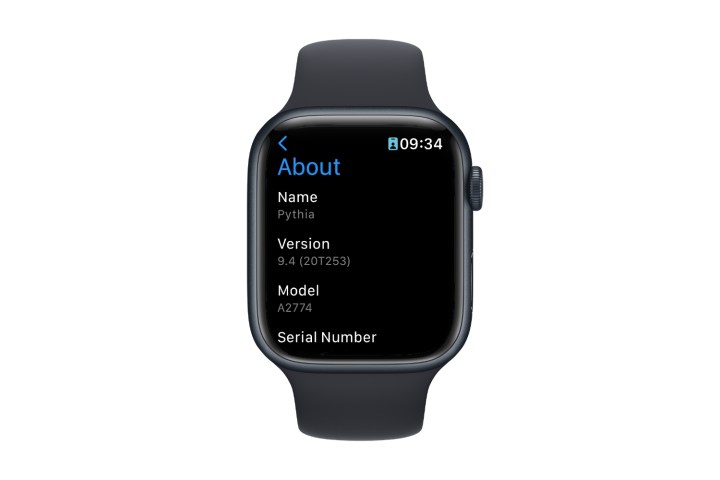
Step 3: If you’re checking for updates from the Watch app on your iPhone, you’ll also be shown the version of watchOS that’s installed on your wearable. If you’re doing this from your Apple Watch, you’ll merely be told that your device is up to date. If you’re curious, you can find out what version you’re using by selecting General > About from the watch’s Settings app.
Note that only the Apple Watch Series 4 and newer can be updated to watchOS 10. If you’re still using an Apple Watch Series 3, you won’t be able to move beyond the latest release of watchOS 8. That’s 8.8.1 as of this writing — and will probably continue to be the latest unless Apple discovers a critical security flaw in that version and needs to release a patch for it.
Jesse Hollington / Digital Trends
Apple Watch won’t update
If you run into problems updating your Apple Watch to the latest version of watchOS, try restarting both your Apple Watch and iPhone and trying to run the update again. If the Apple Watch still fails to update, it’s likely the result of a botched download attempt. Here’s how to clear that out so you can download a fresh version of the watchOS updater.
Step 1: On your iPhone, open the Watch app.
Step 2: Select General from the My Watch tab.
Step 3: Scroll down and select Storage. After a few seconds, you should see a list of what’s taking up space on your Apple Watch.
Step 4: Look for the entry for the watchOS update, select it, and choose Delete to remove it from your Apple Watch storage.
Also, remember that while you can download a watchOS update at any time as long as your iPhone is in range of your Apple Watch and connected to Wi-Fi, the update won’t actually install until your Apple Watch is charged to at least 50% and sitting on its charger.
Andy Boxall / Digital Trends
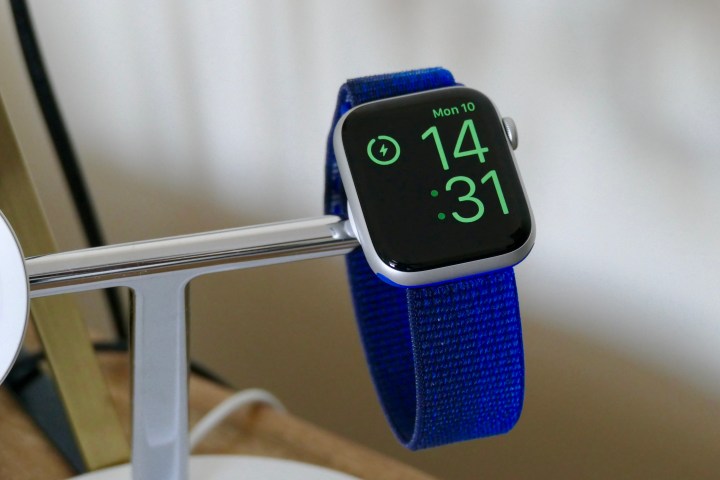
Apple Watch is stuck in power reserve or won’t charge
If your Apple Watch isn’t charging when you connect it to its magnetic charger, there are a few things you can try before taking it in for service.
Step 1: Try charging with the official Apple Magnetic Charging cable that came with your Apple Watch and confirm that it’s connected properly to the USB power adapter and outlet.
Step 2: Clean the back of your Apple Watch and the top of the magnetic charger to ensure there’s nothing interfering with the magnetic contact. Also, make sure you’ve removed the plastic wrap from both sides of the charging disc.
Step 3: If your Apple Watch still isn’t charging, try force-restarting it by holding down the side button and the Digital Crown for 10 seconds until the Apple logo appears.
Note that if your Apple Watch battery has dropped low enough that it won’t even light up in Power Reserve mode, you may have to wait a few minutes before the green lightning bolt appears on the watch face to confirm it’s charging.
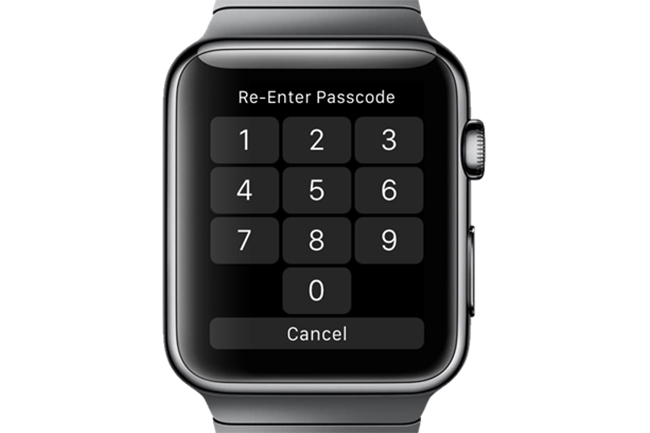
Image used with permission by copyright holder
Apple Watch repeatedly asking for passcode
You may sometimes find your Apple Watch repeatedly asking you to enter its passcode. It’s not entirely clear what causes this issue, but ensuring the following settings are enabled and changing your passcode can help resolve it.
Step 1: Open the Watch app on your iPhone and select Passcode from the My Watch tab.
Step 2: Ensure that Wrist Detection and Unlock with iPhone are both enabled.
Step 3: Select Change Passcode and follow the instructions to set a new passcode on your Apple Watch.
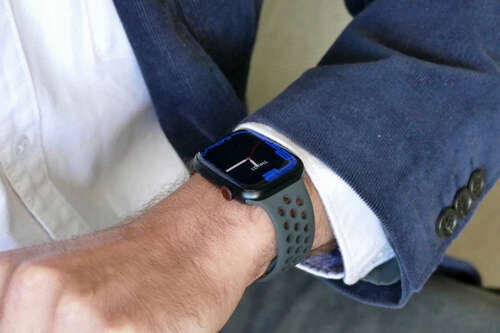
Step 4: Make sure that your Apple Watch fits snugly on your wrist, with the back in contact with your skin at all times — not worn over clothing. The Wrist Detection feature relies on skin contact to keep your Apple Watch unlocked, so if your Apple Watch can’t detect your wrist, it will require a passcode every time you want to use it, just like when you’re not wearing it.
Andy Boxall/Digital Trends
Apple Watch doesn’t turn on when wrist is raised
If your Apple Watch isn’t lighting up properly when raising your wrist — either staying blank or showing the dimmed always-on display — here are a few things you can check.
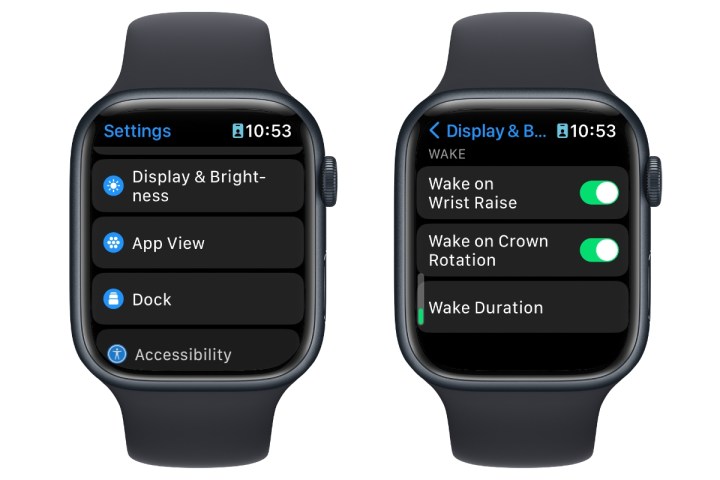
Step 1: Ensure that the Wake on Wrist Raise setting is enabled. You can find this under Display & Brightness in either the iPhone Watch app or the Apple Watch Settings app. If this is already on, try toggling it off and back on again to reset it.
Jesse Hollington / Digital Trends
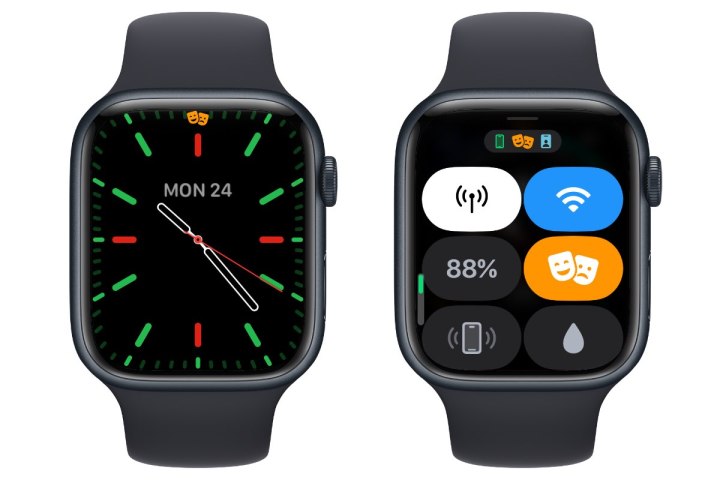
Step 2: Ensure your Apple Watch isn’t in Theater Mode. As the name suggests, this setting is designed to prevent your Apple Watch from inadvertently lighting up in a darkened theatre, which could distract those around you.
When Theater Mode is enabled, you should see a small orange icon at the top of your screen that looks like a pair of masks. To disable Theater Mode, tap on your watch screen or turn the Digital Crown to wake it up, then press the side button to bring up the Control Center (for watchOS 9 or older, swipe up from the bottom to bring up the Control Center)
Jesse Hollington / Digital Trends
Andy Boxall/Digital Trends
Bluetooth won’t connect or frequently disconnects
If you’re having problems connecting your Apple Watch to a Bluetooth device such as headphones or a fitness accessory, or if your Apple Watch frequently disconnects from your iPhone, here are a few things you can try to get it working again.
Step 1: Firstly, proximity matters for Bluetooth, and some devices may be more sensitive to that than others. Some people have reported better performance simply by switching the device they’re using to the same side of their body as the Apple Watch. You could also try switching your Apple Watch to the other wrist. Such a small change in distance shouldn’t make a difference, but some devices can be finicky, so it’s worth a try.
Jesse Hollington / Digital Trends
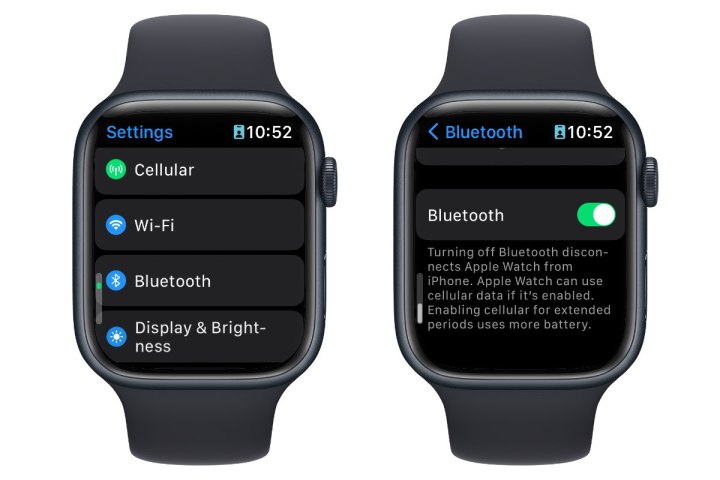
Step 2: Toggle Bluetooth off and back on again on your Apple Watch. This can be found in the Bluetooth section in the Settings app.
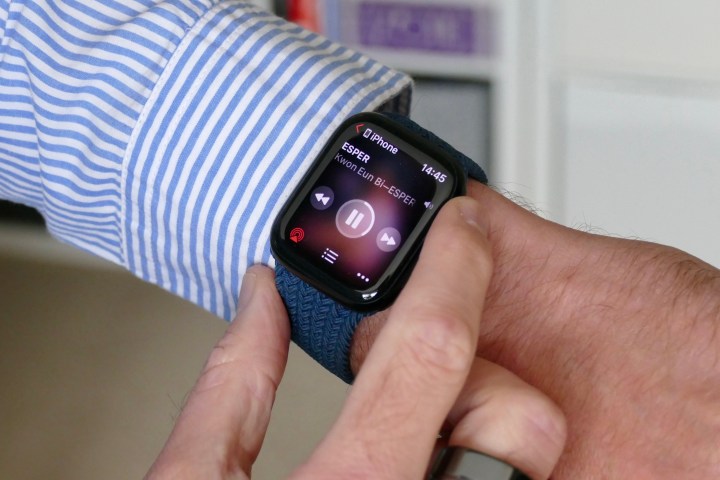
Step 3: If the issue is with Bluetooth headphones and music streaming, syncing your playlist onto your Apple Watch and turning off Bluetooth on your iPhone might help. This avoids extra Bluetooth interference and may allow your music to play seamlessly without annoying disconnections.
First, try toggling the Bluetooth off using the icon in the iPhone’s Control Center, accessed by swiping down from the top-right corner of your iPhone screen. This disables Bluetooth connections from your iPhone to devices like headphones but leaves Bluetooth enabled for communicating with your Apple Watch, so you’ll still be able to connect to the internet and receive notifications from your iPhone.
If that doesn’t help, try switching the Bluetooth radio off entirely on your iPhone by going to the Settings app, selecting Bluetooth, and toggling it off. This will disconnect your Apple Watch from your iPhone, but you can still listen to the music stored on your watch and any workout data will be synced to your iPhone once you re-enable Bluetooth at the end of your run.
Andy Boxall / Digital Trends
Apple Watch isn’t tracking activity
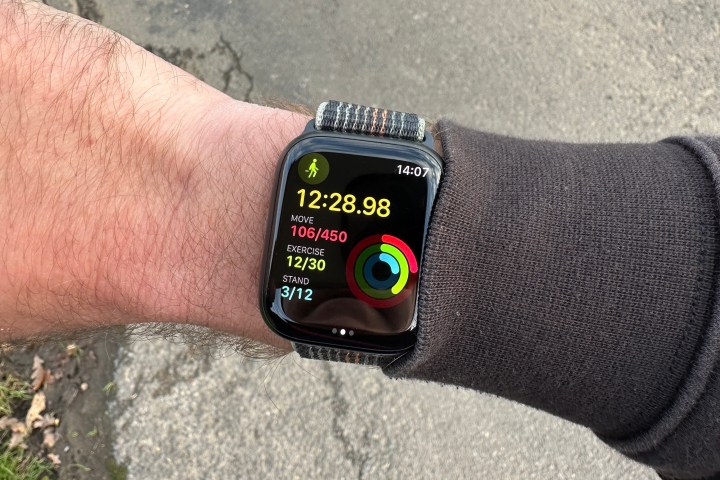
Sometimes your Apple Watch won’t properly track your workouts. This can take several forms, such as inaccurate or missing workout metrics, not having your routes tracked, or workout data from your Apple Watch failing to appear on your iPhone.
Step 1: If your workout data is accurate on your Apple Watch but isn’t appearing properly on your iPhone, ensure that Bluetooth is enabled under Settings > Bluetooth on both the iPhone and Apple Watch, and try restarting both devices to see if things sync up.
Step 2: If you’re getting inaccurate readings for things like calories burned or heart rate, make sure your Apple Watch isn’t too loose on your wrist. Adjusting the band may help the watch better track your activity.
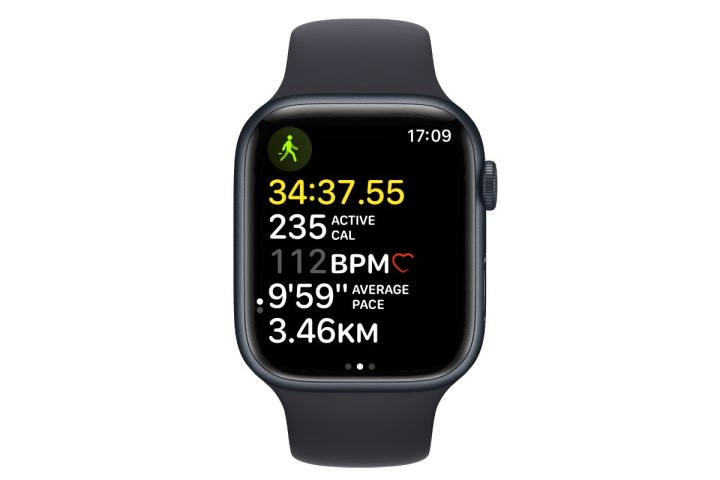
You can often see this problem by the heart rate indicator turning a faded grey during a workout, showing that your Apple Watch isn’t picking up your heart rate properly from your wrist. It’s not abnormal for this to happen occasionally during some workouts, but if it’s happening more frequently, it could indicate a problem with the fit of your Apple Watch, a bug in the watchOS software, or an issue with the physical heart rate sensor.
Jesse Hollington / Digital Trends
Step 3: If workout data doesn’t seem accurate, your watch may need recalibrating. You can start this process by opening the Watch app on your iPhone, selecting Privacy > Reset Calibration Data, and following the calibration instructions.
Step 4: Ensure your personal information, such as height and weight, are up to date. The Apple Watch uses this data to calculate things like calories burned, so while it won’t stop your Apple Watch from tracking your workouts, the data you get may not be as accurate if this information is out of date.
You can check this by opening the Watch app on your iPhone and selecting Health > Health Details. If anything needs to be changed, select the Edit button in the top-right corner and make any necessary updates. This includes adding any medications you’re taking that could affect your heart rate.
Step 5: If your walking or running routes aren’t being tracked properly, ensure that location services are enabled under Privacy & Security > Location Services in your iPhone Settings app. Both Apple Watch Faces and Apple Watch Workout should be set to While Using with Precise Location toggled on.
Also, be sure you’re using the Outdoor version of walking or running workouts, as the GPS on your Apple Watch doesn’t kick in for indoor workouts.
Joe Maring/Digital Trends
Notifications don’t appear on Apple Watch
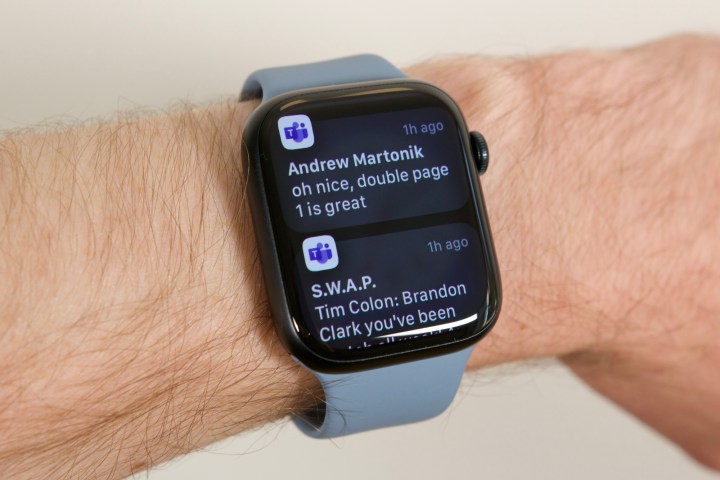
If notifications aren’t appearing on your Apple Watch the way they should be, the most likely cause is that the Apple Watch is locked or a Focus Mode with a Do Not Disturb setting has been enabled. Here’s what you can check:
Step 1: You won’t receive notifications when your Apple Watch is locked with a passcode. If you’ve enabled Wrist Detection in Settings > Passcode, your Apple Watch will stay unlocked as long as you’re wearing it but will lock itself down as soon as it loses contact with your skin.
This means that it will start out locked every time you put it back on, so you won’t receive notifications until you’ve unlocked your watch, either by entering the passcode directly or unlocking your paired phone (if Unlock with iPhone is enabled under Settings > Passcode).
Note that if Wrist Detection is off, your Apple Watch will lock a few seconds after you stop interacting with it, blocking all notifications until you unlock it again.
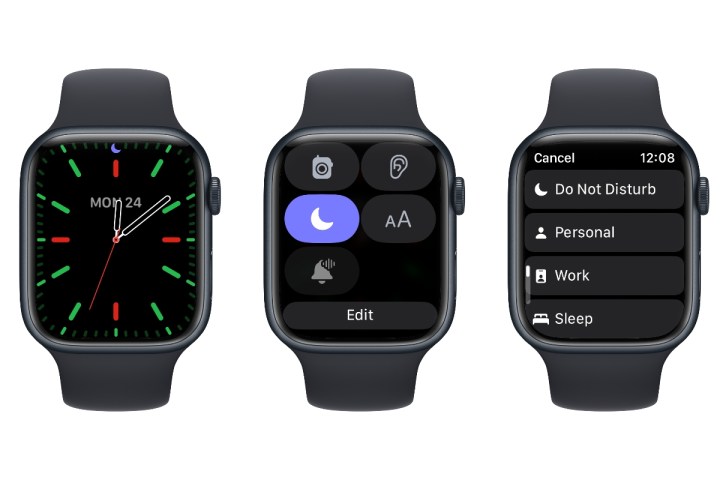
Step 2: Your Apple Watch will mirror any Focus modes you’ve set on your paired iPhone, so if you’ve blocked notifications due to a Do Not Disturb or Quiet Time focus, this will also be reflected on the Apple Watch.
You can see if a Focus mode is enabled by looking for the appropriate icon at the top of your watch face, and you can disable (or enable) Focus modes by swiping up on the watch face to bring up the Control Center and looking for the Focus mode icon. If a Focus mode is enabled, it will match whatever you see at the top of your watch face.
Jesse Hollington / Digital Trends
Step 3: If you’re only missing notifications from certain apps, check to ensure those are enabled on your Apple Watch. These don’t always mirror your iPhone settings, so it’s good to take a quick trip into the Notifications section of your iPhone’s Watch app and confirm everything there is set up the way you prefer.
Jesse Hollington / Digital Trends
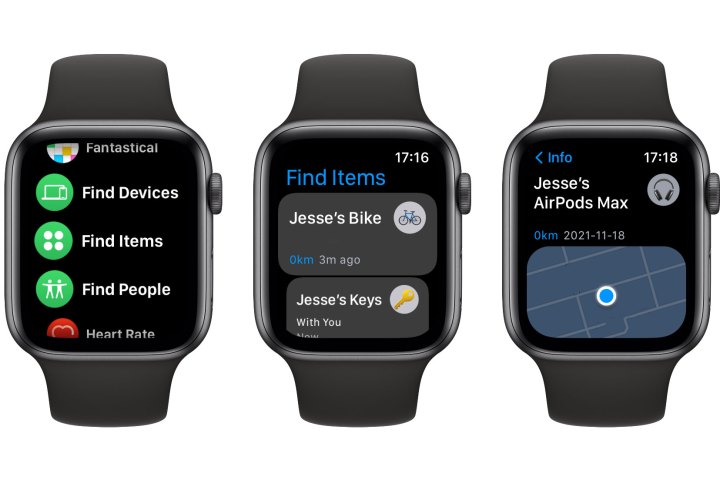
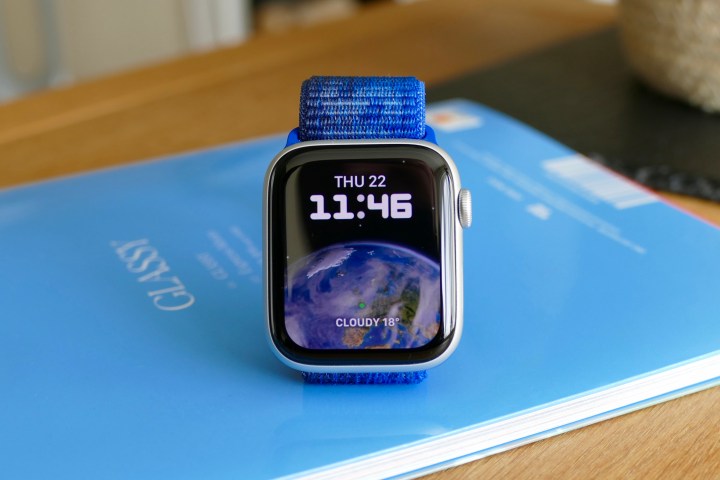
Notify When Left Behind not available on Apple Watch
Some folks have complained that the Notify When Left Behind feature that was introduced with iOS 15 isn’t working on the Apple Watch. When trying to set it up, the option is greyed out, and they’re told that the feature isn’t available. This seems to occur most commonly with the Apple Watch Series 6, but it’s not exclusive to that model.
This is a software issue known to Apple, and it’s believed to have been fixed in later point releases of iOS 15 and watchOS 8, so your best bet is to ensure that both your iPhone and Apple Watch are running the latest official releases. If you continue experiencing problems, you can try the following:
Step 1: Close the Find My app and restart your iPhone and Apple Watch. Likewise, toggle Notify Left Behind off and then toggle it on again.
Step 2: Make sure you use the same Apple ID for your iPhone and Apple Watch. Notify When Left Behind alerts won’t work if your devices are signed in to different Apple ID accounts.
Step 3: On your iPhone, open the Settings app and choose Privacy & Security > Location Services. Make sure you have Location Services on and set to Allow While Using App for all of the “Apple Watch Find…” settings and that Precise Location is toggled on.
Andy Boxall/Digital Trends / Digital Trends
Apple Watch won’t connect to LTE
Following the release of the Apple Watch Series 3, the first LTE-capable model of the wearable, we saw more than a few reports of problems connecting to the cellular network. Apple has long since fixed this bug, which had to do with the hand-off between Bluetooth, Wi-Fi, and LTE.
If you do run into this problem where your cellular Apple Watch refuses to connect to an LTE network, it’s most likely either a glitch with how your plan was provisioned on your Apple Watch or an issue on your carrier’s end.
Step 1: Try setting up your cellular plan again through the Watch app on your iPhone. Choose Cellular, select the i button to the right of your carrier name, and then choose Remove [carrier] Plan from the pop-up that appears at the bottom of your screen.
Once the plan has been removed, you can add it again by selecting Add a New Plan and following the instructions to reactivate it with your carrier.
Step 2: If that doesn’t resolve the issue, reach out to your mobile provider. We’ve seen reports, particularly from AT&T customers, that their LTE plan had to be reinitialized on the carrier’s end for things to start working properly again.
Andy Boxall / Digital Trends
Skin beneath Apple Watch feels uncomfortable and itchy
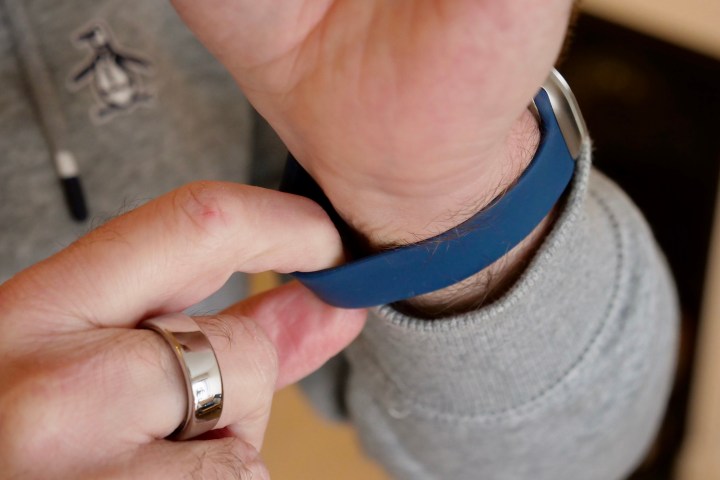
For some folks, the area of skin that comes into direct contact with their Apple Watch’s sensors can become itchy and feel uncomfortable, especially after wearing it for an extended period of time. Some people have this problem with watches in general, but even those who have never encountered this with other watches may find the sensor points on the Apple Watch to be specifically irritating.
Unfortunately, this is usually a skin sensitivity issue, so there isn’t really a technical solution for it. However, there are a few ways to lessen its impact:
Step 1: Loosen the strap on your Apple Watch. Sometimes the issue can be caused by sweat becoming trapped between the skin and sensors, effectively lowering your skin’s ability to breathe. Loosen your strap a little, and the extra room will allow your skin to breathe a little better. This shouldn’t affect your Apple Watch’s sensors too much either as long as they remain in contact with the skin; they don’t need to be tight against your wrist, just touching it.
Step 2: Take a scheduled break from your Apple Watch every day. Give your watch time to recharge and your skin a chance to recover. If your symptoms are minor, just a little time off can stop it from becoming irritating. You may have to forego sleep tracking, or at least take a few nights off every week, but letting your wrist breathe at night can make a big difference.
Andy Boxall/Digital Trends
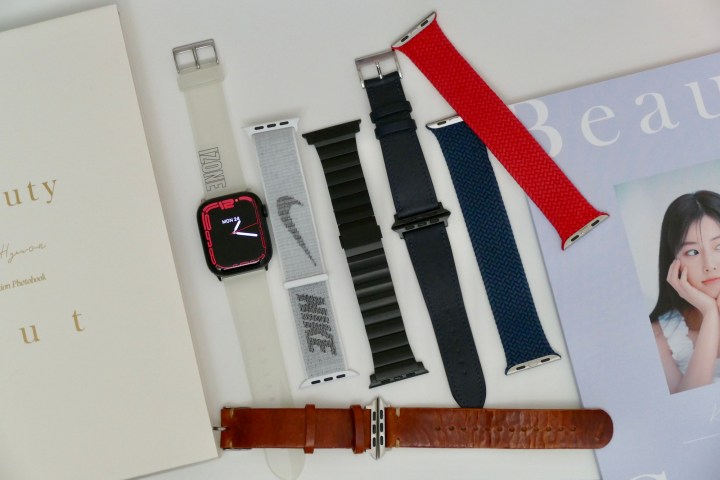
Step 3: You’re not stuck with the fluoroelastomer band that comes with the standard Apple Watch models, which, let’s face it, can be kind of irritating for longer periods of wear. One of the great things about the popularity of the Apple Watch is that there’s a massive selection of different bands and straps to choose from, so you may find that swapping it out for a band made from a more breathable material can help reduce skin irritation.
Apple Watch overheating
A few years ago, a number of Apple Watch SE owners shared reports that their wearables were getting extremely hot on their wrists. This was typically followed by physical damage to the watch’s screen.
We haven’t heard any reports of this recently. Still, if you run into a situation where your watch is heating up to the point of being uncomfortable, it’s best to take it off and let the battery run down — don’t put it on the charger, as that’s likely to exacerbate the problem. This is almost certain to be a hardware fault, so it’s best to take it to an Apple Store or Apple Authorized Service Provider before you attempt to wear it again.
Andy Boxall / Digital Trends
Poor battery life
Apple promises up to 18 hours of battery life for the Apple Watch, and while your mileage will vary on that one, a relatively new Apple Watch should still be able to get you through the day before you need to refuel.
Keep in mind that the lithium-ion batteries used in most modern electronics have a limited number of charge cycles. For the Apple Watch, that’s 500 full discharges and recharges. Once that number is reached, your battery capacity will slowly begin to drop. For most Apple Watch users, this works out to about two years of normal use before it becomes noticeable. So, if you’re still wearing an Apple Watch that’s more than two to three years old and your battery is no longer cutting it, you’ll likely need to either get the battery replaced or upgrade to a newer model.
Whether it’s new or old, here are a few things you can try to eke some longer battery life out of your Apple Watch:
Step 1: If you have a cellular Apple Watch model, be aware that using LTE drains the battery significantly faster. Using the Apple Watch on Wi-Fi is considerably better, but it will get the best battery life when you keep your iPhone nearby. Your iPhone has a much bigger battery, so your Apple Watch prefers to let it do the heavy lifting of handling power-hungry data communications.
If you regularly go out without your iPhone, disabling your cellular connection can make a big difference in battery life. You can easily toggle cellular off and on through the Control Center, accessed by swiping up from the bottom of the screen when viewing your watch face. Alternatively, take your iPhone with you whenever you can.
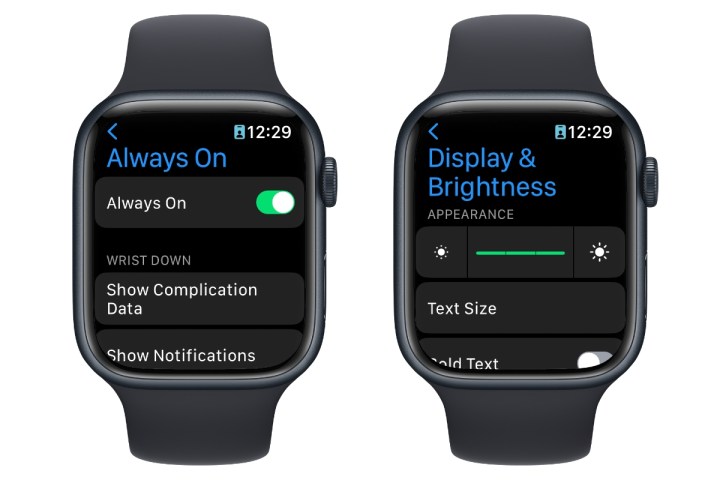
Step 2: If you have an Apple Watch Series 5 or later with an always-on display, you may be able to save a bit of power by toggling this off under Settings > Display & Brightness. The always-on display is designed to consume very little power, but if your Apple Watch is older and your battery is getting weak, every little bit helps.
Jesse Hollington / Digital Trends
Step 3: While you’re in the Display & Brightness settings, try turning down the brightness of your display. Again, every bit of power conservation can help here.
Step 4: Similarly, toggling off Wake on Wrist Raise in the Display & Brightness settings will keep your display from turning on as frequently — especially if you move your wrist more often. When this setting is off, you’ll need to tap on the screen or move the Digital Crown to light it up.
Step 5: Opening the Watch app on your iPhone and selecting Notifications will let you review anything that might be needlessly coming to your wrist. Fewer notifications mean fewer haptics, sounds, and activation of the display. Plus, you’ll get more peace of mind by filtering out the things that aren’t really urgent enough to appear on your watch.
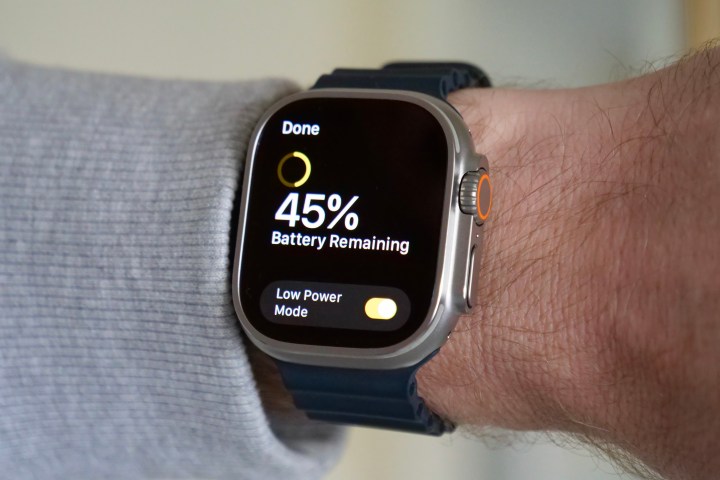
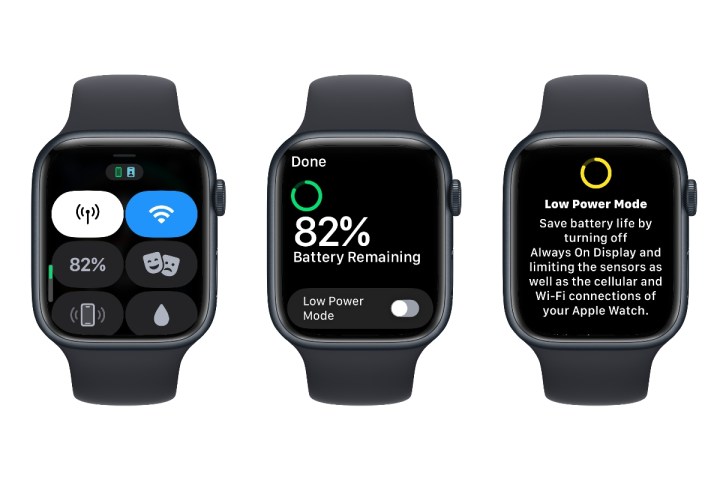
Step 6: If you’re running watchOS 10 or newer, you can enable Low Power Mode to automatically disable many of the more power-hungry background features all at once. This includes heart rate and blood oxygen measurements and notifications, the always-on display, and persistent Wi-Fi and cellular connections. This last part means you won’t receive notifications, messages, or even phone calls when your iPhone isn’t nearby, although you’ll still be able to connect to the internet when you open an app that requires a data connection.
You can enable Low Power Mode by swiping up to bring up the Control Center, selecting the battery percentage icon, and toggling the Low Power Mode switch. Scroll to the bottom and select either Turn On to switch it on until you manually toggle it off or Turn on For… to select a time interval of one, two, or three days.
Jesse Hollington / Digital Trends
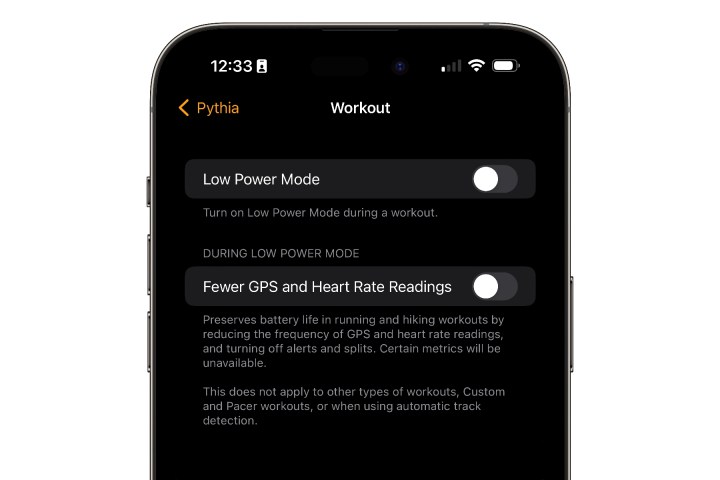
Step 7: You can also optimize battery life during workouts automatically by enabling Low Power Mode when you start a workout, and further reducing the number of GPS and heart rate readings taken during a running or hiking workout. You can find these options in Settings > Workouts on the Apple Watch or in the Workouts section of the iPhone Watch app. This feature requires an Apple Watch Series 8, Apple Watch SE (2022), or Apple Watch Ultra, running watchOS 9.1.
Jesse Hollington / Digital Trends
Step 8: If you have an older Apple Watch, or you haven’t yet upgraded to watchOS 10, you’ll only have the option of putting your Apple Watch in Power Reserve mode. This effectively powers down the Apple Watch almost entirely, disabling all the advanced features and turning your smartwatch into a mere timepiece. However, it’s better than switching it off and being without a watch, and you can take the watch back out of Power Reserve when you need it to be a smartwatch again.
To enable Power Reserve mode manually, press your Apple Watch’s side button to bring up Control Center (or swipe up on the watch face for watchOS 9 or older)
Restore your Apple Watch to factory settings
While it’s a more drastic step, if all else fails, you can easily restore your Apple Watch back to factory settings and then re-pair it with your iPhone as if it were a new device. When you do this, you’ll have the option of restoring from your last backup or starting fresh.
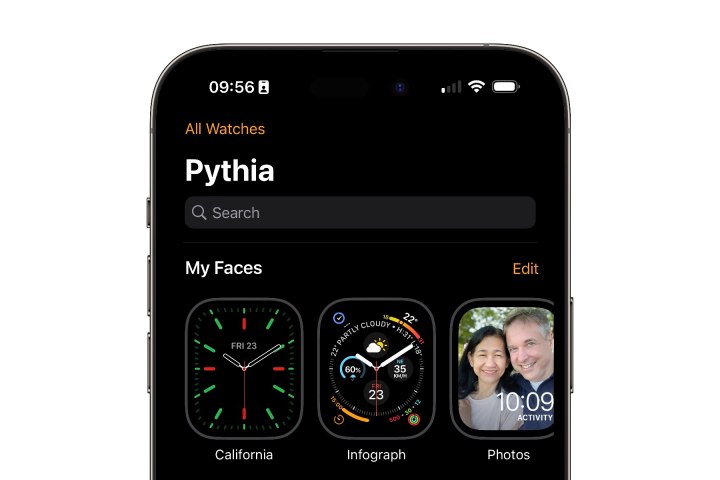
Step 1: Open the Watch app on your iPhone.
Jesse Hollington / Digital Trends
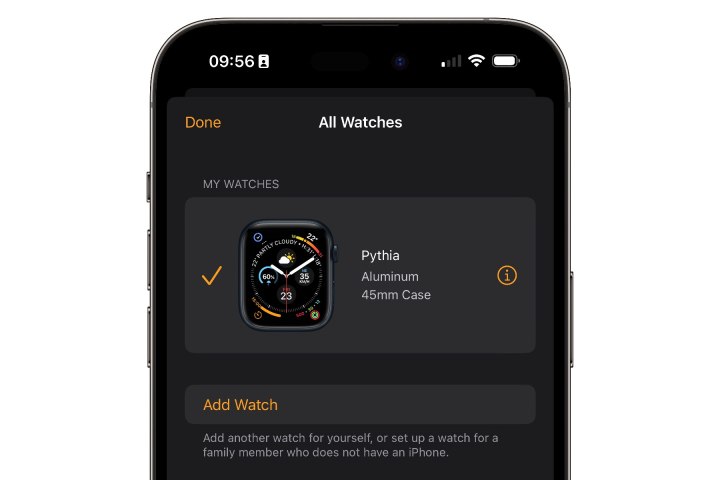
Step 2: Select All Watches in the top-left corner of the “My Watch” screen.
Jesse Hollington / Digital Trends
Step 3: Select the i button to the right of the watch you would like to unpair.
Step 4: Select Unpair Apple Watch at the bottom of the screen, and then select Unpair [your Apple Watch name] to confirm.
Jesse Hollington / Digital Trends
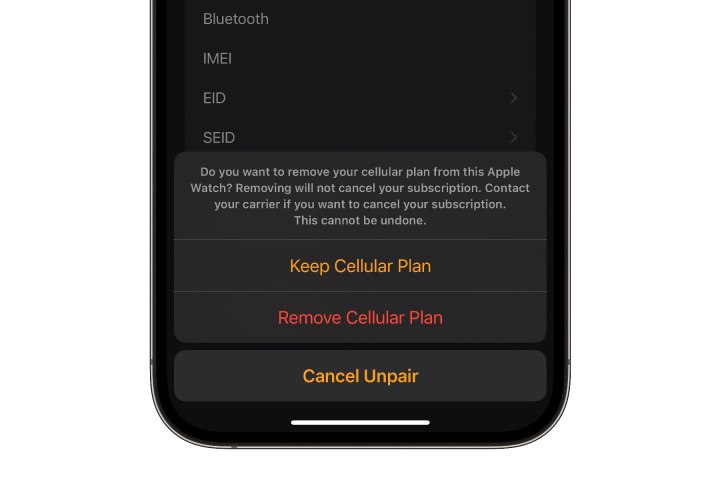
Step 5: If you’re using a cellular Apple Watch, you’ll be asked whether you want to keep your cellular plan or remove it. In most cases, you should select Keep Cellular Plan as you’ll be setting this Apple Watch up again.
If you do opt to remove your plan, it will be disabled on the eSIM in your Apple Watch. Depending on your carrier, you may need to contact them to get it set up again. Note that removing your plan in this manner will not automatically cancel your subscription with your mobile provider.
Jesse Hollington / Digital Trends
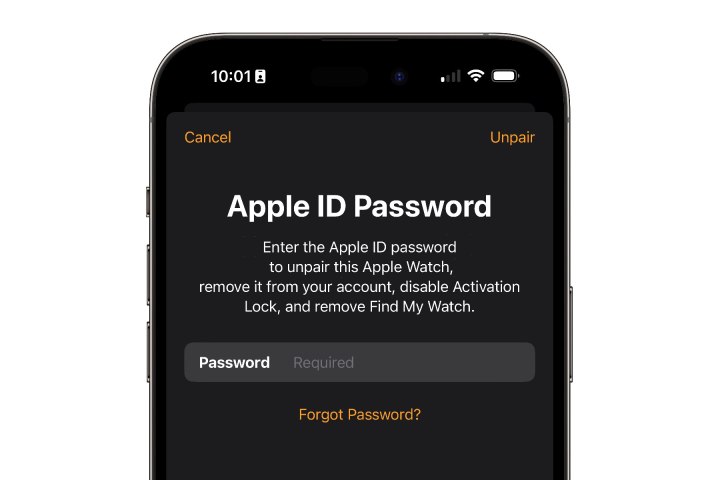
Step 6: When prompted, enter your Apple ID password and select Unpair. This additional security step confirms you’re authorizing the removal of the Apple Watch from your account and disables the Activation Lock and Find My Watch features.
Step 7: Your iPhone will create a new backup of your Apple Watch and then proceed to erase all content and settings from the wearable. This backup is stored on your iPhone and included in any backups you make from your iPhone to iCloud or your computer.
Apple Watch backups include most of the data and settings from your watch; however, for security reasons, credit and debit cards used for Apple Pay, Bluetooth pairings, and your Apple Watch passcode are not backed up, so you’ll need to set these up again.
Step 8: Once the process has finished, the Apple Watch should restart to the initial setup screen. Proceed to pair it with your iPhone as if it were a new Apple Watch.
If you’re setting it up with the same iPhone that you unpaired it from — or a new iPhone that you’ve transferred your data to — you’ll be offered the option to restore from a previous backup or set it up as a new device.
Depending on the problem you’re having, it may be a good idea to skip the backup and set it up as new to see if the issue recurs. If it does, you’ve likely run into a hardware or watchOS issue. However, if everything is okay, then you can follow the above steps to unpair your Apple Watch again and then restore it from your prior backup during setup.
Joe Maring/Digital Trends / Digital Trends
Gunked-up buttons
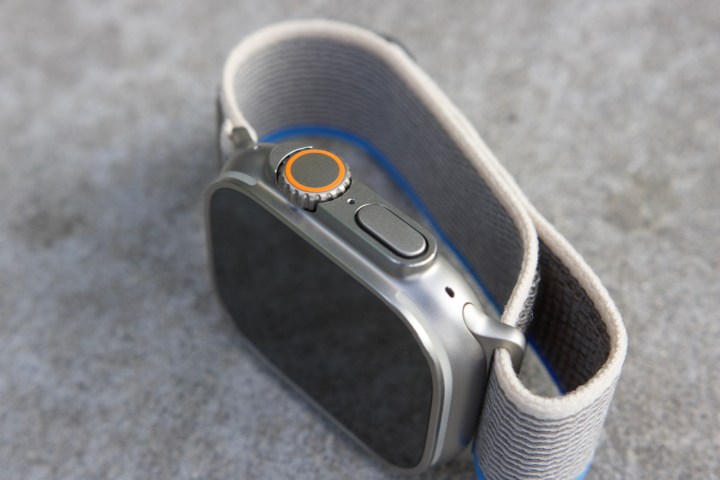
While most of the Apple Watch UI is screen-based, the side-facing Digital Crown and side button are key parts of your user experience. If you’ve noticed your Digital Crown isn’t turning correctly, or you can’t seem to get the side button to react, you may be dealing with sticky components. Gunk and dirt buildup is no match for these steps though!
Step 1: Power down your Apple Watch and remove its band.
Step 2: Dab a Q-tip into isopropyl alcohol, then gently work the Q-tip into the grooves, seams, and surface of both the Digital Crown and the side button.
Step 3: Alternatively, you could use warm, running water; although the isopropyl alcohol has a better chance of breaking down tougher substances.
Step 4: Use the dry end of the Q-tip to sop up any excess liquid.
Editors’ Recommendations

