In Word, there are two types of quotation marks: straight and curly. We’re going to explain the difference and show you how to set up your Word documents to use the quotation mark style you prefer.
From this point, we will refer only to “quotation marks” (or “quotes”)—however, the following instructions also work well for apostrophes.
What Are Curly and Straight Quotes?
Curly quotes (also known as smart quotes) tend to have a body and a tail, curving towards the quoted text. However, straight quotes are vertical and don’t point towards any words. Straight quotes come from the old days of the typewriter, when there was limited space and functionality. They are still used today for stylistic purposes and coding. Curly quotes, on the other hand, are sometimes preferred by writers, as they help with the legibility of a text and some people think they look better on the page.
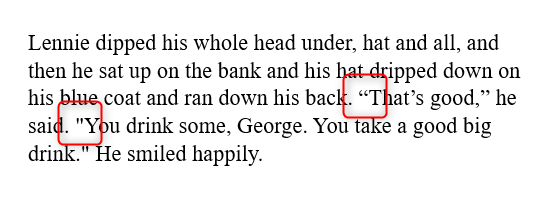
If you’re copying and pasting text from another source, or collaborating with another writer on different computers, you might find that your document contains both types of quotation marks. Whichever you prefer to use, the important thing to ensure is consistency, so we will show you how to achieve this in your Word document.
How to Set Your Quote Style Preference in Word
By default, Word renders all quote marks that you type as curly. If you want to use straight quotes instead, or switch back to curly if you’ve changed the behavior previously, you need to tweak Word’s AutoFormat settings.
This only affects all future quotation marks you type, and does not change any existing quotation marks in a document—we’ll cover that in the next section.
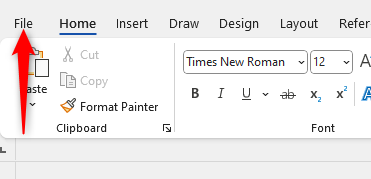
To begin, click “File” in the top-left corner, then “Options” from the left-hand menu.
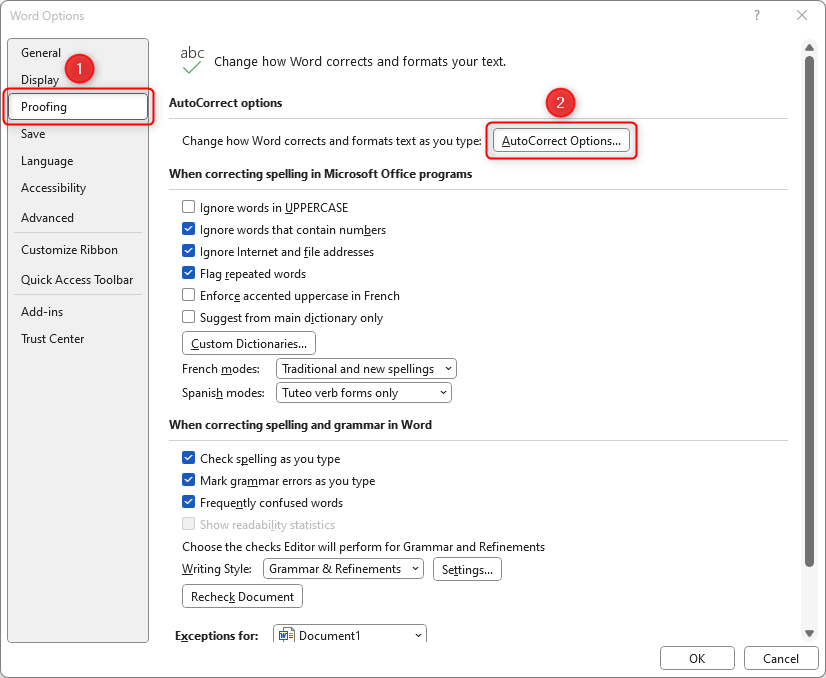
This opens the Word Options window. From the left-hand menu, click “Proofing”, and then “AutoCorrect Options” from the main pane.
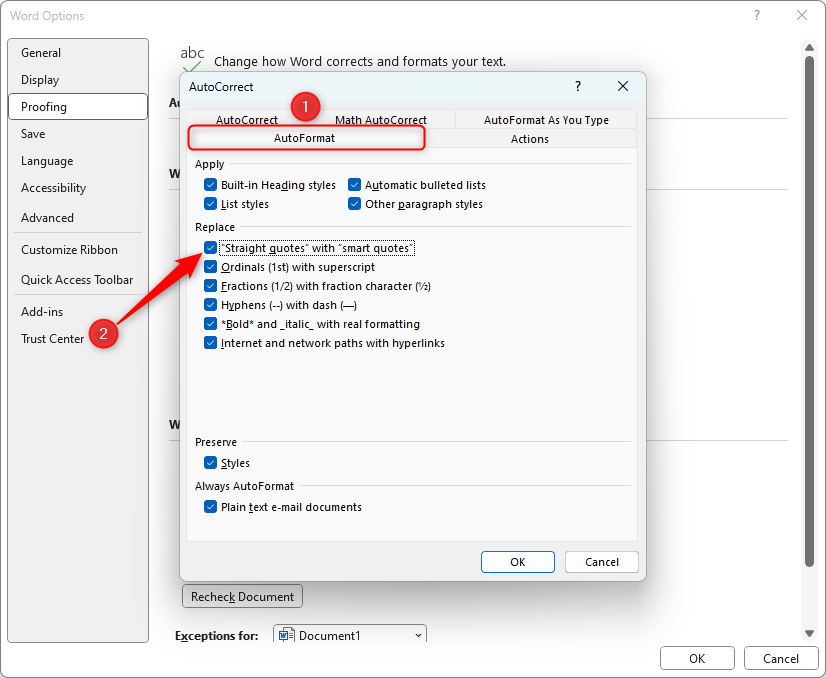
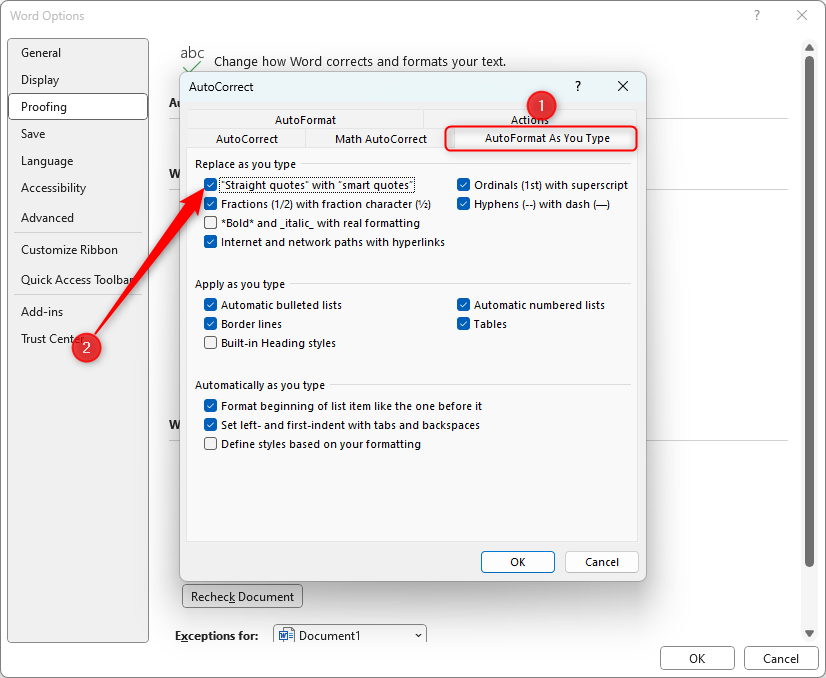
In the window that opens, click the “AutoFormat” tab. If you want to use straight quotes, uncheck “Straight Quotes With Smart Quotes”. Alternatively, check this to use curly quotes.
Then, click the “AutoFormat As You Type” tab. Again, if you want to use straight quotes, uncheck “Straight Quotes With Smart Quotes”, or check this to use curly quotes. Now click “OK”.
Your document is now set up to automatically use straight quotes or curly quotes when you’re typing.
How to Convert Quote Styles in an Existing Word Document
If you’ve already typed in your Word document but notice that your quotation marks are inconsistent, changing them all manually can be cumbersome and time-consuming. Here’s how to overcome that.
How to Convert Straight Quotes to Curly Quotes
If your Word document contains straight quotes, and you want to convert them all to curly quotes, go to File > Options > Proofing > AutoCorrect Options. Make sure “Straight Quotes With Smart Quotes” is checked in the “AutoFormat” tab. It is also worth doing this in the “AutoFormat As You Type” tab so that any subsequent quotes you type are also formatted correctly. Then click “OK”.
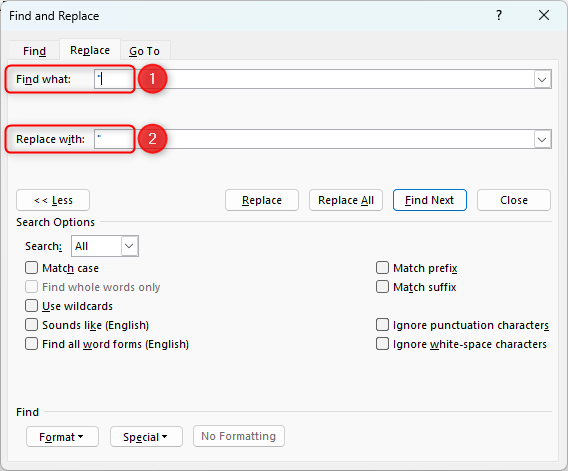
Next, press Ctrl+H to open the “Find And Replace” window. Using Shift+2, type the quotation mark into both the “Find What” and “Replace With” boxes. Finally, click “Replace All” and close the “Find And Replace” window.
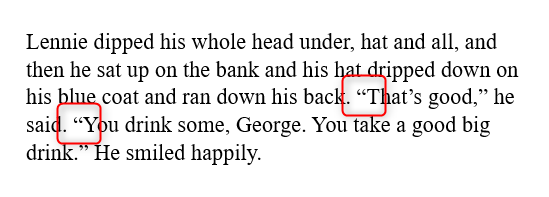
You will see that this changes your straight quotes to curly quotes.
Alternatively, if you find you have to make this conversion often and want to create a one-click solution, you’ll need to customize the Quick Access Toolbar. For this to work, make sure that the “Straight Quotes With Smart Quotes” box is checked in the “AutoFormat” and “AutoFormat As You Type” tabs of the “Proofing” section of Word’s Options. Follow the instructions above to achieve this.
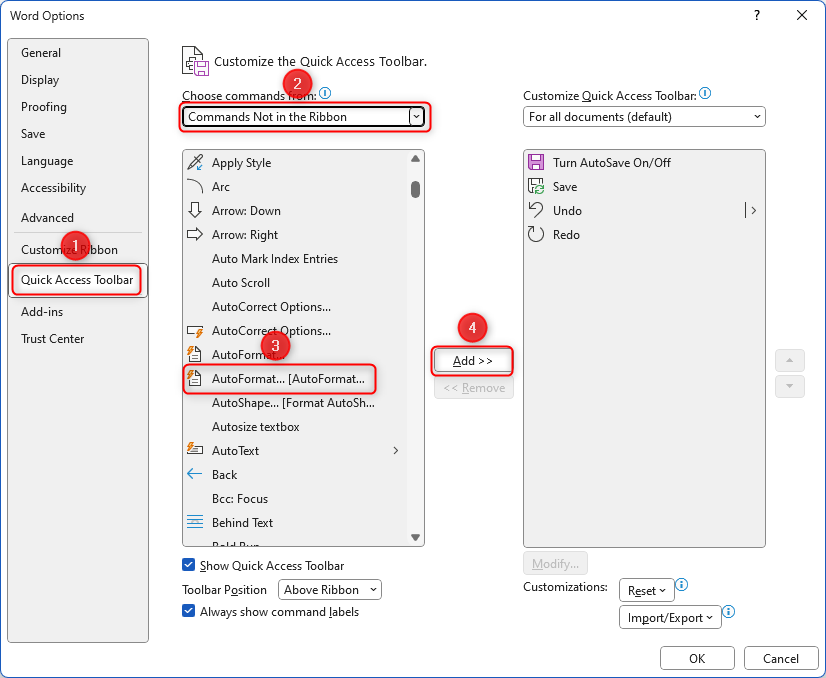
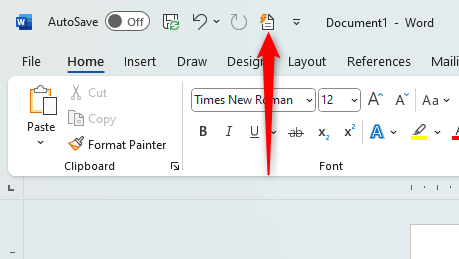
Now, with the Word Options window still open, click “Quick Access Toolbar” and then “Commands Not in the Ribbon” from the left-hand side drop-down box. In the choices that appear below the drop-down box, scroll down to and click “AutoFormat Now”. Be careful here—there are several AutoFormat options with the same icon. If you hover over each option, you’ll be able to find the correct one. Finally, click “Add” and then “OK”.
If “AutoFormat Now” does not show under “Commands Not in the Ribbon”, you probably already have this showing, so you can skip this step.
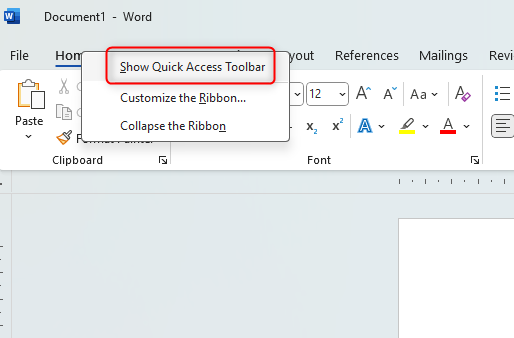
To access the AutoFormat Now icon, make sure your Quick Access Toolbar is showing. Right-click anywhere along the ribbon (where you can see File, Home, etc.) and choose “Show Quick Access Toolbar”. If you only see “Hide Quick Access Toolbar” as an option, this means it is already showing.
You are now set up to retrospectively change all straight quotes to curly quotes. You will see the AutoFormat icon in the Quick Access Toolbar at the top of the window.
Click this icon (or press Alt+Ctrl+K) to turn all straight quotes to curly quotes. Be aware that the AutoFormat function automatically formats everything in your document to your predefined styles (not just your quote style preference), so check your paragraph styles before you click “AutoFormat Now”.
How to Convert Curly Quotes to Straight Quotes
If your Word document contains curly quotes, and you want to convert them all to straight quotes, go to File > Options > Proofing > AutoCorrect Options. Make sure “Straight Quotes With Smart Quotes” is unchecked in both the “AutoFormat” and “AutoFormat As You Type” tabs, and then click “OK”.
Press Ctrl+H to open the “Find And Replace” window. Using Shift+2, type the quotation mark into both the “Find What” and “Replace With” boxes. Finally, click “Replace All”.
You will see that this changes your curly quotes to straight quotes.
Alternatively, if you want to enact an in-the-moment change from curly to straight, follow these instructions:
- If “Straight Quotes With Smart Quotes” is unchecked in both the “AutoFormat” and “AutoFormat As You Type” tabs, go to the curly quote you want to convert, delete it, and retype the quote. This retains the straight quote.
- If “Straight Quotes With Smart Quotes” is checked in both the “AutoFormat” and “AutoFormat As You Type” tabs, go to the curly quote you want to convert, delete it, and retype the quotation mark. The quote automatically turns curly, but immediately press Ctrl+Z, and this reverts Word’s automatic conversion and retains the straight quote.
Now you know how to let Microsoft Word do the hard work for you, so you can focus on the content of your work rather than worry about the consistency of your quotation marks. Happy typing!

