Key Takeaways
- Clear your Spotify cache occasionally to free up storage space and improve performance.
- Manage your Spotify downloads by selectively removing songs or removing all downloads at once.
- Change the audio quality of your Spotify downloads will reduce storage usage.
Is Spotify taking up a huge chunk of your storage space? There are a number of things you can try, including clearing your cache, changing your audio quality, and managing your downloads to make it use less storage. We’ll walk you through each one.
Clear Your Spotify Cache
Spotify regularly creates temporary stores of data called “cache” on your device. These cache files contain anything from portions of songs to album art and playlist content. Their purpose is to help Spotify load content faster and give you a speedy and reliable listening experience.
However, these cache files can add up, and even with Spotify automatically deleting old and unused cache files, it is still very possible to end up with a ridiculously huge Spotify cache. If that’s the case for you, it’s time to delete your Spotify cache.
Where are Spotify Downloads Stored?
One of the best things about being a Spotify Premium user is that you can download songs for offline listening. Any songs you download are stored on your device’s internal storage (or SD card). Downloading songs saves data by avoiding repeated streaming, but it also takes up some of your device’s available storage space.
If your Spotify downloads are taking up too much space, it might be time for you to do some housekeeping. There are two ways you can go about it: selectively remove songs you no longer want, or you can remove all your downloads in one go.
How to Manage Spotify Downloads on Android and iPhone
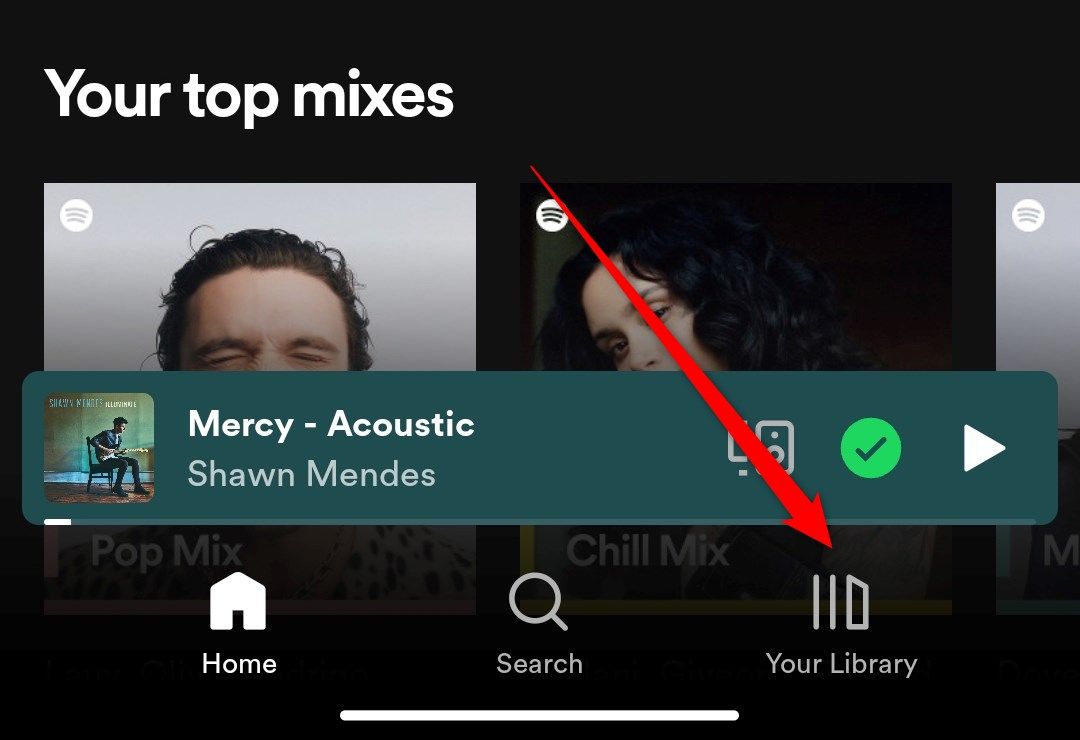
To selectively remove your Spotify downloads, open the Spotify app on your iPhone, iPad, or Android device and tap on “Your Library.”
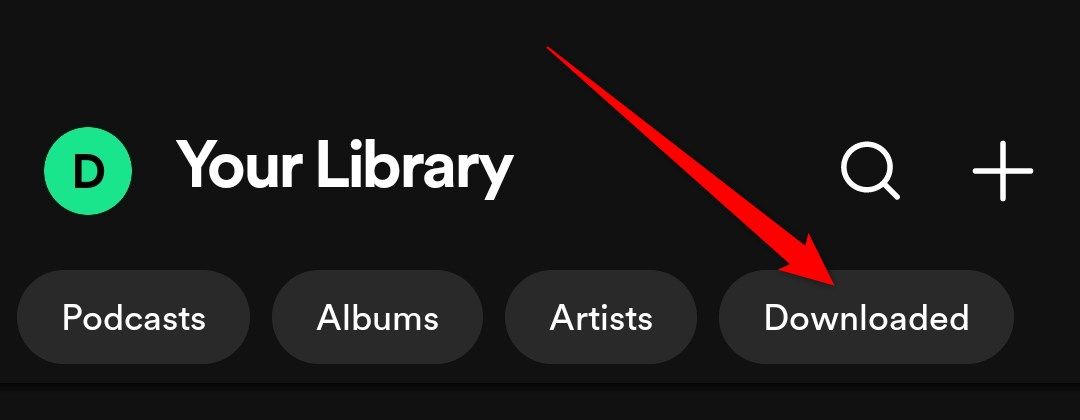
Next, scroll through the bubbles on the top of your screen till you find one that says “Downloaded,” and tap on it. This will bring up all your downloaded albums and playlists.
Select the album or playlist you want to remove.
Tap on the green download icon.
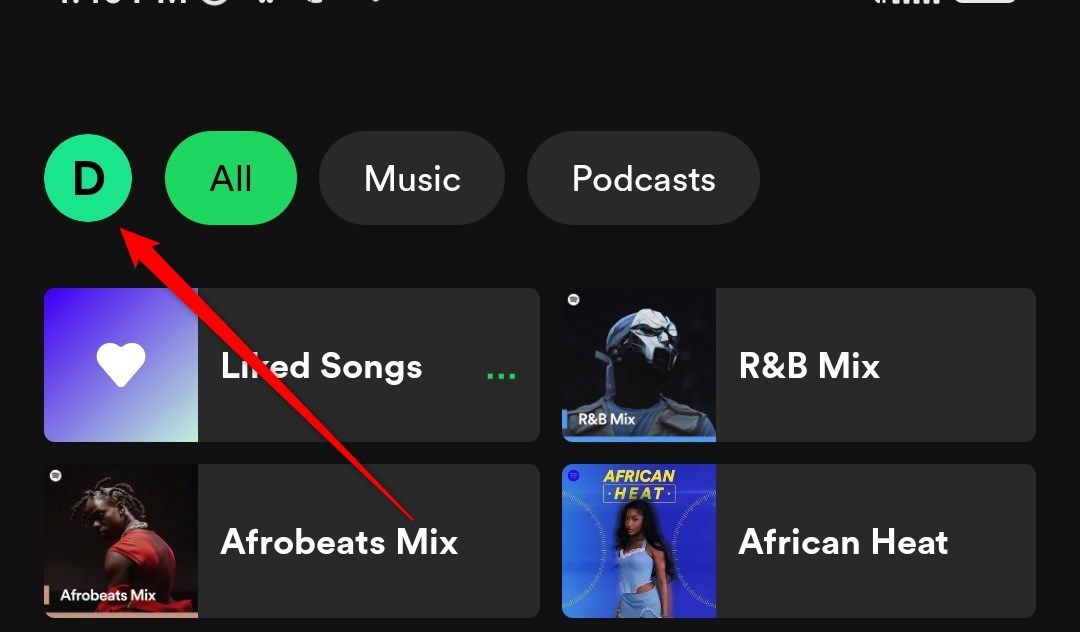
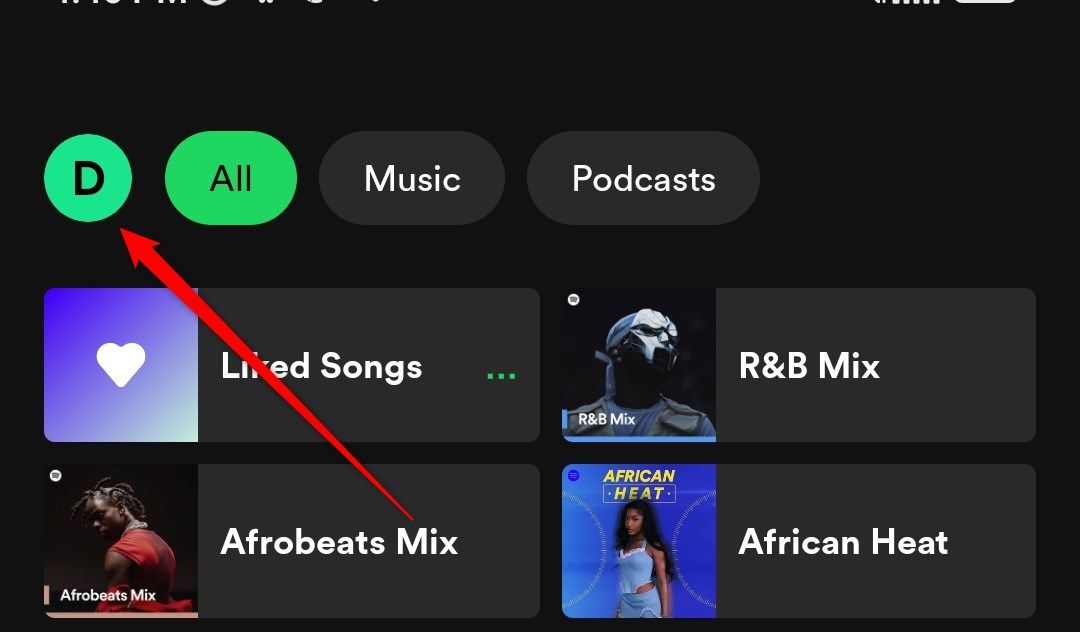
To remove all your downloads in one go, click on your profile photo.
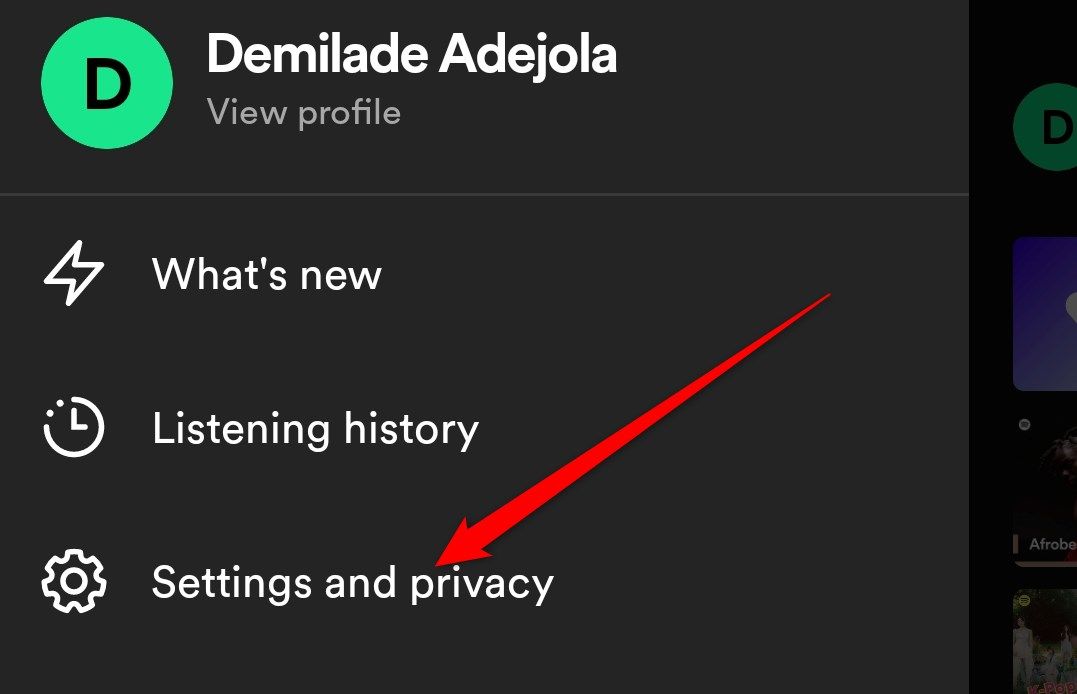
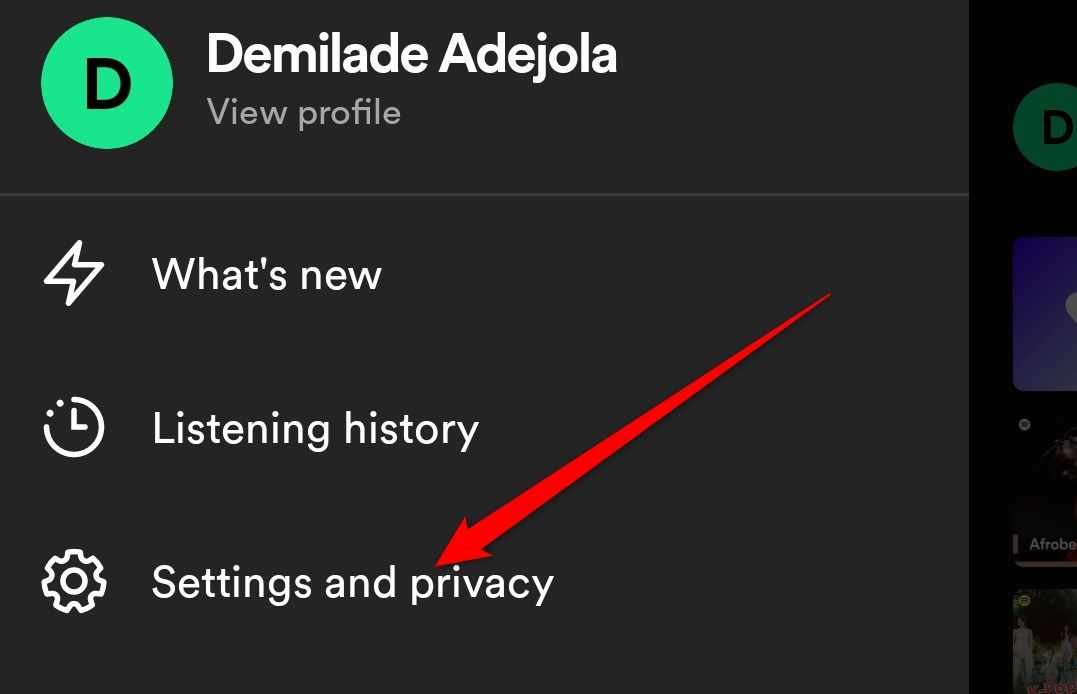
Select “Settings and Privacy.”
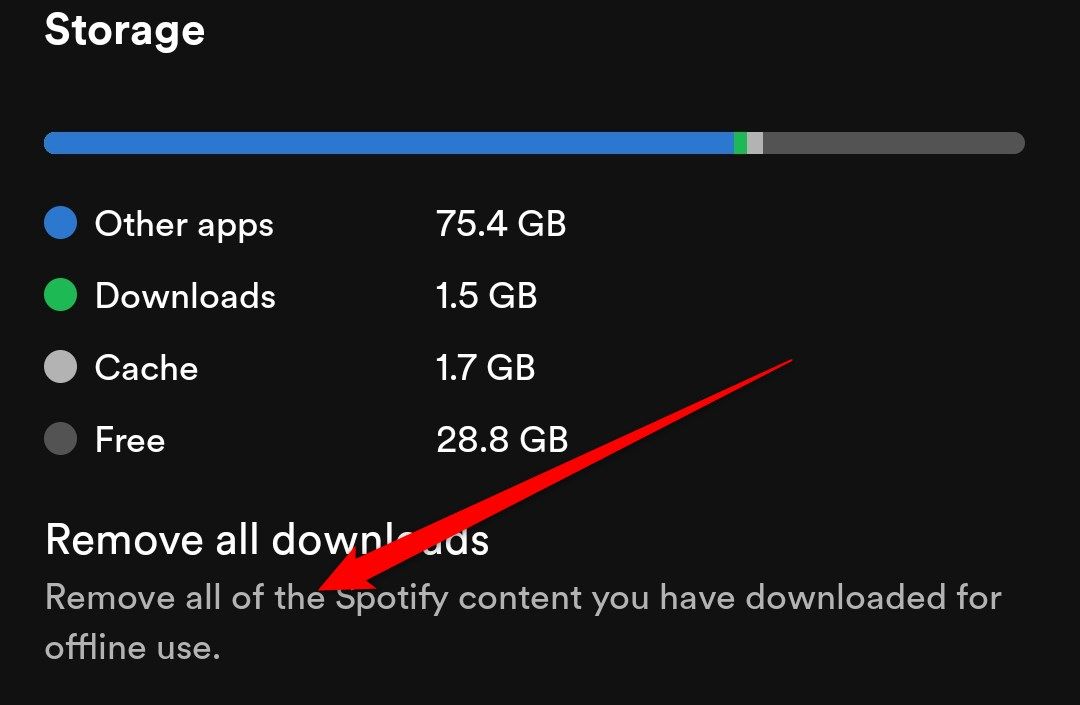
Scroll down to the “Storage” section and tap on “Remove All Downloads.”
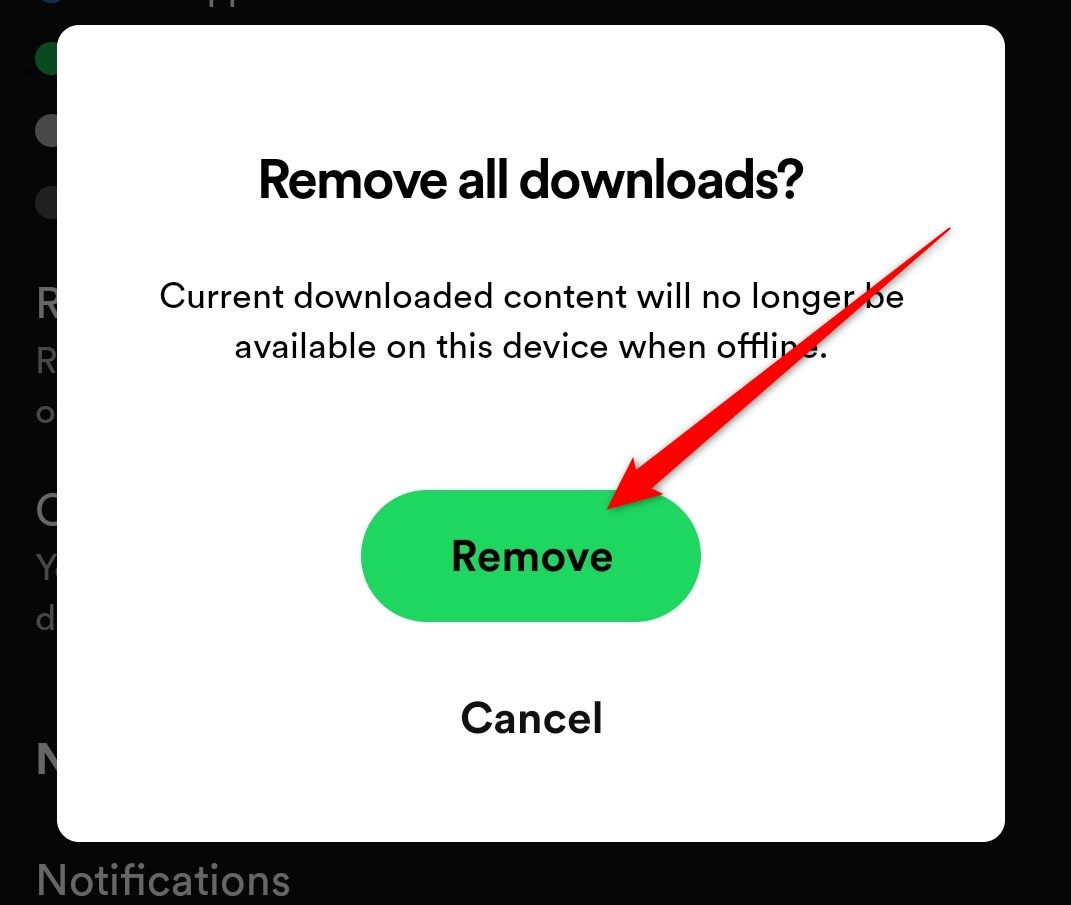
Confirm that you want to remove all your downloads by tapping the “Remove” button.
This will remove all the content you’ve downloaded on Spotify.
How to Manage Spotify Downloads on Desktop
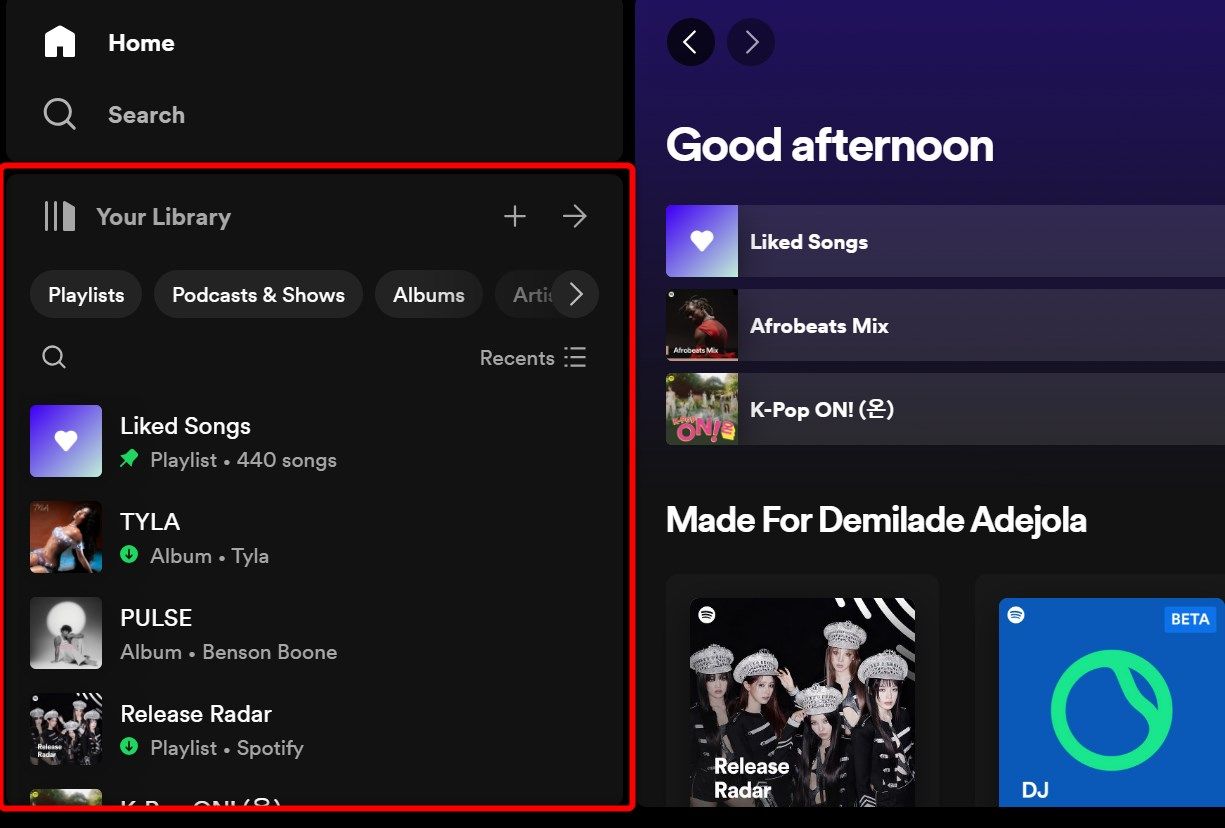
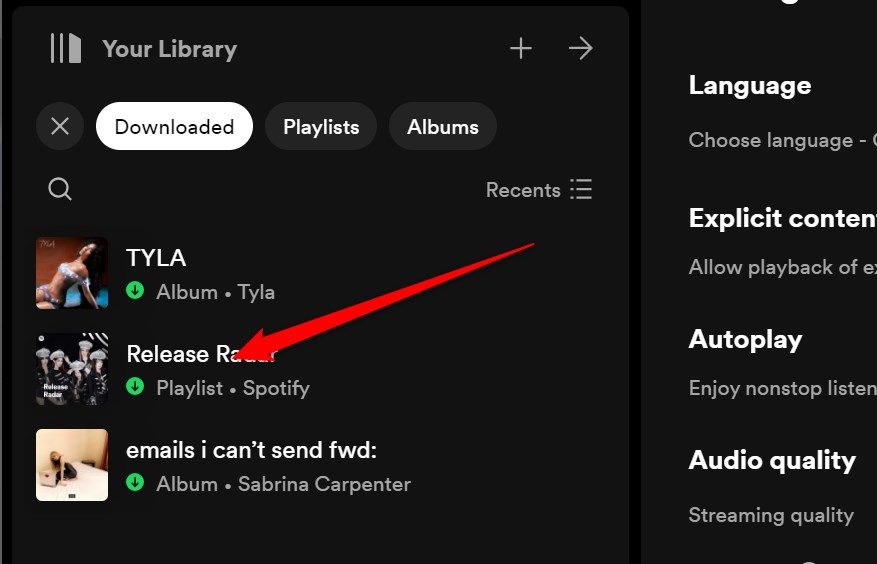
To selectively remove your Spotify downloads on your desktop, head over to the Spotify app. Your library should appear on the left side of your screen.
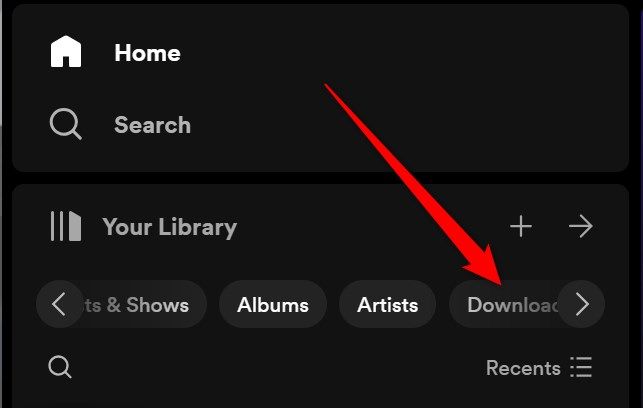
Click on the “Downloaded” button to show only your downloads.
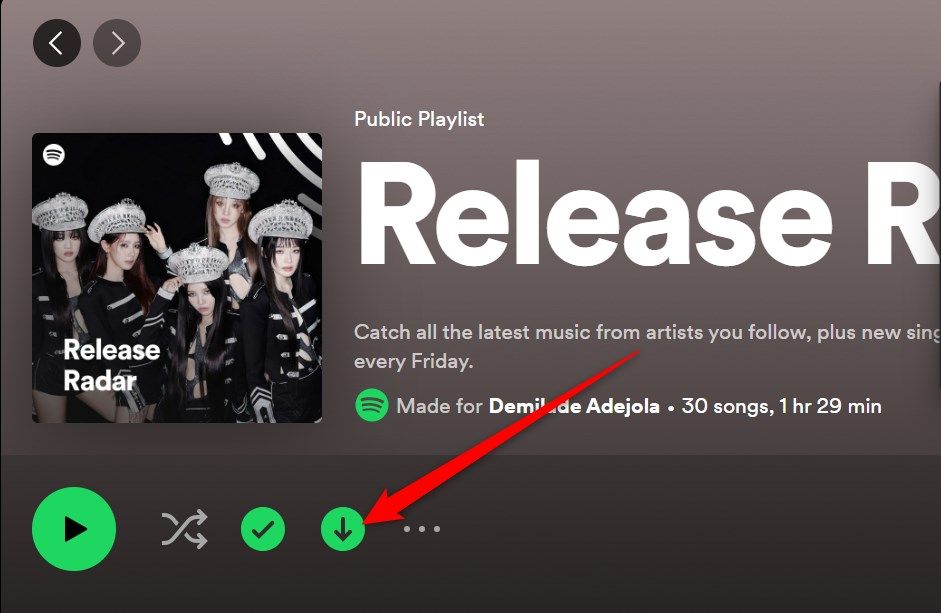
Select the album or playlist you want to remove.
Tap on the green download button to remove it.
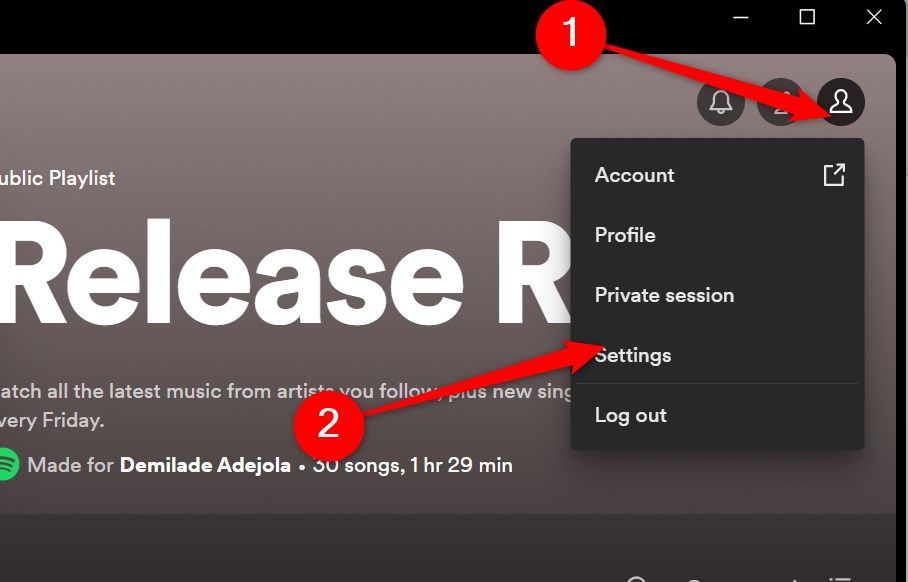
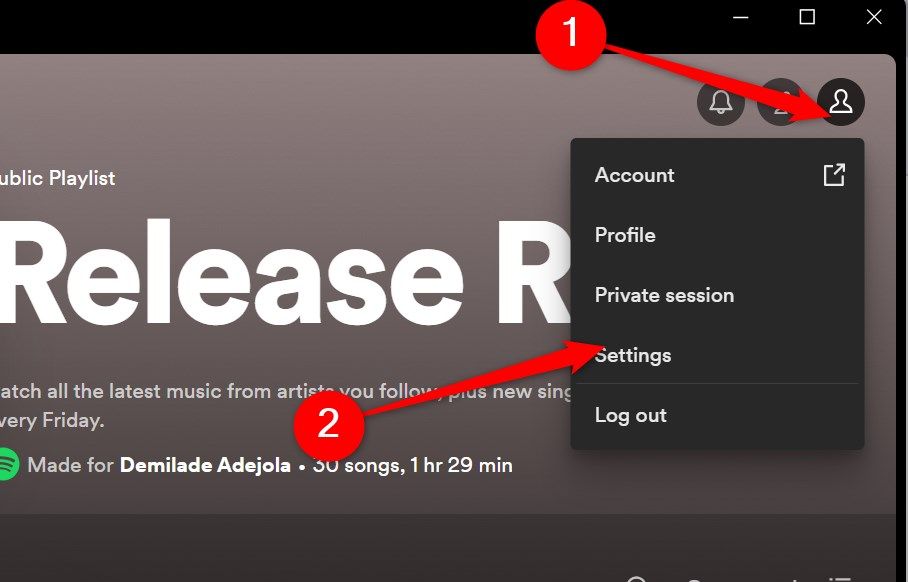
To remove all your Spotify downloads, click on the profile icon and select “Settings.”
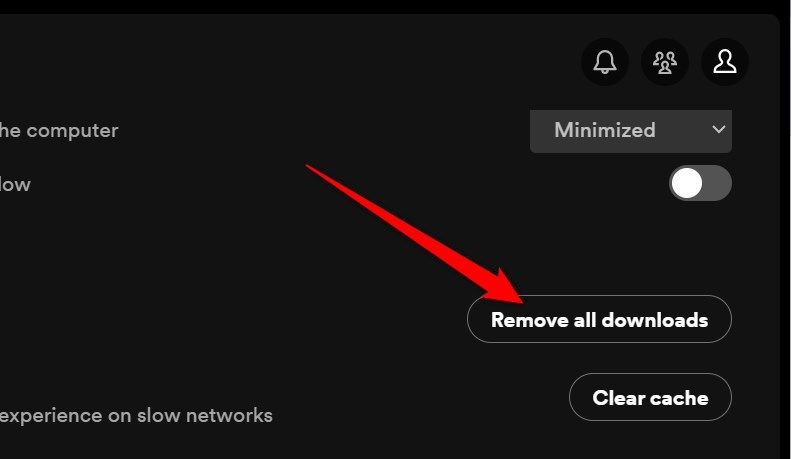
Now scroll down to “Storage” and select “Remove All Downloads.”
Change the Audio Quality on Spotify
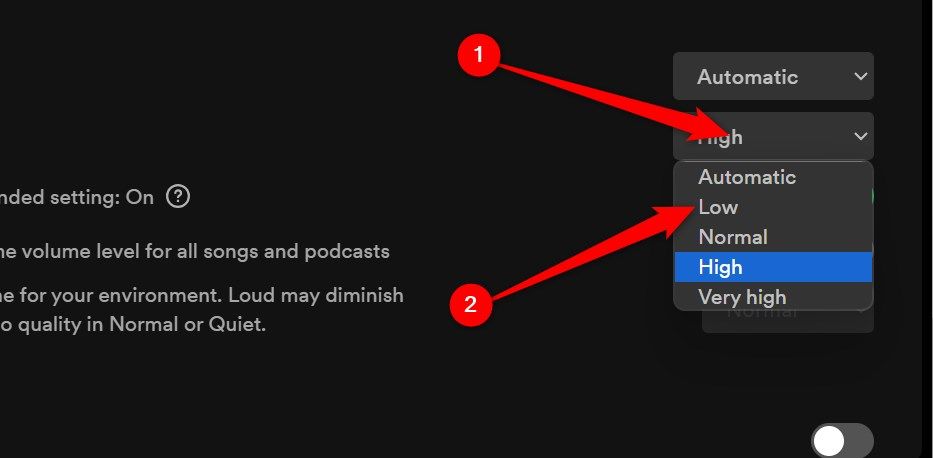
Spotify has a few audio quality options for downloading music. They are “Low,” “Normal,” “High,” and “Very High.” There’s also “Automatic,” which adjusts your download quality based on your internet speed.
Downloading at a higher quality may help you hear the finer details in your music, but it also comes at an increased storage cost. By default, Spotify sets your download audio quality to “Normal,” but you can adjust this in a few easy steps.
How to Switch to a Smaller Download Size on Android and iPhone
To change the quality of your Spotify downloads, open the Spotify app on your iPhone, iPad, or Android device and tap on your profile photo in the top right corner.
Next, select “Settings and Privacy.”
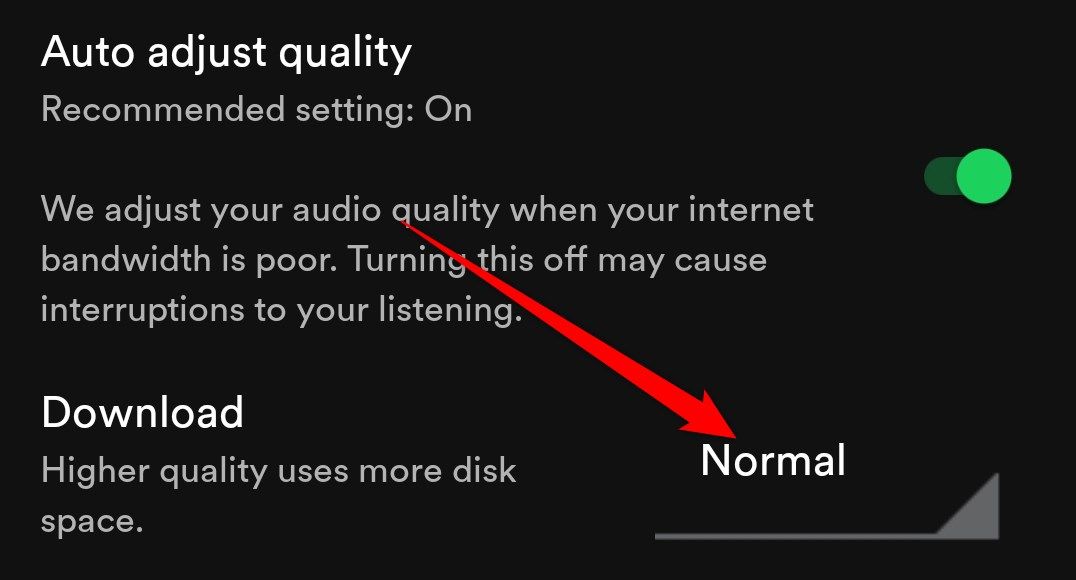
Scroll down till you reach the “Audio Quality” section. To adjust the download audio quality, tap on the downward-pointing triangle next to “Download.”
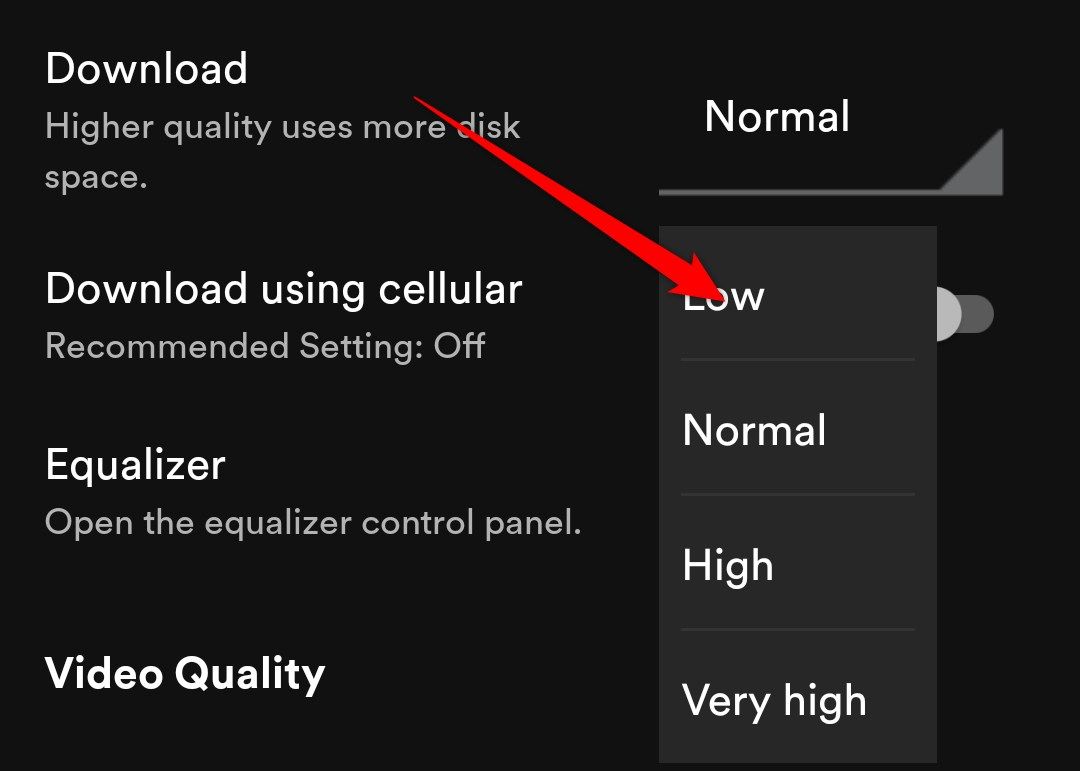
Select “Low.”
Your songs will now download at “Low” quality and use less storage space.
How to Switch to a Smaller Download Size on a Desktop
To switch to a smaller download size on your desktop, open the Spotify app, click on the profile icon, and select “Settings.”
Scroll down to “Download” in the “Audio Quality” section. Click on the downward pointing arrow and select “Low.”
Now, all your subsequent downloads will use less storage space.
Any changes you make to your download quality will only affect the songs you download
after
making the change. Any songs you’ve previously downloaded will remain unaffected. Therefore, if you want to reduce the storage space of songs you’ve already downloaded, you’ll need to delete and re-download them for the change to take effect.
Spotify can be a storage glutton, but with these three fixes, you can easily claw back those extra gigabytes you need to keep things running smoothly.
