Has your wireless Windows mouse suddenly stopped responding? It’s a frustrating issue that’s tricky to diagnose; the fault could lie with the hardware itself (like the mouse or the USB receiver) or with your computer software. But don’t worry—follow our advice to get your mouse working again.
1. Undertake Basic Device Diagnosis
Before doing anything else, you should determine whether your mouse is connected to your PC. So, perform some basic hardware diagnosis, like ensuring the mouse is switched on (the power switch is usually on the bottom of the mouse) and that the USB receiver is connected to the computer.
If the mouse still doesn’t work after these basic checks, try these other hardware-orientated fixes:
Reconnect the USB Receiver
Disconnect the USB receiver, wait ten seconds, then plug it back in. This is age-old advice, but it may kick Windows to recognize the mouse.
Use a Different USB Port
The USB port you’re using for the receiver may be faulty, so use a different one to check. If your computer only has one USB port, you could use an adapter or a dongle that connects to a different port to provide more USB connections.
Check the Mouse Battery
The battery is typically the reason for wireless mice not working. Check the battery is fully inserted in the compartment and that it’s positioned correctly. Also, replace it with a new battery if you’re unsure how much charge it has left (or plug it in to charge if the battery isn’t replaceable).
Unplug Other USB Devices
Other USB devices connected to your computer can cause interference. Disconnect these in turn; if it doesn’t fix your mouse, plug them back in again.
Check for Hardware Damage
Your mouse or USB receiver may be defective, especially if you accidentally dropped them recently. Examine your USB port, receiver, and mouse for physical damage. Check for dirt or dust in the USB ports and clean them if required.
Connect to Another PC
Connect the receiver to a different Windows device and see if the mouse works there. If not, the mouse or receiver is probably defective. To determine which is to blame, you could get another receiver—most manufacturers sell them standalone or will send you one under warranty. If this doesn’t work, you then know the fault lies with the mouse itself (so buy a new one or claim under warranty).
Alternatively, if everything works on another device, it means the issue is with your computer rather than the mouse or receiver.
2. Disable USB Power Management
A USB receiver requires an adequate amount of power from the computer to work properly. Windows has a setting which disables USB devices to save power, and this can cause issues.
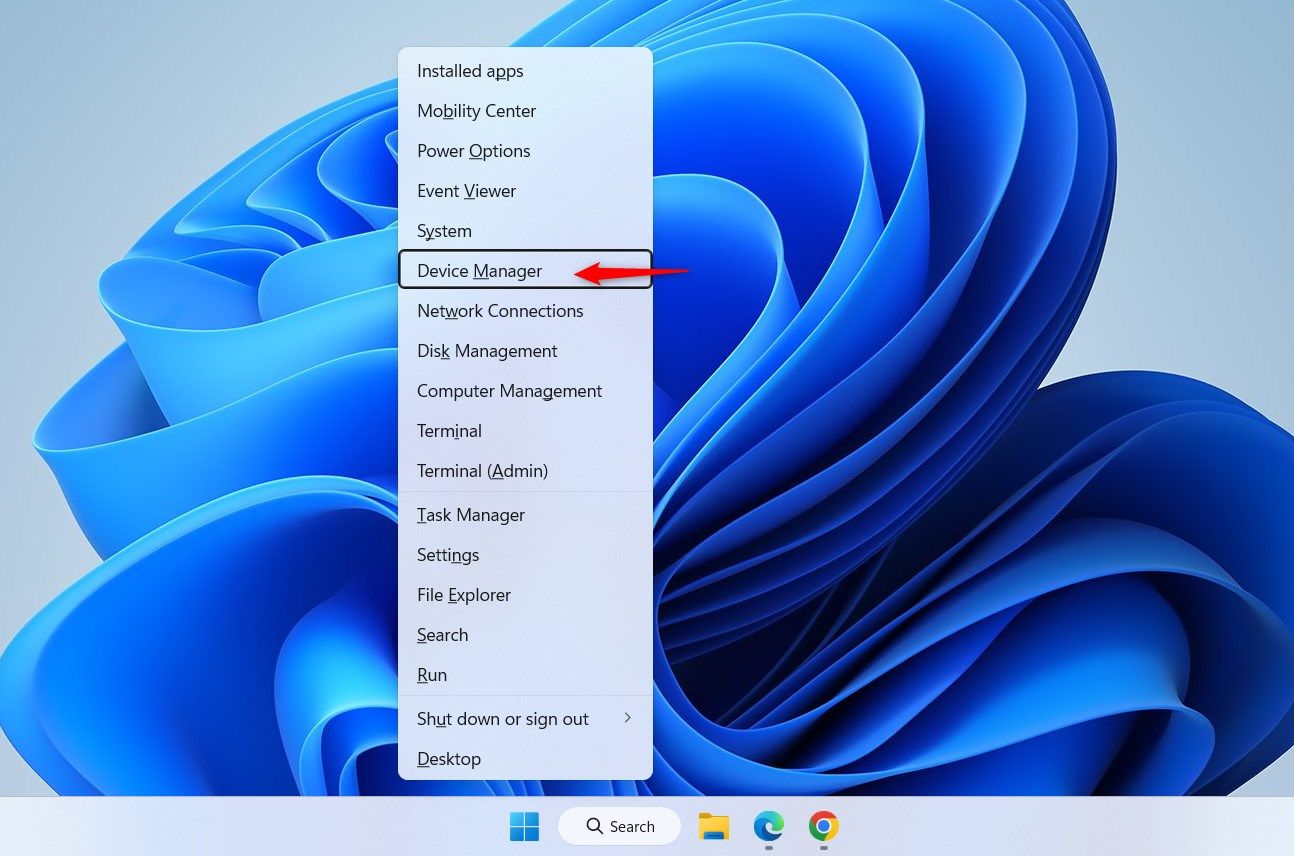
To change this, press Windows+X and select “Device Manager” from the pop-up menu.
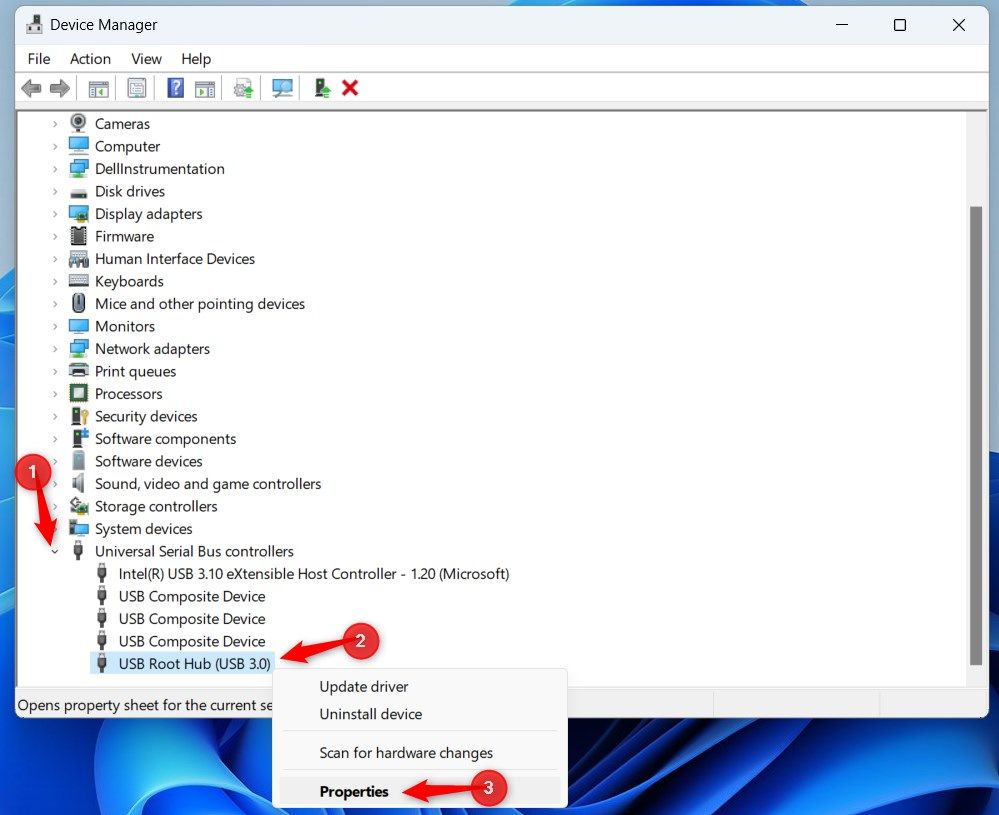
In Device Manager, scroll down and double-click the “Universal Serial Bus Controllers” section to expand it. Right-click “USB Root Hub” and select “Properties.”
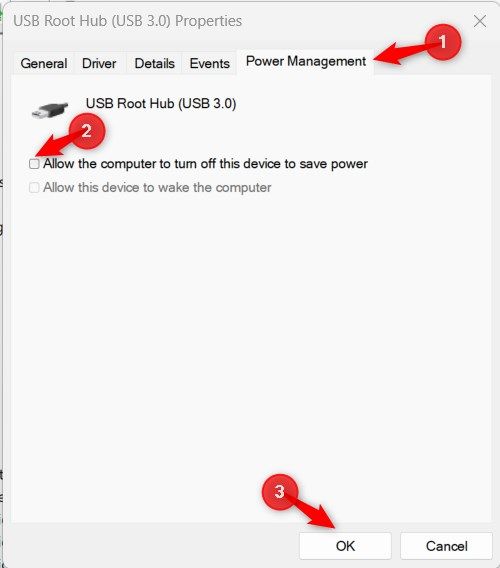
In the Properties window, select the “Power Management” tab and uncheck “Allow the Computer to Turn Off This Device to Save Power.” Click “OK”.
Finally, remove and reconnect the USB receiver.
3. Disable Fast Start-up
Windows’ Fast Start-up feature launches your computer quickly, but Fast Start-up has drawbacks, including connection issues with USB devices. Therefore, it’s worth disabling it.
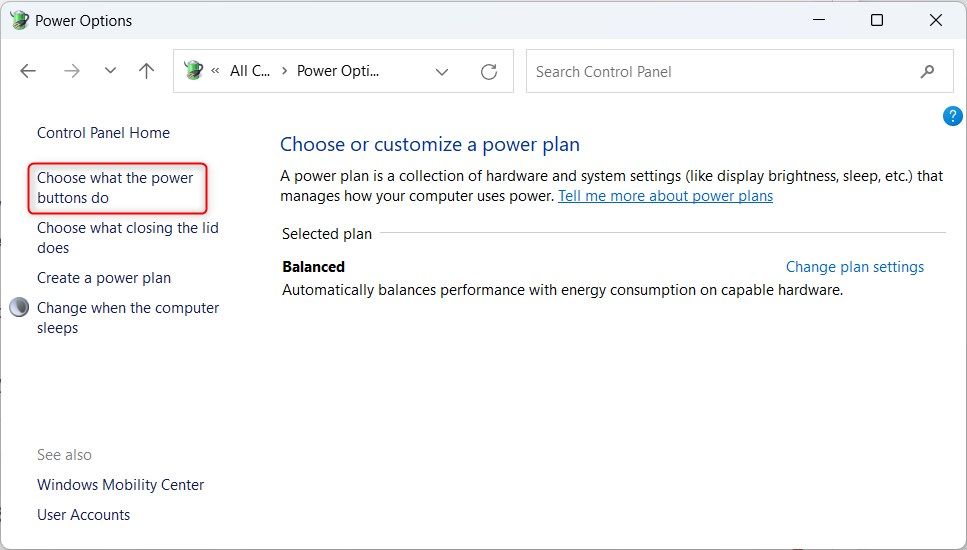
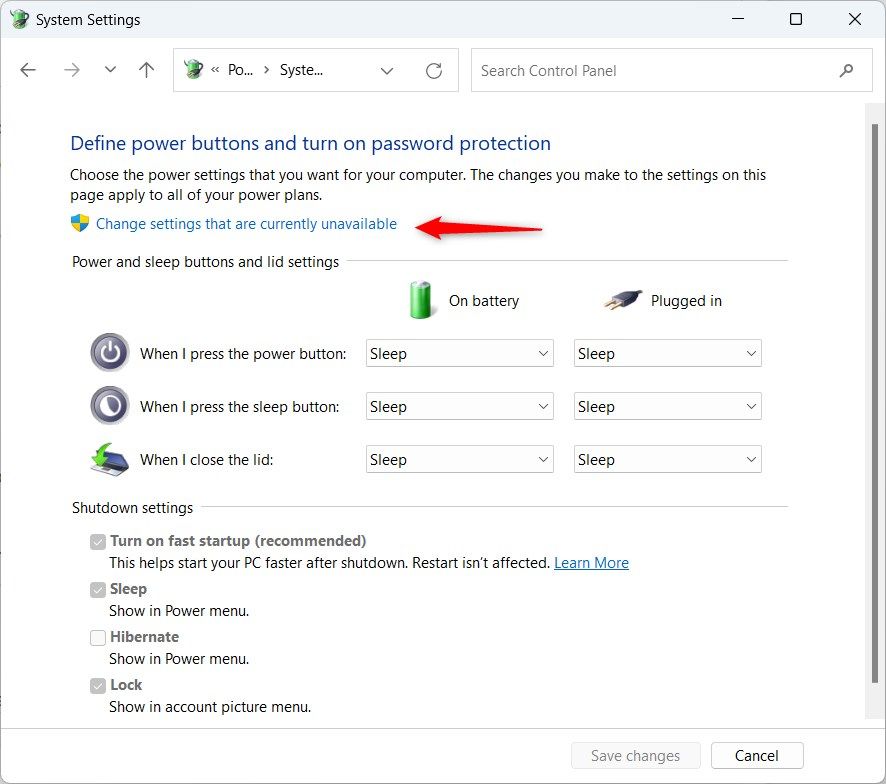
Search for “Control Panel” in the Start menu and open it. Go to “Power Options” (search for it if you don’t see it), then click “Choose What the Power Buttons Do.”
Click “Change Settings That Are Currently Unavailable.”
Now, uncheck “Turn On Fast Start-up” and click “Save Changes.”
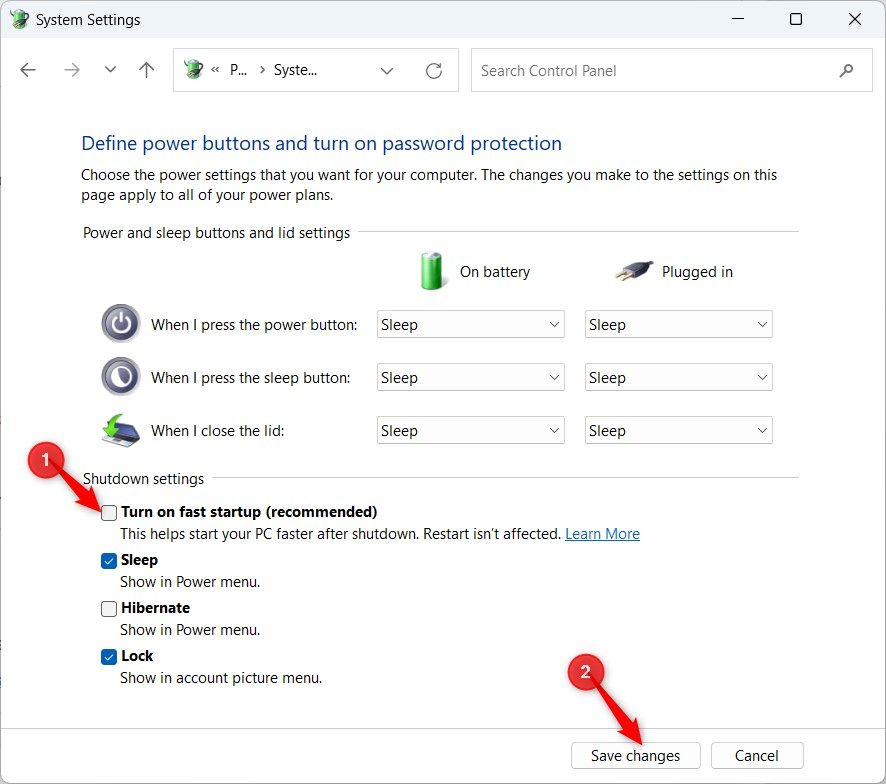
Shut down your computer, unplug and reconnect the USB mouse receiver, then turn the computer back on.
4. Update or Rollback the Mouse Drivers
If your mouse drivers are outdated or corrupted, this might cause connection issues. If they are outdated, you should update your Windows 11 drivers. Alternatively, if a recent update caused the issue, you should roll back.
How to Update the Mouse Drivers
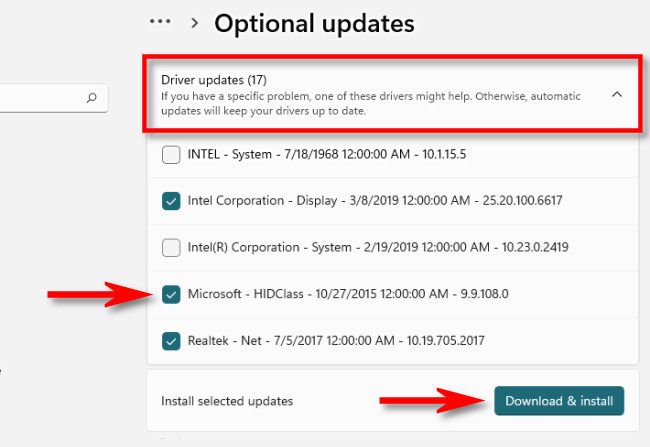
The best way to do this is through Windows Update. Press Windows+i to open Settings and go to Windows Update > Advanced Options > Optional Updates. If available, click “Driver Updates”, select those you need (any related to connectivity and the mouse), and click “Download & Install.”
If Windows Update doesn’t detect any available driver updates, manually install them. To do this, go directly to the mouse manufacturer’s website. They should have a driver section, or they might have dedicated software—in either case, download and run the executable, then follow the prompts.
How to Roll Back the Mouse Drivers
To roll back the drivers, press Windows+X and select “Device Manager.” Double-click the “Mice and Other Pointing Devices” section to expand it. Right-click the wireless mouse and select “Properties.”
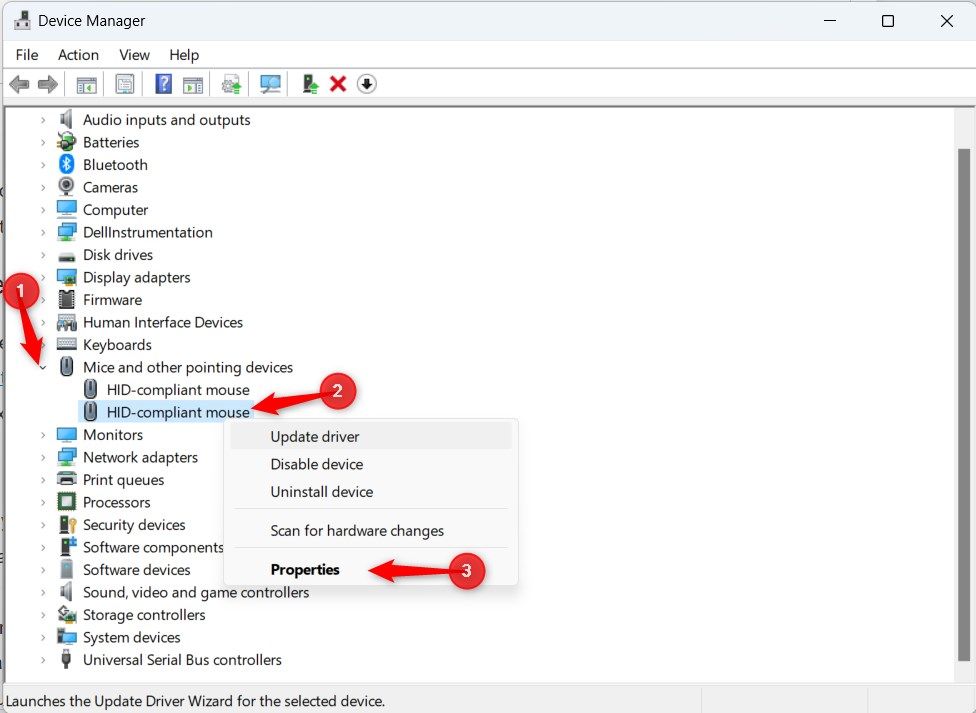
In the Properties window, select the “Driver” tab and click “Roll Back Driver.”
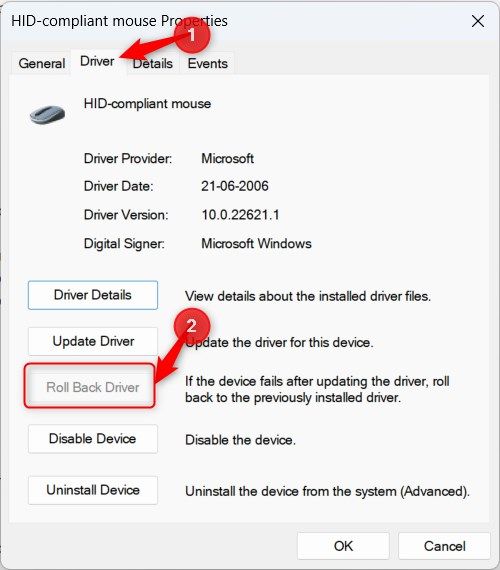
Click “Yes” on the warning pop-up and wait until Windows automatically restores to the previous version.
5. Reset the USB Ports
If you suspect the fault lies with your USB ports, resetting them can resolve this.
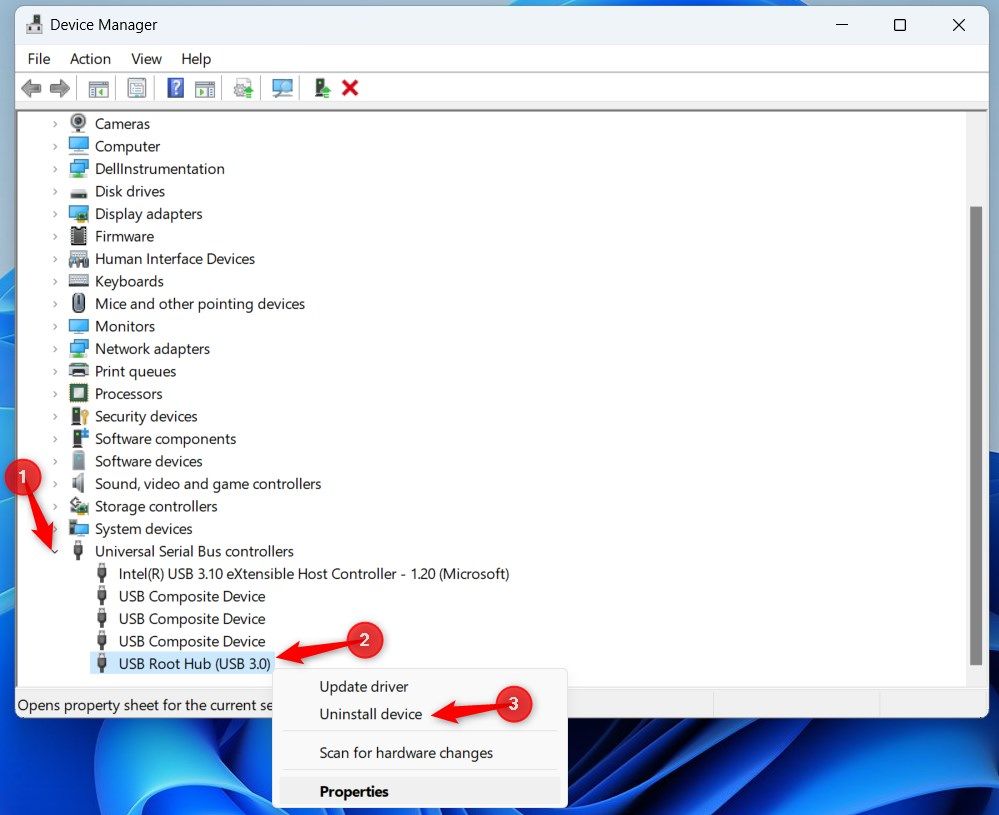
Press Windows+X and select “Device Manager.” Double-click “Universal Serial Bus Controllers” to expand it. Right-click “USB Root Hub” and select “Uninstall Device.”
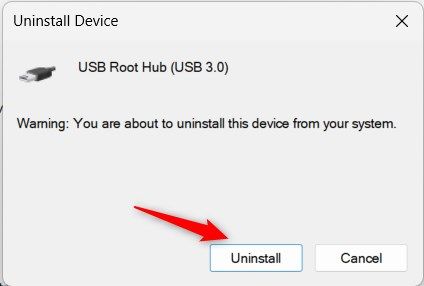
Select “Uninstall” in the pop-up window.
Repeat the above steps for each USB Root Hub on the list.
Restart your computer, and it will automatically scan and reinstall the USB controllers. If it doesn’t, go back to Device Manager and select Action > Scan for Hardware Changes.
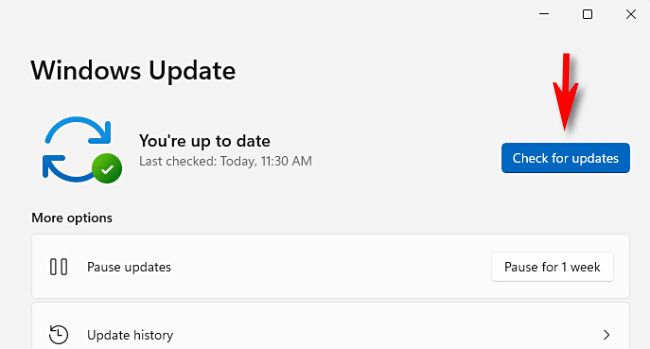
6. Update Windows 11
Install all available Windows 11 updates (Windows+i > Windows Update > Check for Updates) and restart your computer. Keeping Windows up-to-date can resolve many issues.
On the other hand, sometimes Windows updates can be buggy and be the root of the problem. If you recently updated Windows and your mouse stopped working afterward, uninstall the recent Windows update (Windows+i > Windows Update > Update History > Uninstall Updates).
7. Run a Malware Scan
If your system is infected with malware, it can interfere with external devices like mice. This is why you should run a malware scan to detect and remove harmful threats, either using Microsoft Defender or any reliable third-party antivirus software.
8. Connect the Mouse With Bluetooth
The majority of wireless mice also connect to your computer via Bluetooth, bypassing the need to insert a USB receiver. However, your PC must also support Bluetooth.
First, switch your wireless mouse’s connection to Bluetooth (usually via a switch or button on the bottom of the mouse.)
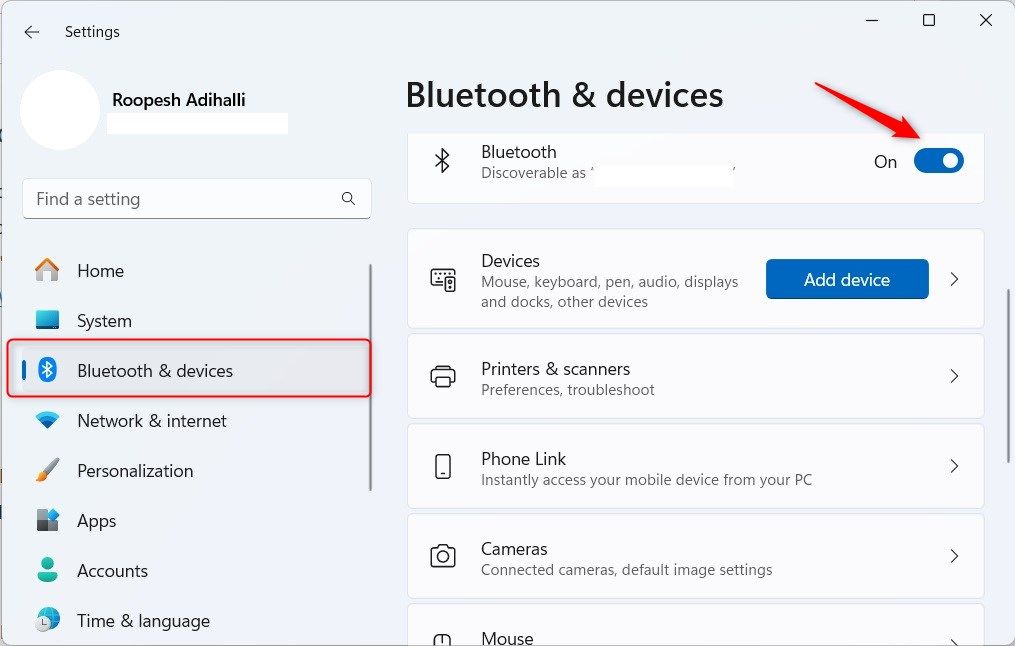
Next, enable Bluetooth on your Windows 11 PC. To do so, press Windows+i to open Settings and click “Bluetooth & Devices.” Toggle the “Bluetooth” slider to “On.”
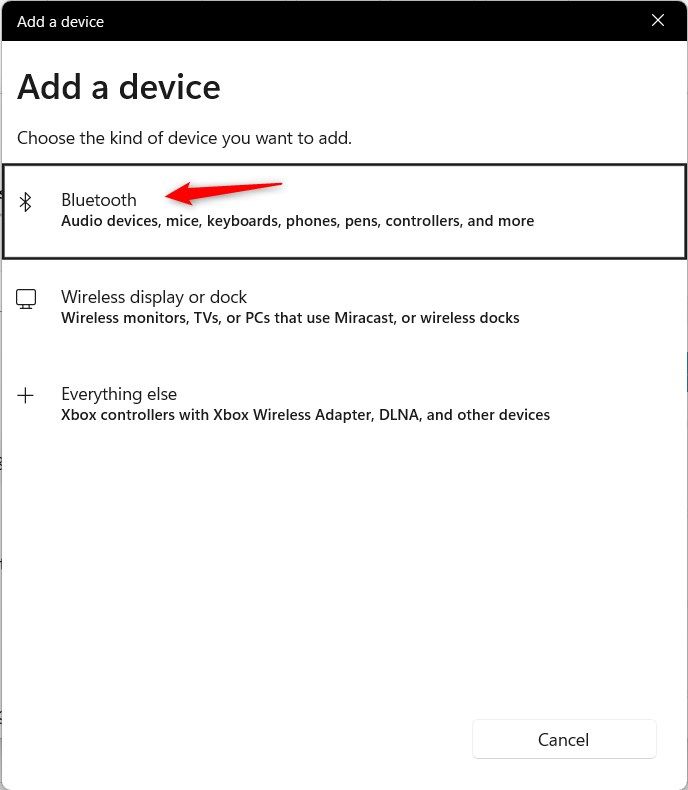
After turning on Bluetooth, select “Add Device” and then select “Bluetooth” from the list.
Your PC will start searching for Bluetooth devices. Choose your wireless mouse from the list.
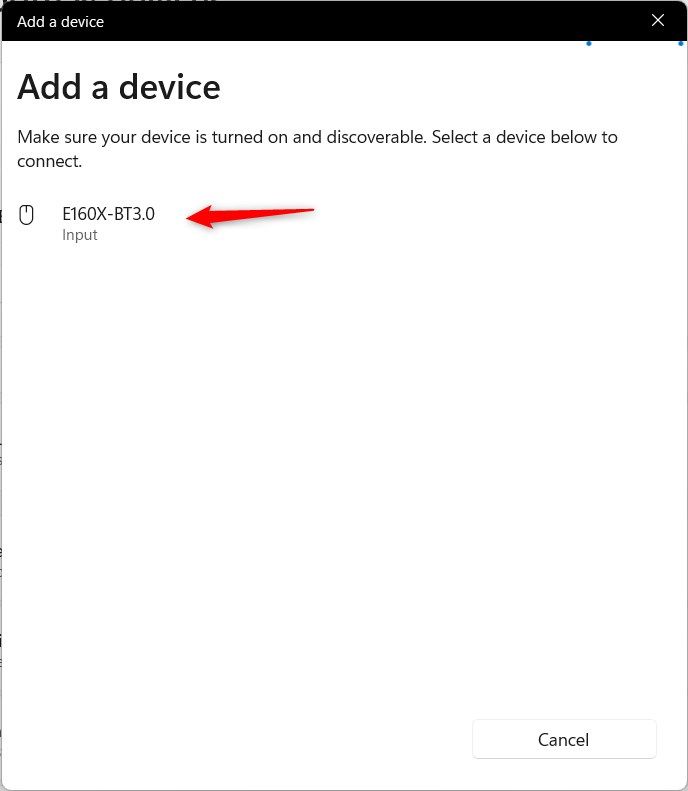
Wait until the connection is established. After a few seconds, your mouse is ready to use via Bluetooth.
9. Perform a System Restore
If none of these steps helped and your wireless mouse is still not working, consider performing a system restore to set Windows back to an earlier state and uninstall drivers and updates added since the last restore point.
However, you can only do this if a restore point has previously been created.
After following all these steps, your mouse should successfully connect to your computer again. If not, it might be time for a new mouse—there’s plenty of great wired and wireless options out there, whether you need it for productivity or play.

