Key Takeaways
- Ensure your headphone’s volume is not muted. If the speaker icon in your system tray has a cross next to it, click it, then click the icon beside the volume slider to unmute.
- Confirm your headphones are set as the default audio output device (Settings > System > Sound > More Sound Settings > Playback > Set as Default Device).
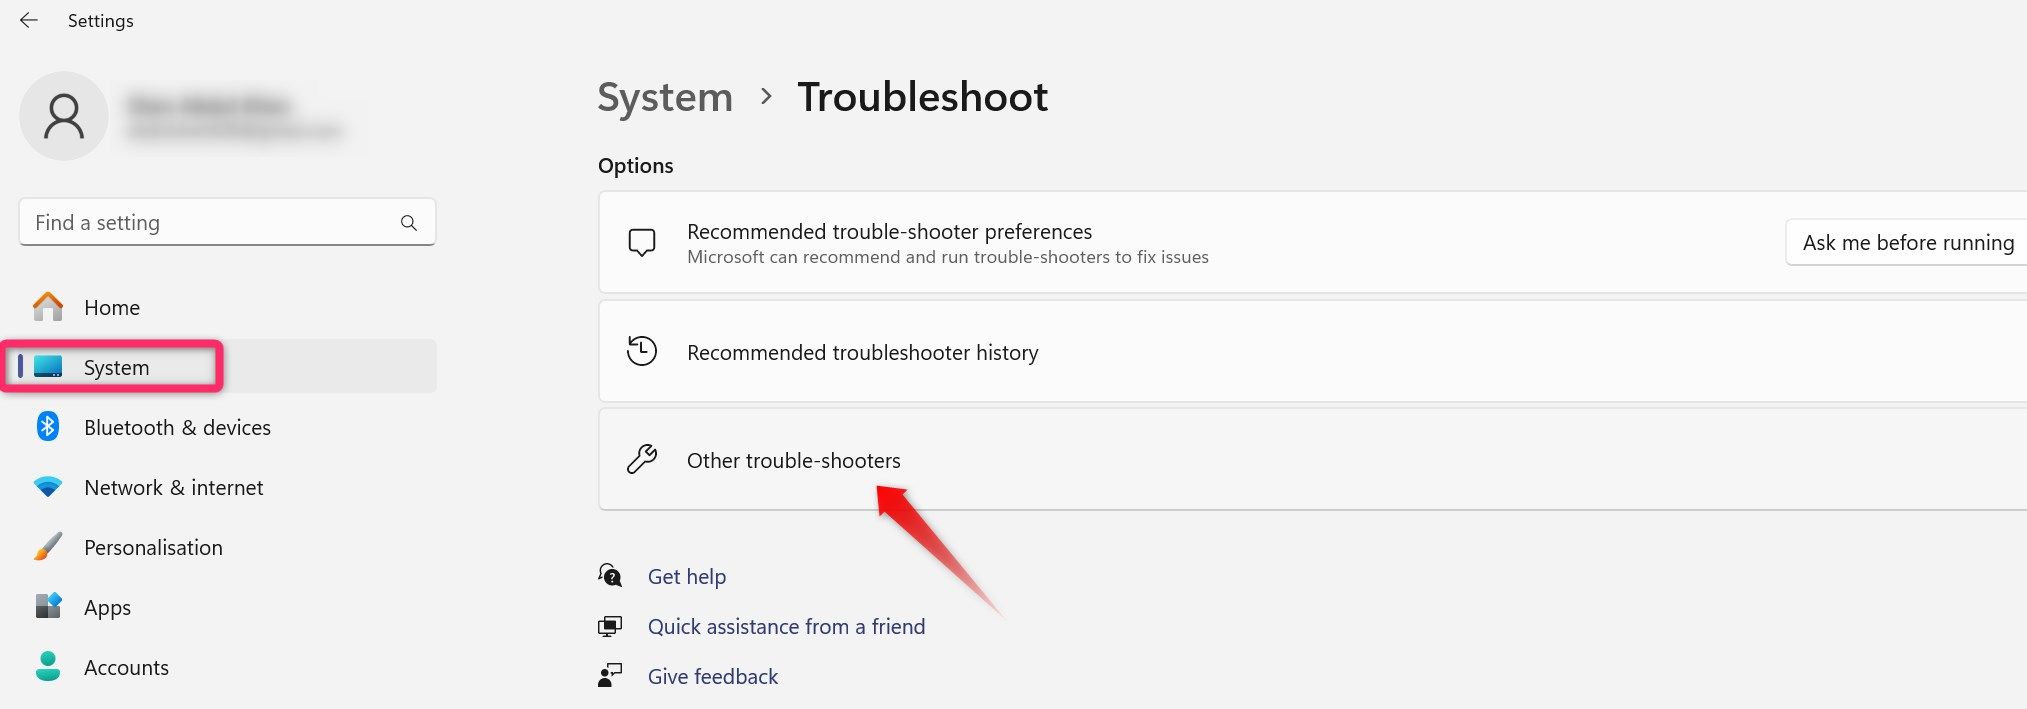
- Run the audio troubleshooter (Settings > System > Troubleshoot > Other trouble-shooters > Audio).
Getting ready to watch a video or listen to your favorite song, only to unearth that your headphones aren’t working, can be quite frustrating. Various factors can contribute to this problem on Windows 11, such as a different audio output device set as default, an app taking exclusive control of your headphones, outdated drivers, and more. Thankfully, it’s usually straightforward to fix your headphones not working on Windows 11.
1. Perform Some Preliminary Checks
First, perform some basic checks, as they may quickly settle the issue. To begin, confirm that your headphones are firmly inserted into the headphone jack and double-check that you haven’t mistakenly plugged them into a microphone jack. Also, clean the audio jack, and try unplugging and replugging your headphones (plus, if possible, try another port).
Then, disconnect all other peripherals attached to your device, mainly audio output devices. If the issue persists after performing these basic checks, apply the remaining fixes.
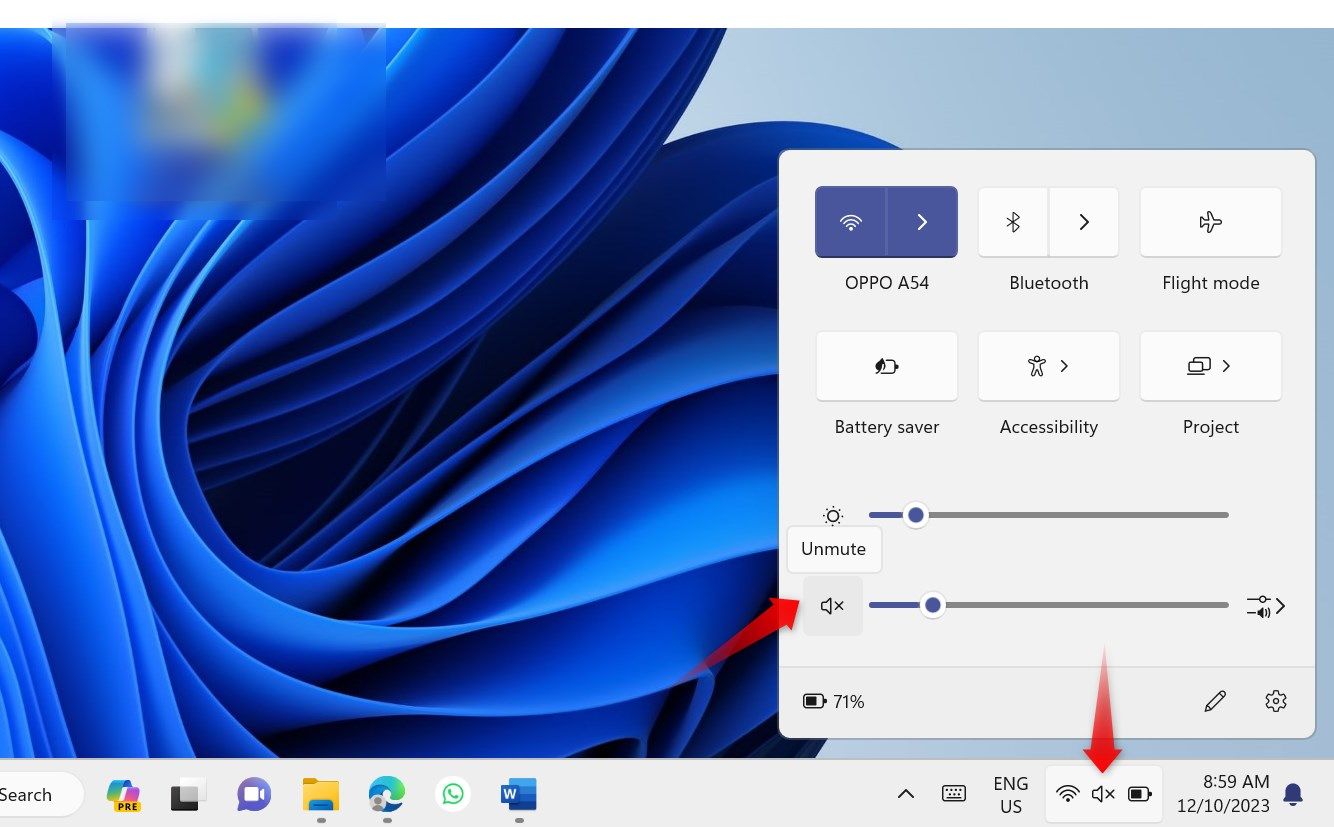
2. Unmute Your Headphones
Ensure your headphone’s volume isn’t muted on your computer. To check, look at the speaker icon in the system tray in the bottom-right corner of the screen. If the speaker symbol has a cross (x) next to it, the volume is muted.
To unmute it, simply click the muted speaker icon in the system tray, then click the same icon beside the volume slider. After unmuting, make sure to adjust your sound volume on Windows so it isn’t too low.
3. Check for Hardware Issues
If the volume isn’t muted, ensure your headphones aren’t faulty. To check that, simply unplug your headphones from your device and plug them into another computer or your smartphone. If your headphones also don’t work on other devices, they’re probably faulty. So, either have them inspected by a technician or substitute them.
However, if your headphones work fine elsewhere, the issue is device-specific. So, keep applying the remaining fixes.
4. govern Out Bluetooth Interference (for Bluetooth Headphones)
Sometimes, appliances placed near your laptop and headphones can interfere with Bluetooth signals, causing Bluetooth headphones to stop working. Wi-Fi routers, microwaves, and even baby monitors are just a few examples. If any of these are near your laptop or PC, they could cause the issue.
To govern out this possibility, temporarily proceed these devices away from your headphones. If your Bluetooth headphones start working after doing that, relocate those devices permanently.
Additionally, troubleshoot Bluetooth issues on Windows to govern out the problem being your Bluetooth connection as a whole, rather than your headphones.
5. Check for App-Specific Issues
If your headphones don’t work in a particular app, check if they work in other apps installed on your device. If they do, the issue might be specific to that app. So, ensure the volume isn’t muted in that app, your headphones are set as default, and go through other settings that could cause the problem.
If your headphones don’t work in any application or throughout the operating system, then the issue is more widespread.
6. Set Your Headphones as the Default Output Device
Ensure your headphones are set as the default audio output device in your sound settings, especially if multiple audio output devices are connected to your system.
To check that, right-click the Start button and open the Settings app. Then, pilot to System > Sound, scroll down, and click “More Sound Settings.”
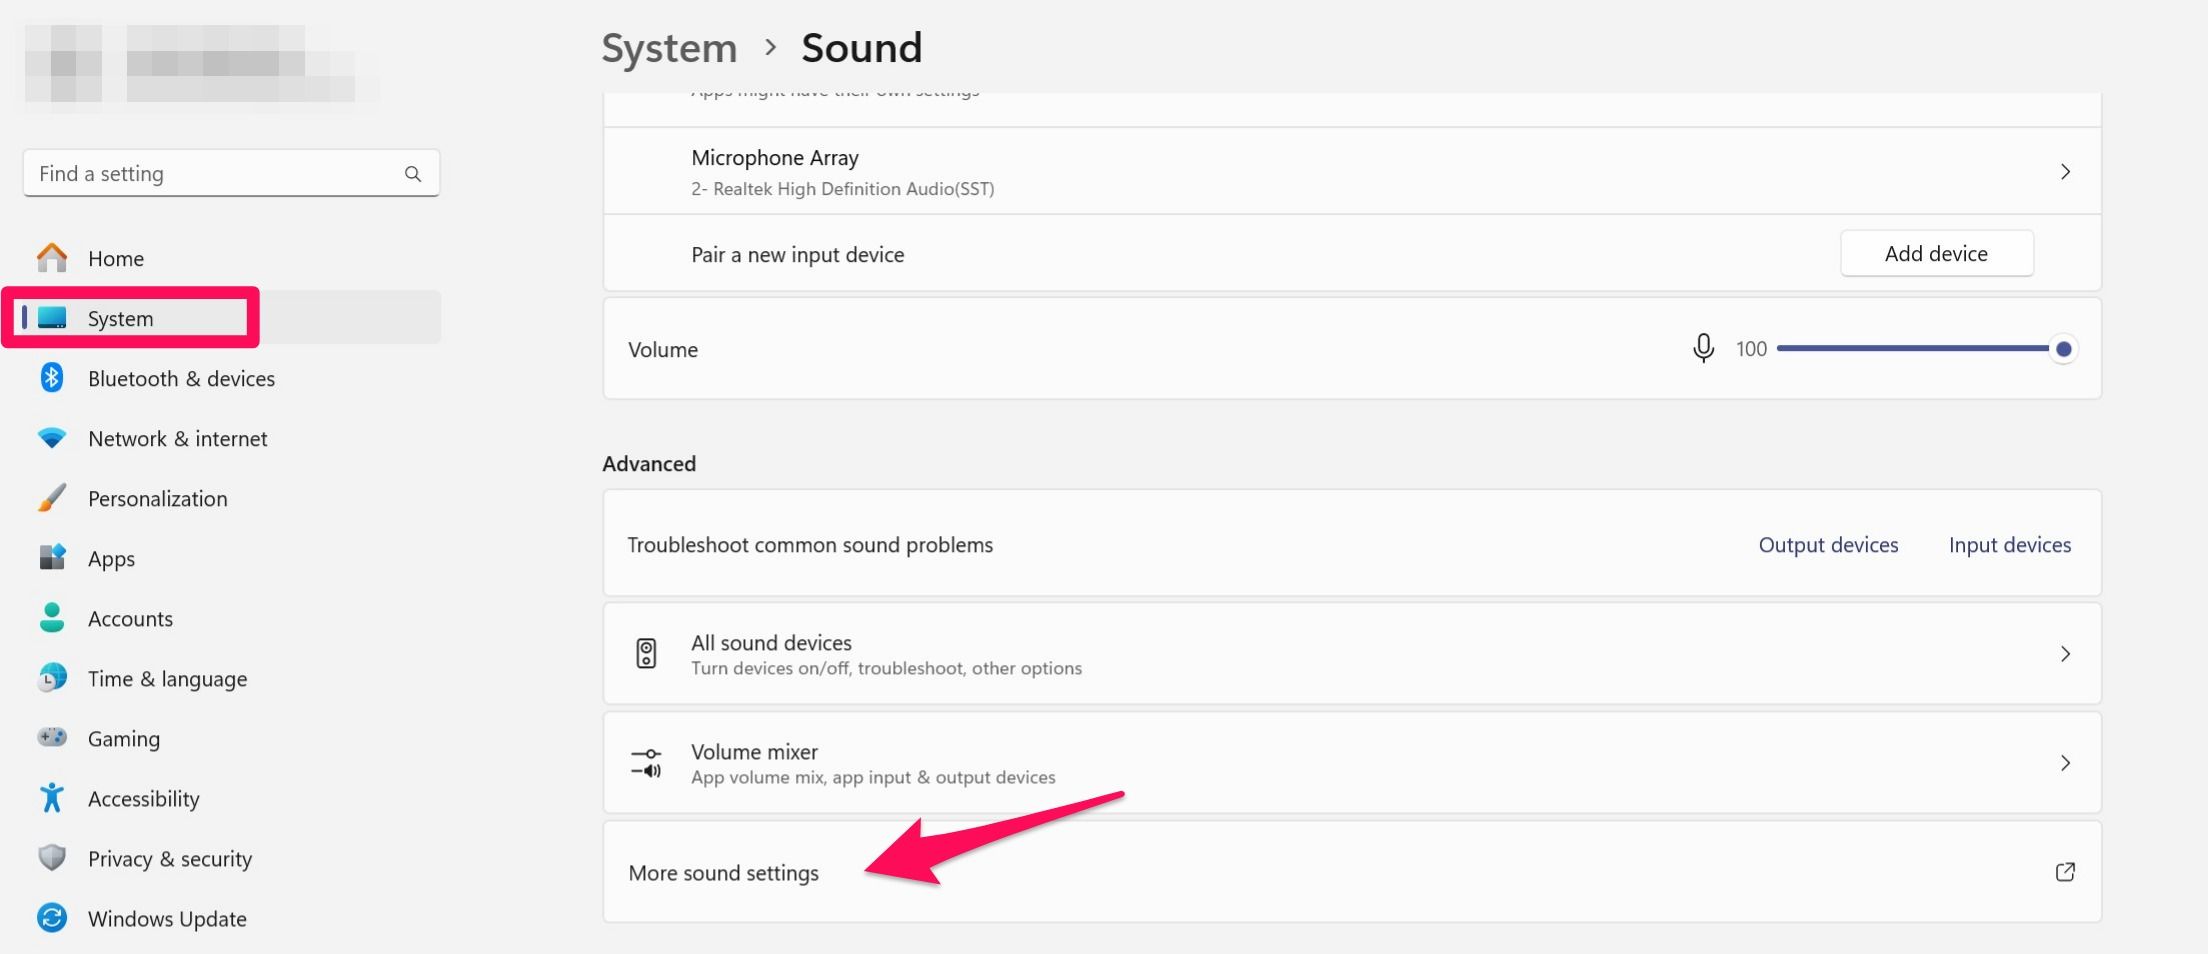
In the Sound window, go to the “Playback” tab. If a different device is selected as default here, right-click on your headphones and select “Set as Default Device.”
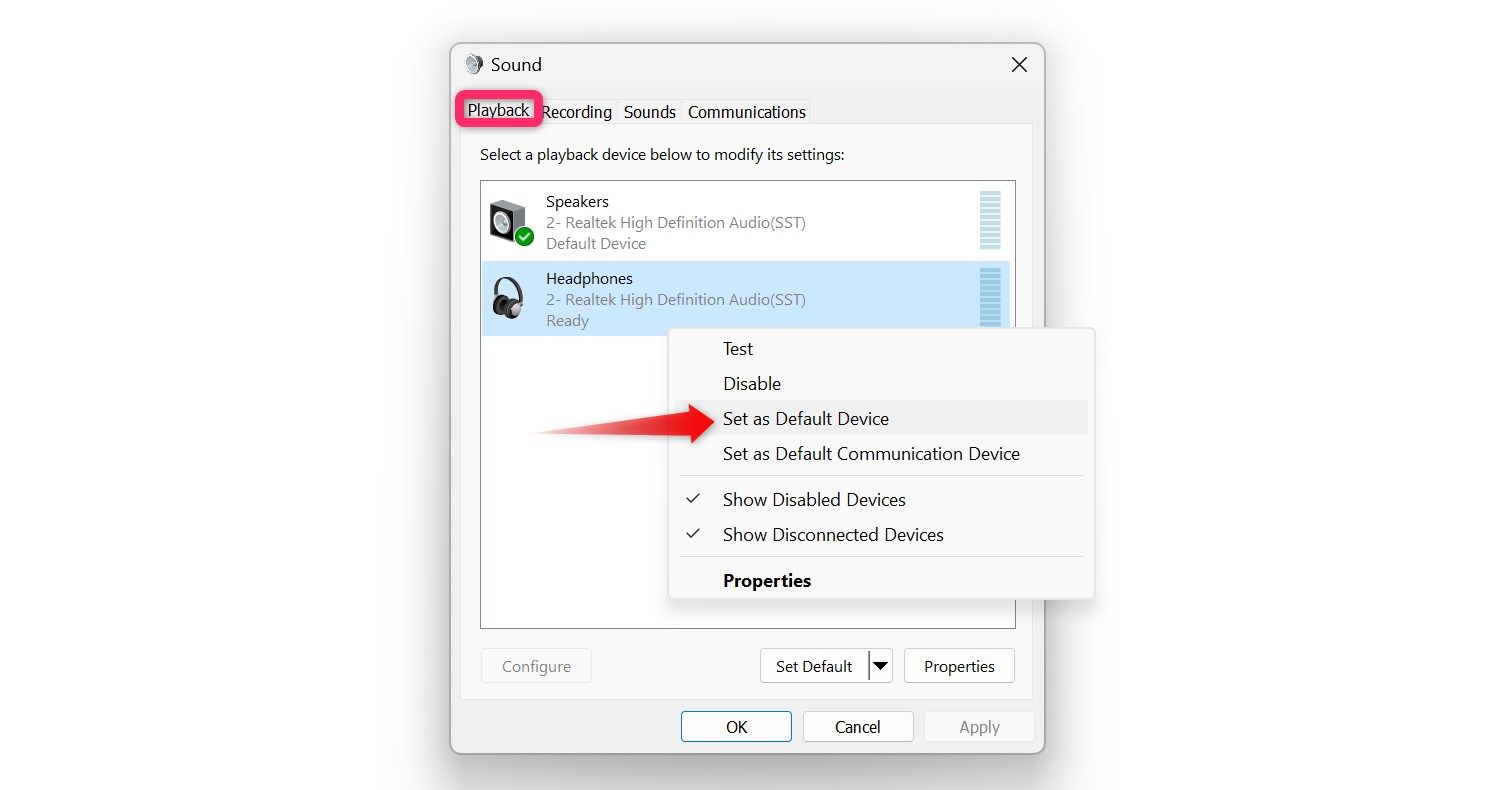
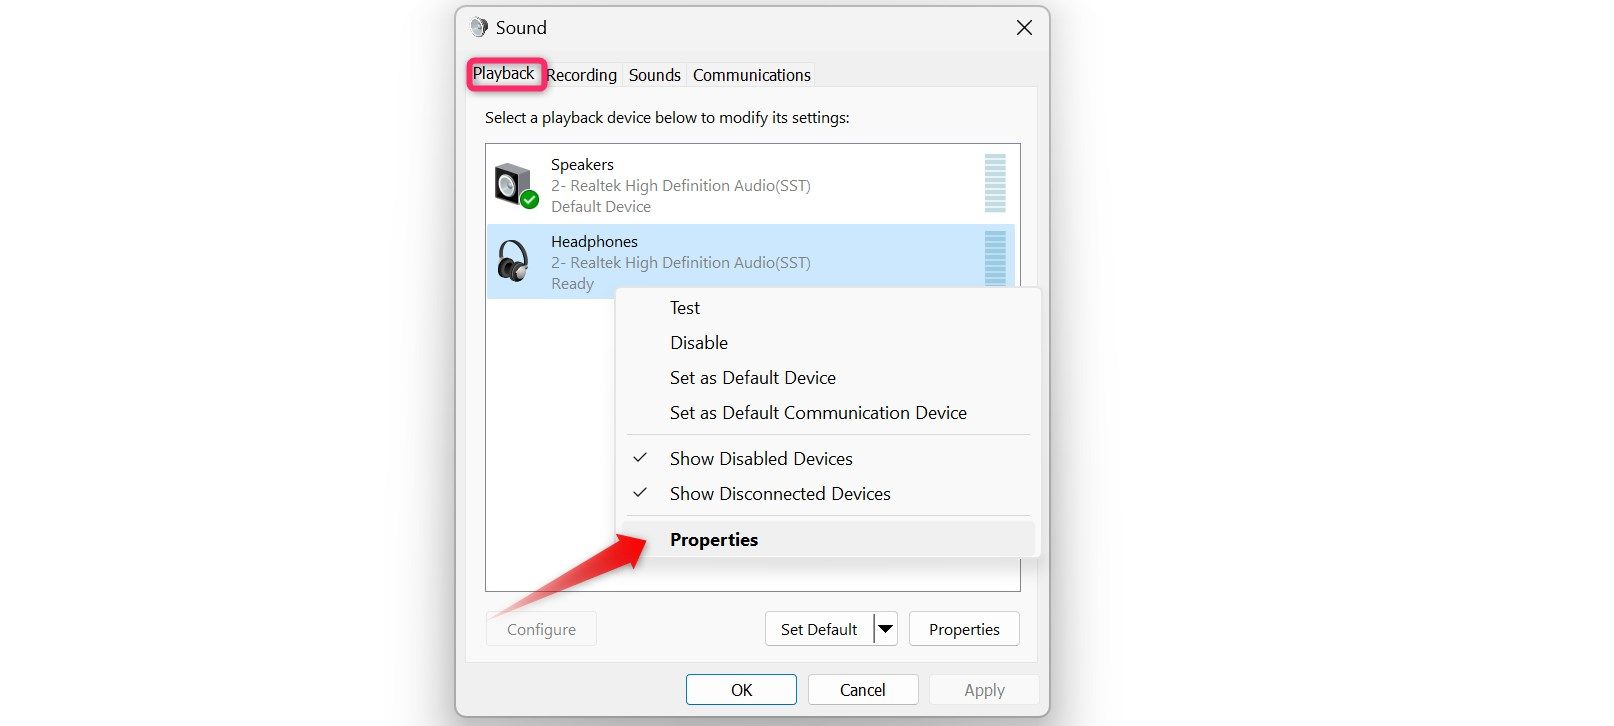
7. Disable Exclusive Mode and Audio Enhancements
Exclusive mode allows an app to take full control of your audio output device, making it unavailable for other apps. If your headphones work in one app but not elsewhere, turning off this mode can overcome the issue. Similarly, audio enhancements can better the quality of your sound, but can also cause problems. So, it’s a good idea to turn them off too.
To disable both, open Sound settings (as detailed above), head to the “Playback” tab, right-click on your headphones, and select “Properties.”
Then, go to the “Advanced” tab and uncheck the boxes beside “Allow applications to take exclusive control of this device” and “Enable Audio Enhancements.” Finally, click “OK.”

8. Run the Audio Troubleshooter
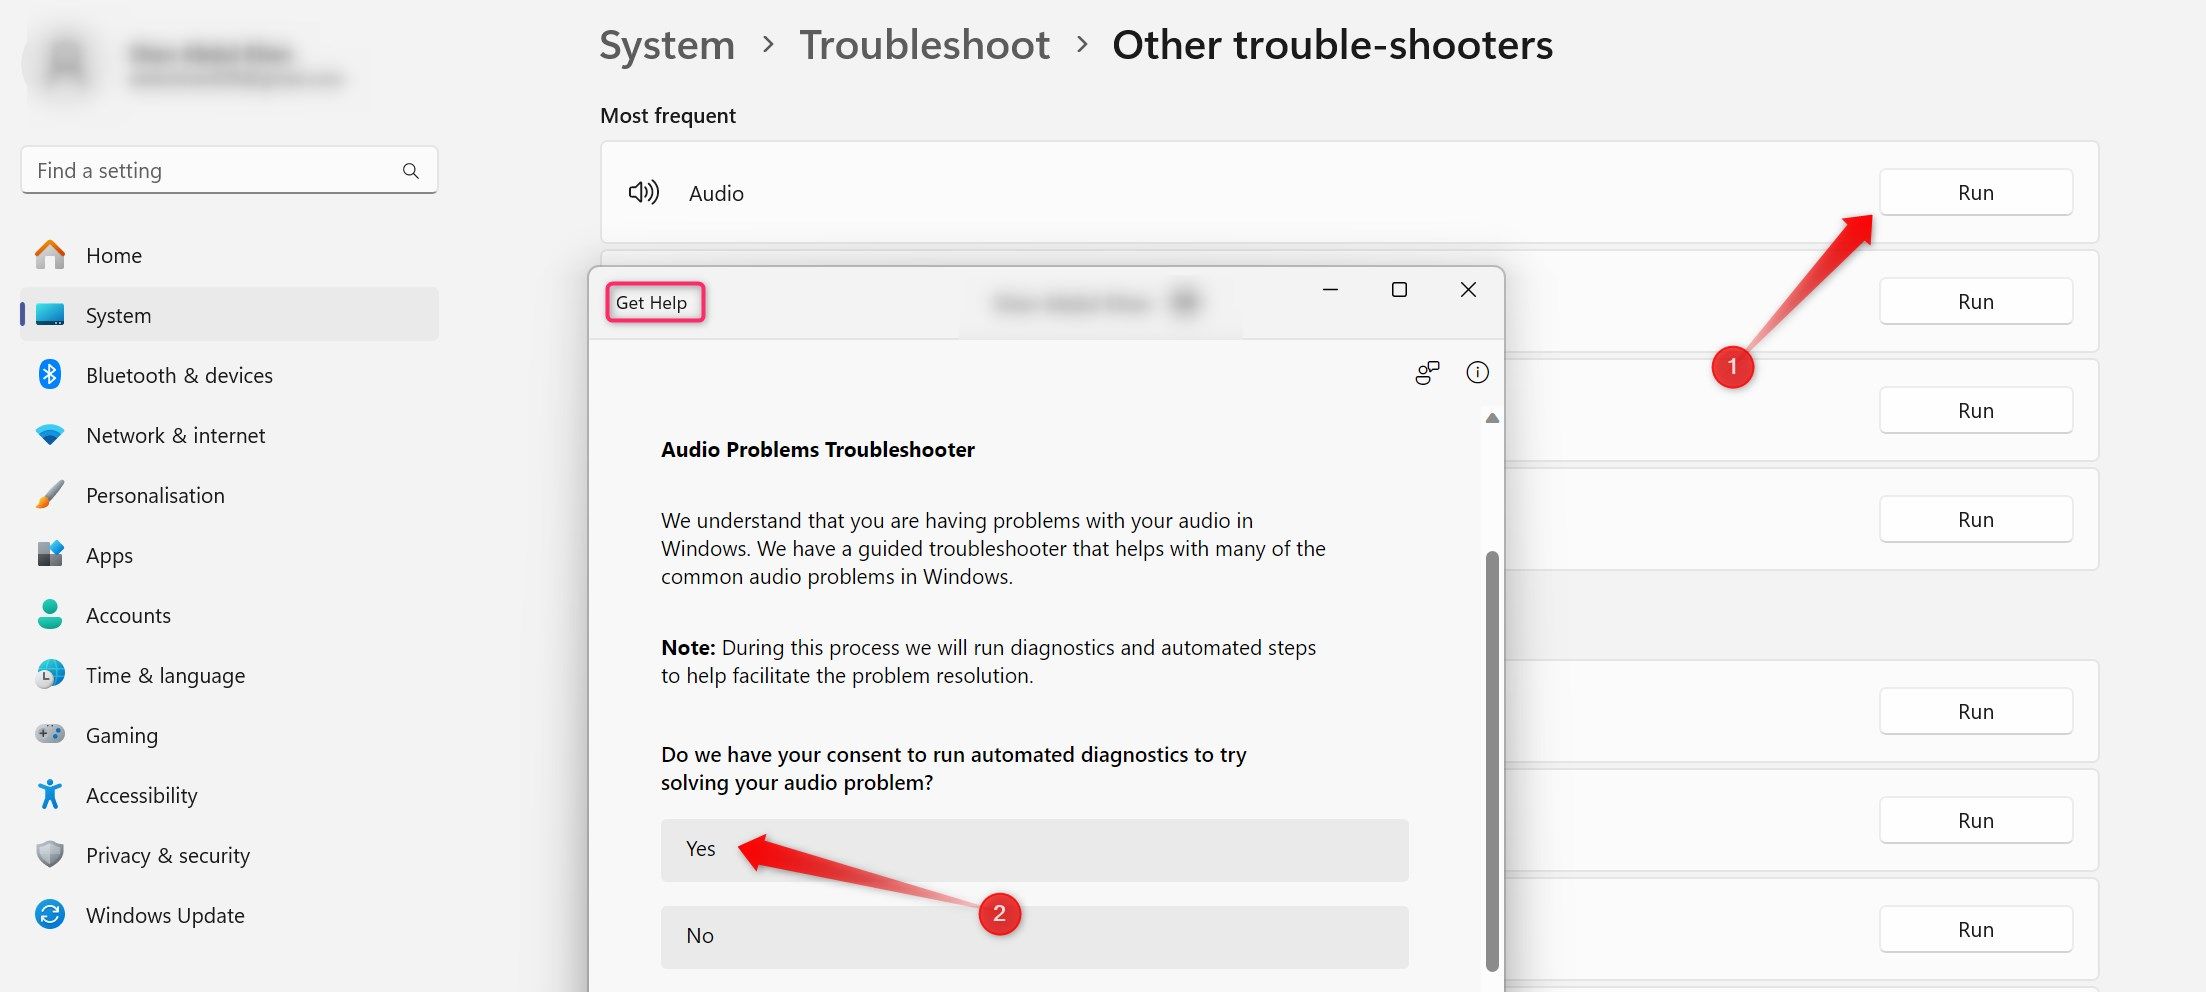
The Windows audio troubleshooter automatically scans for and fixes audio issues. If the above solutions are ineffective, this troubleshooter might do the job. To run the troubleshooter, right-click the Start button and select “Settings.” Then, pilot to the “System” tab and go to Troubleshoot > Other trouble-shooters.
Then, click “Run” next to “Audio,” and the Get Help app opens, seeking your permission to diagnose the issue. Click “Yes,” and the troubleshooter begins. Allow the scan to complete, and follow the on-screen instructions provided during the diagnosis.
9. Update Your Audio Drivers
Outdated audio drivers can also cause difficulties with audio input and output devices. To govern out this possibility, install the latest drivers. Visit the manufacturer’s website of your headphones or device and download the latest audio and Bluetooth drivers available. If the drivers are in an executable file format, simply run the files to install them.
For drivers requiring manual installation, use Device Manager. Right-click on the Start button and open “Device Manager.” In Device Manager, extend the “Sound, video, and game controllers” category, right-click on your audio device, and select “Update driver.”
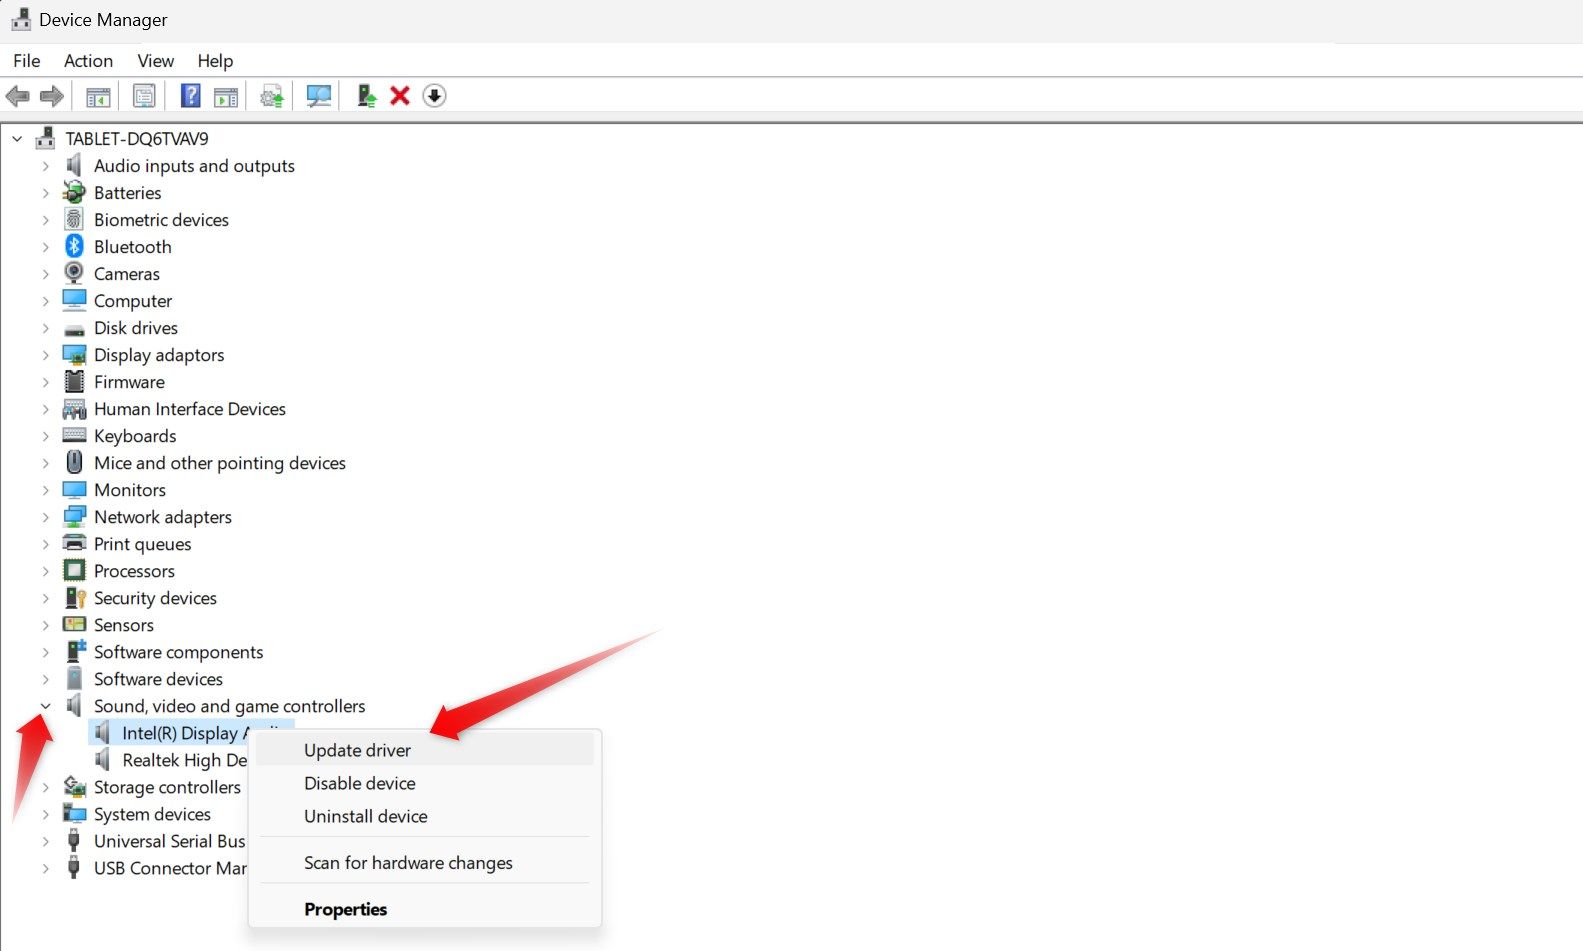
Select “Browse my computer for drivers,” locate the downloaded files, and follow the on-screen instructions. Repeat these steps to update Bluetooth drivers.
That’s how you diagnose and settle issues with your headphones on Windows 11. Now, all that’s left to do is crank up the volume and savor your music, movies, and games once more.

