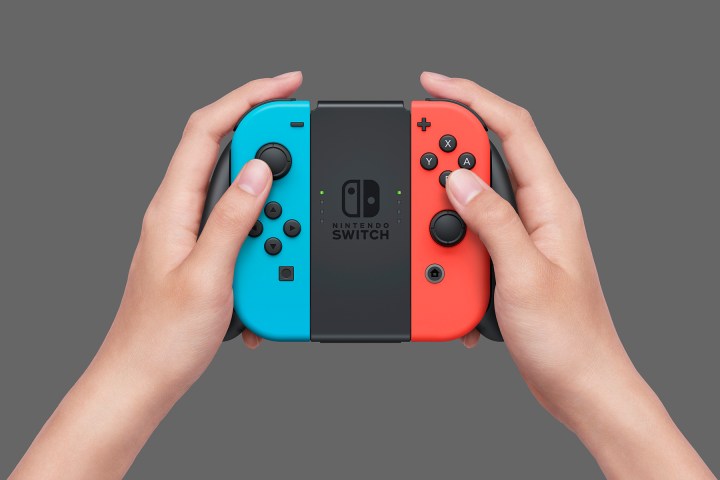
One reason that so many gamers appreciate the Nintendo Switch is that its Bluetooth technology easily hooks up and connects to nearby PCs. You can connect Switch Pro and Joycon controllers to your PC if you have them.
It takes a bit more elbow grease to get it working with all your games when compared to connecting an Xbox controller, but it’s a great option if you already own a Switch. Before you connect your Nintendo Switch controller to your laptop or another Android device, you should make sure that you’ve got a Bluetooth receiver and that both objects are relatively close together. Once that’s squared away, here’s how to get connected.
How to connect a Switch Pro Controller to PC using Steam
The Steam client now officially supports the Switch Pro Controller, with it previously only being available in the beta client. This gives you the ability to use it with all of your PC games and even remap its buttons, should you see fit.
Step 1: Head to the Controller Settings menu in Steam. From here, you can check support for the Switch Pro Controller and enable the Use Nintendo Button Layout option, which changes all your games’ button prompts to match the Pro Controller. If you leave this unchecked, the A/B and X/Y buttons will be swapped, like they are on the Xbox One.
Step 2: Next, plug in your Switch Pro Controller with a USB cable, and you’ll be asked to register it as well as calibrate the built-in gyro sensor for motion control in certain games.
Step 3: Once you’ve done that, select Controller Configuration, and you can set the function of every button and stick on the controller, make preset configurations for certain games, or choose a community member’s own configuration by pressing the X button. If you like, you can even bind the gyro sensor to a particular function, which could enable you to be nearly as accurate as mouse-and-keyboard players in certain games.
How to connect Joy-Cons or a Switch Pro controller to your PC via Bluetooth
You can easily pair Switch controllers with a Windows or Mac computer from directly within the Bluetooth menu. The steps are essentially the same for both types of controllers, so you can follow along with whatever style of Switch controller you intend on using.
Step 1: Turn on Bluetooth on your computer.
Step 2: Disconnect the controller from the Switch.
Step 3: Hold the Sync button, located between the SR and SL buttons, until the LED lights start flashing.

Image used with permission by copyright holder
Step 4: Look for the controller in your computer’s Bluetooth menu, and select the option to pair it with your device.
There are some quirks to watch out for, such as when the pairing lights on the Joy-Cons won’t stop blinking. You can confirm that the controller is connected, however, by looking at your computer’s Bluetooth settings. If you see the error message below, move the controller around to ensure no other devices are interfering with the signal. Then try again.
Unfortunately, the two Joy-Cons will be treated as separate controllers by default. That’s great for two-player games, but it makes them useless for playing anything complex, like a first-person shooter.
There is a fairly elaborate workaround to sync a pair of Joy-Cons together as a single controller, and it involves multiple external programs and some intensive tinkering. We think the process we’ve described is the best way to go, but if you’re interested, follow the steps outlined by this Reddit user.
The Pro Controller should prove more viable for a wider range of games than the Joy-Cons, namely because it touts a more traditional layout, although it’s not compatible with everything. That’s due to the controller APIs in use; the Pro Controller apparently uses DirectInput, rather than the newer API XInput, making it incompatible with many newer games.
One method to get around this is to download the freeware program x360ce, which translates DirectInput commands for XInput games. It was specifically designed for Xbox 360 controllers, so x360ce does recognize the Switch Pro Controller.

Image used with permission by copyright holder
Other things to keep in mind
If you’re using the Joy-Cons, keep in mind that connectivity issues may translate to similar problems on other devices. Connection challenges with the left Joy-Con on the Switch were common in the Switch’s early days. If you notice lagging or other quirks with either Joy-Con, you can expect pairing with a PC to be a bit more finicky. Plus, the Bluetooth connection can be iffy and is typically vulnerable to interfering devices. Questionable Bluetooth is a problem that plagues plenty of accessories, so we can’t fault Nintendo too much. For the most straightforward pairing, keep the line between the Joy-Con and your PC clear. If it becomes inconsistent, try adjusting where you hold the controller.
If you’ve never had Joy-Con problems, you’re probably lucky enough not to have a faulty unit. Nintendo said shortly after the launch of the Switch that it had corrected future shipments’ connectivity issues. So if you didn’t buy your console when the Switch launched in 2017, you would likely encounter fewer problems. Or, if you purchased another Joy-Con recently, it’s probably free of whatever bug plagued earlier versions.
One more thing to keep in mind if you connect the Switch Pro Controller wirelessly: You can’t charge the Pro Controller while it’s paired via Bluetooth. If you plan to connect it for non-Steam gaming, plug in the Pro Controller before and after, especially if it’s your controller of choice for marathon sessions. Thankfully, the Pro Controller has exceptional battery life — 40-plus hours on a full charge.
Outside of the Steam realm, both the Pro Controller and Joy-cons are excellent for playing older games compatible with DirectInput API and simple controls. Both of these controllers are also suited to play games through your PC’s emulator, which is handy if you like to play old-school Nintendo games on modern technology. It might take some adjusting to get used to using upgraded controllers to play your retro favorites, but it’s a bunch of fun once you learn.
Editors’ Recommendations

