Running out of room? Here’s how to check your free disk space on Windows 10.
Key Takeaways
- Use File Explorer to check your free disk space by opening it and clicking on “This PC” to see the amount of free disk space.
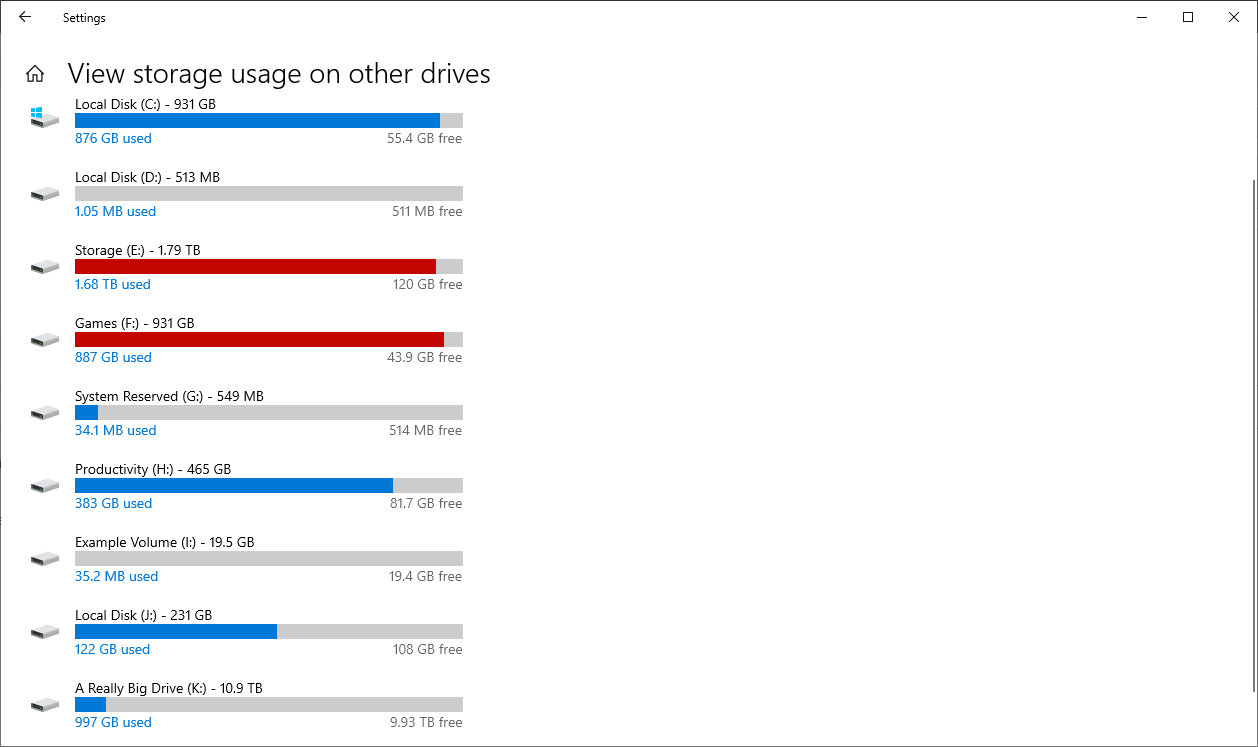
- You can also check your free space in the Settings app. Oepn Settings, navigate to System > Storage, and then click “View Storage on Other Drives.”
Sometimes it feels like you never have enough free disk space. Every app you install takes up valuable room on your main drive, and you might eventually run out. Here’s how to check how much you have left.
Check Your Free Space Using File Explorer
First, open File Explorer. To do so quickly, press Windows+E. Or click the folder icon in your taskbar if File Explorer is pinned there. You’ll also find File Explorer in your Start menu.
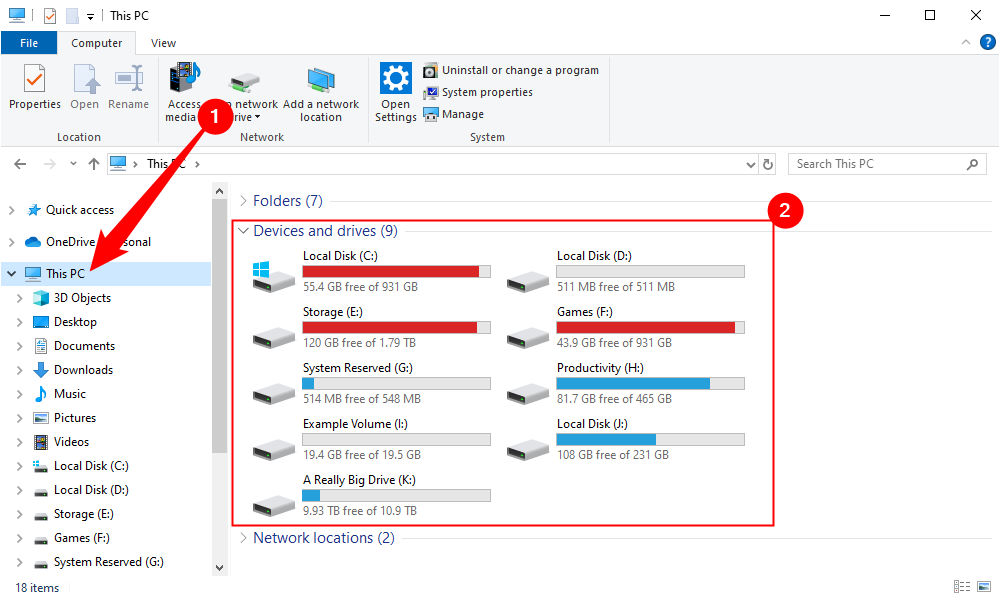
Click “This PC” in the left column. Under “Devices and Drives,” you’ll see your main system volume (C:) and any other drives in the computer. Windows shows the amount of free disk space on the drive directly below the drive’s name.
In general, Windows needs at least a few gigabytes of free storage space to perform optimally. For example, it uses this to cache important programs and virtual memory to disk, which speeds up the operation of Windows.
Check Free Space in the Settings App
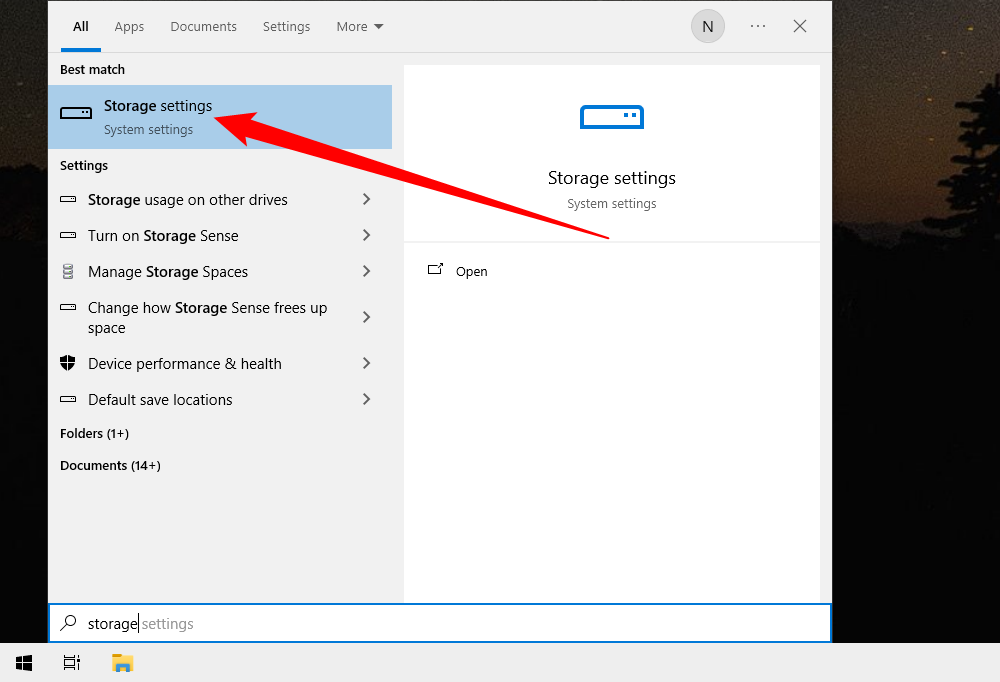
To check how much free space you have using the Settings app, open the Settings app and navigate to System > Storage. Alternatively, search for “Storage” in the Start menu or taskbar search and click “Storage Settings.”
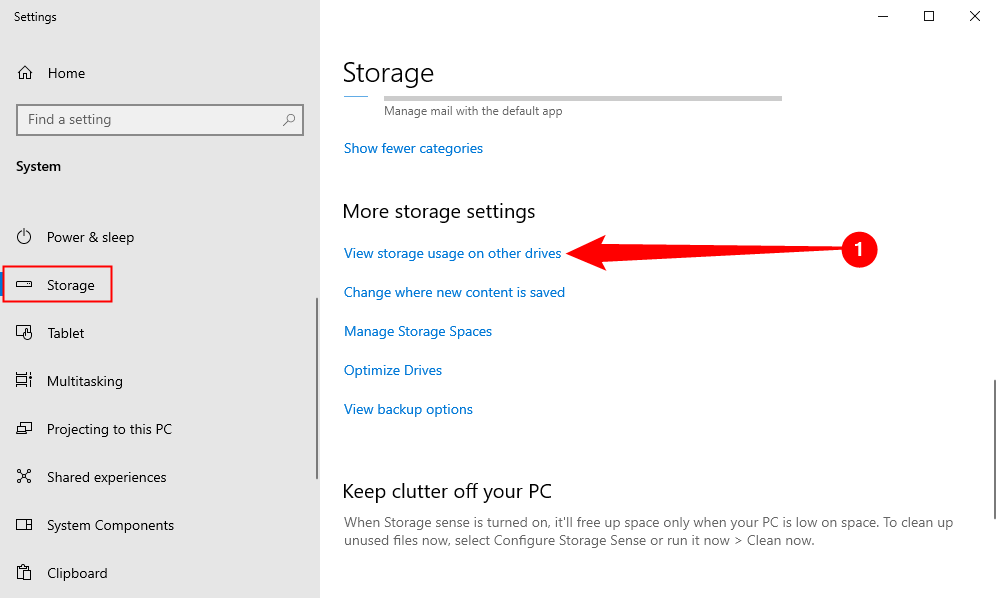
Scroll down a bit in the Storage window and click “View Storage on Other Drives” under More Storage Settings.
You’ll see a list of every storage device attached to your PC—internal and external.
If you’re running low on space, consider freeing up storage by uninstalling programs you no longer use. Also, Windows 10 includes a handy “Free Up Space” tool that helps you clean up your hard drive.
