Quick Links
Key Takeaways
- You can block installing new apps by creating a standard user account or limit app installs to Microsoft Store, and you can also prevent these settings from being altered.
- You may use Group Policy Editor to block installing executables, such as MSI files, for better control over app installations. Alternatively, consider using a third-party app like Install-Block or Deep Freeze.
Do you want to stop people from installing new apps on your Windows PC? You’re not alone. Luckily, there are several ways you can do this on Windows 11, Windows 10, or older versions. Let’s see how.
Why Block Installing Apps on Windows?
Every user could have their own conditions and use cases. However, the general reasons to block installing new apps or programs may include:
- You don’t want your children to install new apps when using your computer.
- You don’t want your employees to install external apps or programs on their work PCs.
- Your Windows machine already has what it needs, and allowing the installation of new apps may risk your security.
- You may do this to block the potential malicious Windows apps from being installed from any source.
How to Block Users From Installing New Apps on Windows
We’ve outlined several methods for stopping app installations on Windows, and you can pick the most appropriate method for your use case. Let’s start with the most basic method.
1. Creating a Standard Account
When you create a user account on a Windows PC, you get to choose specific privileges and permissions for each user. For our purposes, we recommend you create a Standard User Account, and anyone using the machine through this account will not be able to install new apps unless they provide the administrator’s PIN code. Also, since this method is very basic, it works on Windows 11, 10, and older.
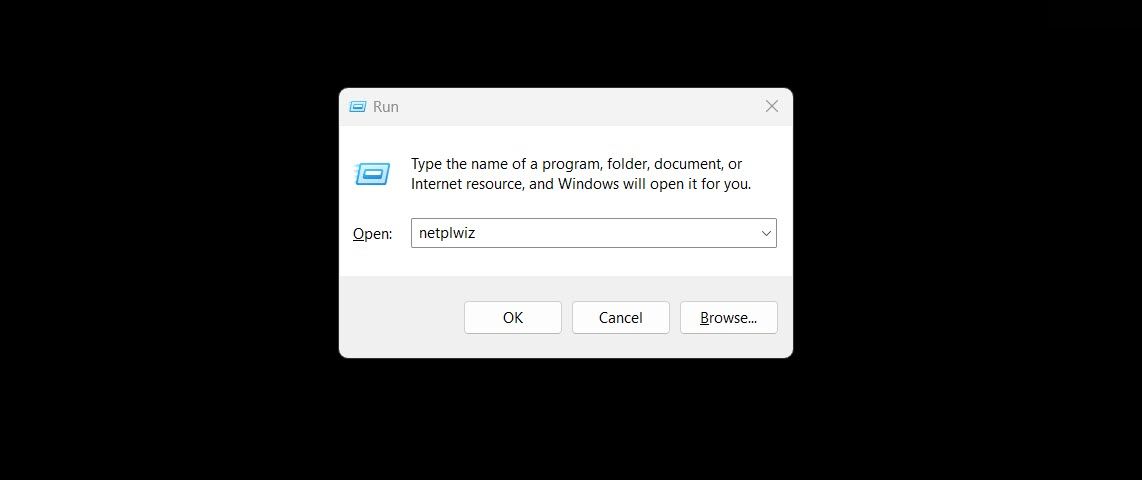
The first step is to access the “User Accounts” settings page, and the easiest way to do so is to press Win+R to launch the Run app, then type netplwiz and press Enter.
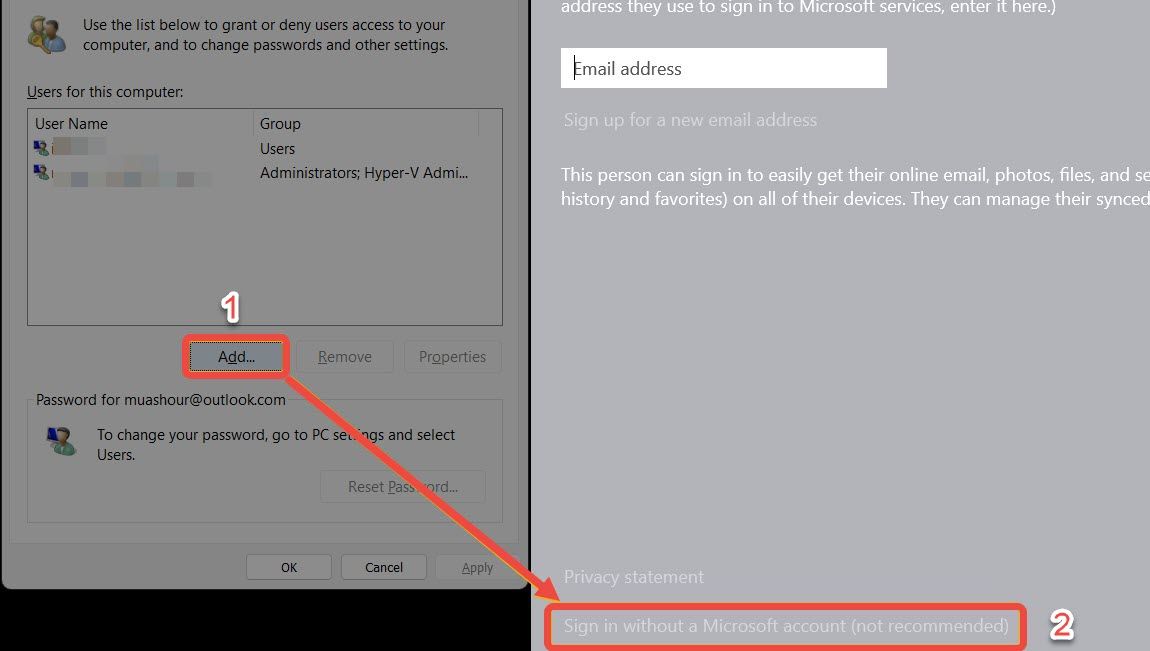
After the User Accounts window opens, click the “Add” button and select the “Sign in without a Microsoft account” option because creating a local account is more manageable and makes more sense in our situation.
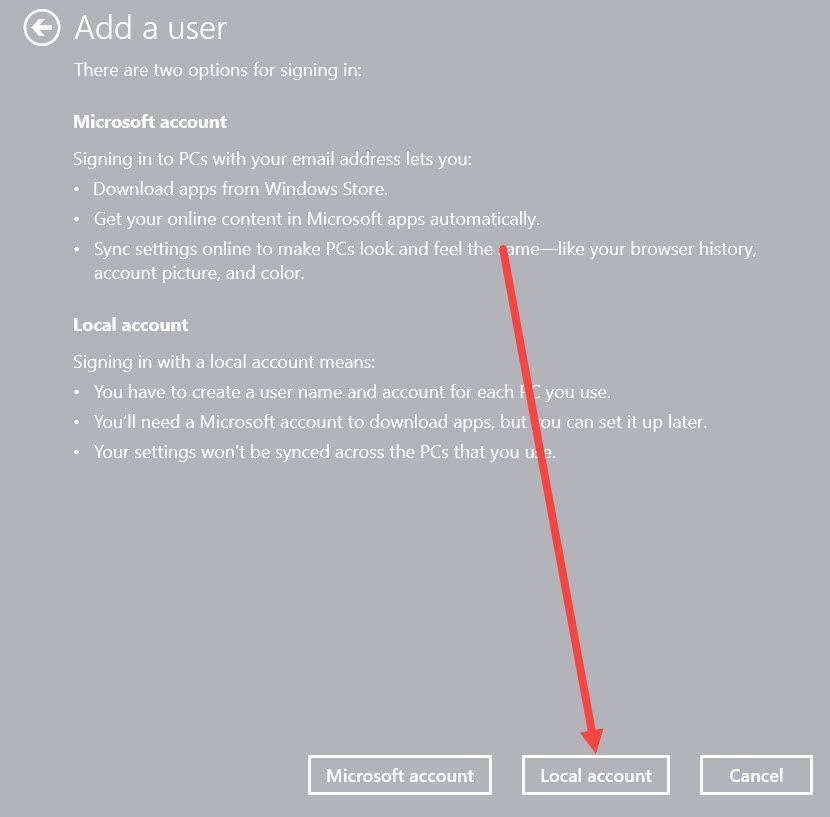
A confirmation window will appear. Proceed by clicking the “Local Account” option.
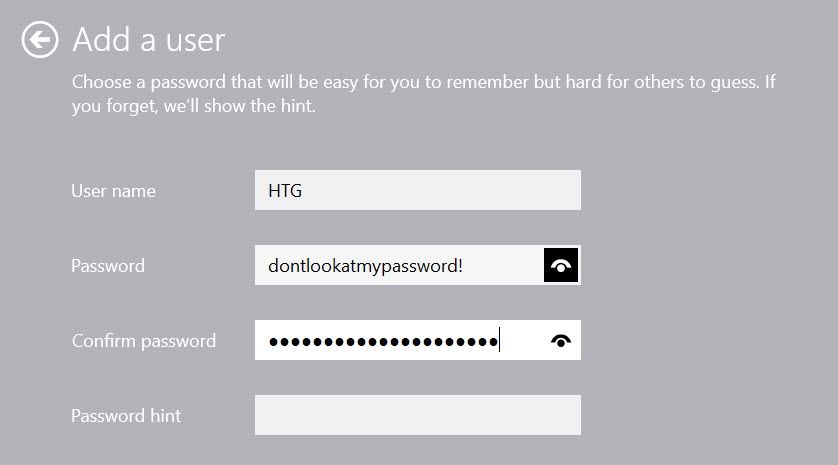
Now, you need to set the name, the password, and the password hint. Note that you (or the concerned person) will need this to log in to the new account. After adding the information, click “Finish.”
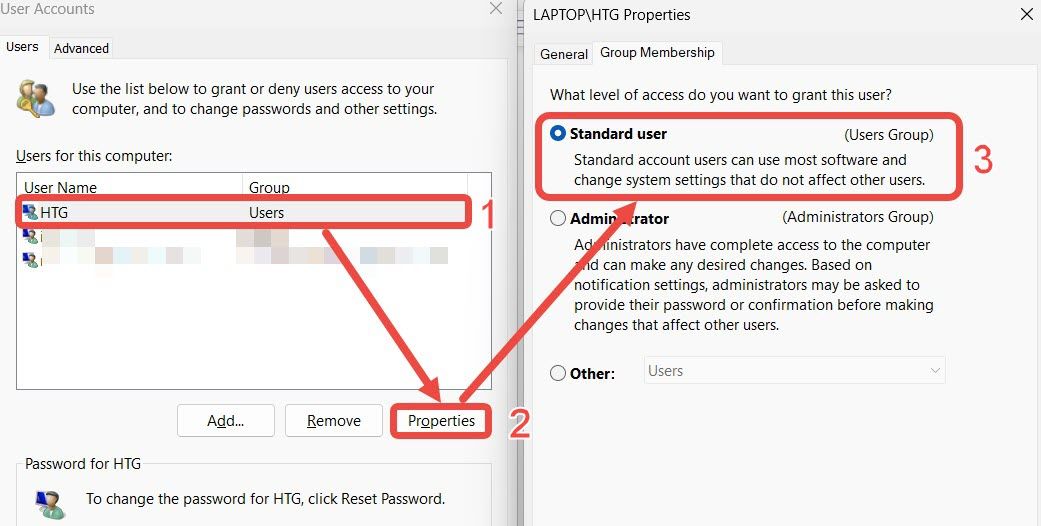
Back in the User Accounts settings, you’ll see the newly created user. Click it to select it, then click the “Properties” icon. Finally, make sure that the user is a standard user.
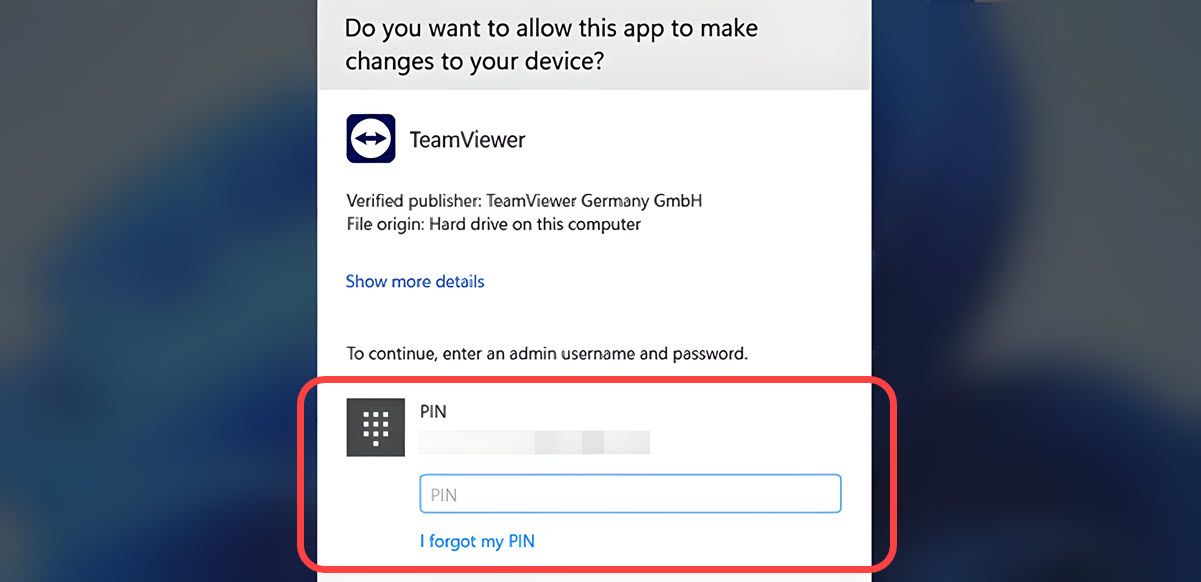
After you restart your PC, you can log in to this new account. Alternatively, open the start menu and click on your photo to see the option to switch the user on Windows without restarting or signing out. Later, if the user tries to install a new app, they’ll be obligated to provide the administrator PIN code, which is typically your user password.
2. Limiting Apps Installs to Microsoft Store
Another approach is to block installing apps or programs on your Windows PC unless they come from the Microsoft Store. This is good for security because apps (or most apps) on the Microsoft Store are already safe to install. It’s worth noting that Microsoft Store now has regular apps like Firefox or Opera, so users aren’t limited to UWP apps. Additionally, this works fine on Windows 11 and 10.
One drawback, however, is that the person using the PC can turn off this option without needing to authenticate. Luckily, we can fix this with a quick group policy edit.
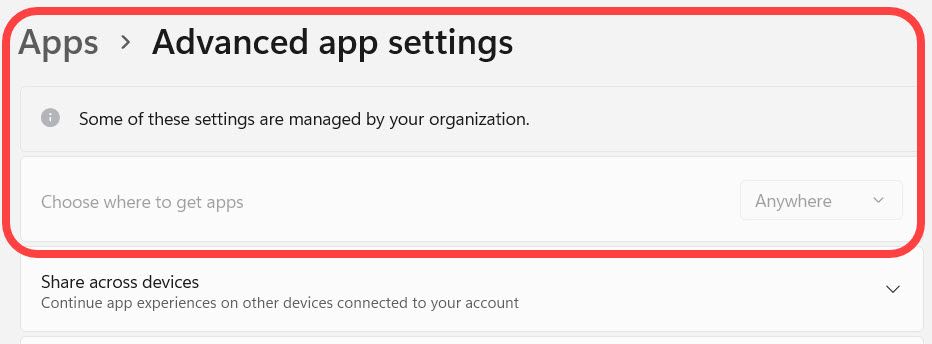
Open the Settings app by pressing Win+i or normally navigating to it, then go to the “Apps” section and select “Advanced App Settings.
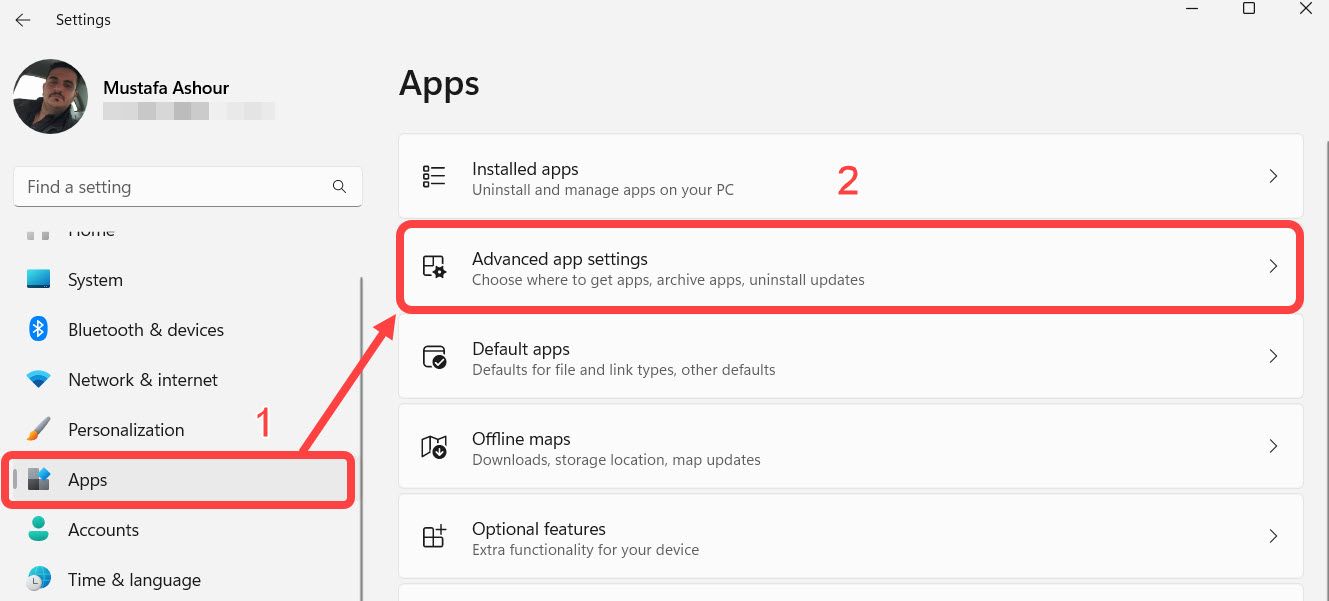
Through the “Choose Where to Get Apps From” drop-down menu, select “The Microsoft Store Only.”

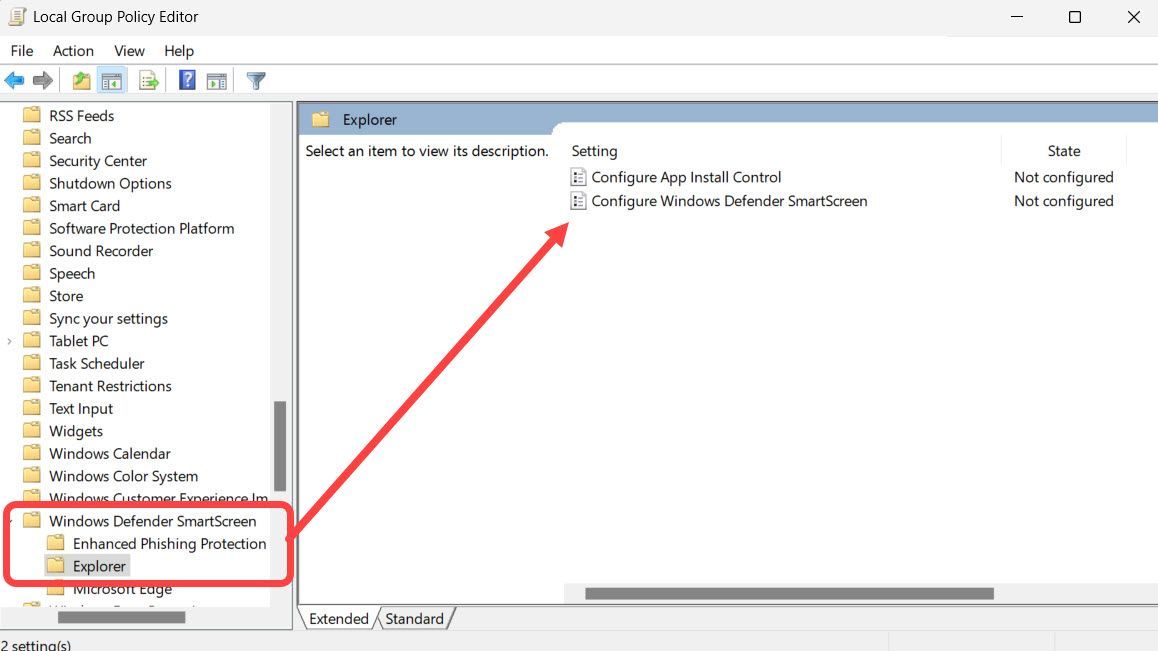
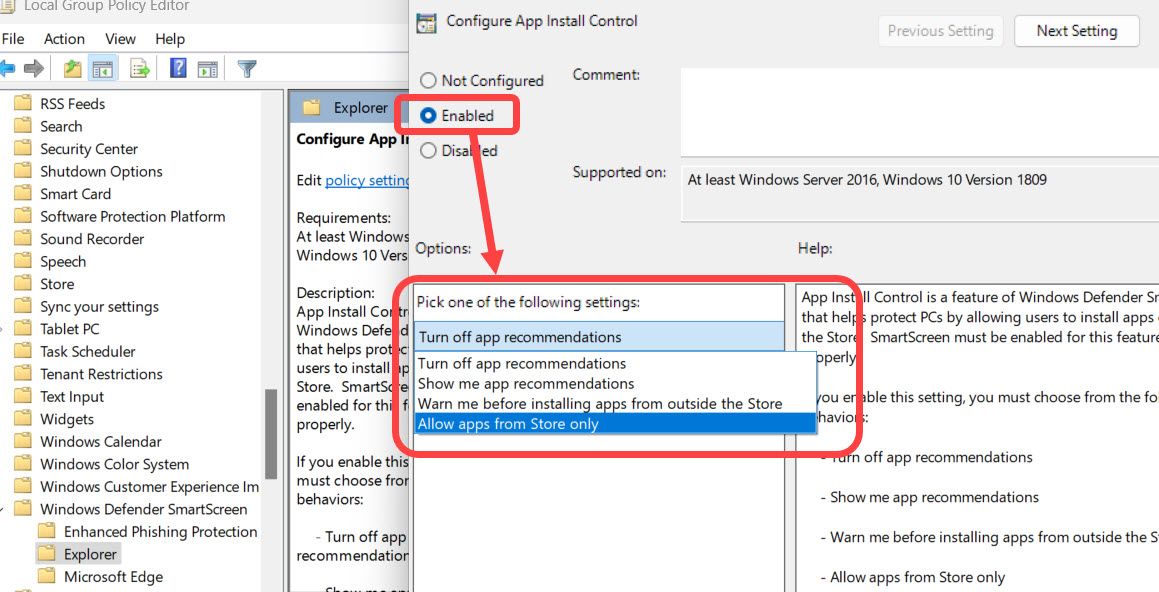
To prevent this option from being altered later, you’ll need to modify the Group Policy Editor, which is available only for the Pro versions of Windows. To continue, launch the Group Policy Editor by searching for it through Windows Search (or by pressing Win+R and typing “gpedit.msc”) and navigate to the following path:
Computer Configuration\Administrative Templates\Windows Components\Windows Defender SmartScreen\Explorer
Double-click the “Configure App Install Control” policy and select “Enabled.” Then, select “Allow Apps from Store Only” through the “Options” drop-down menu. Finally, click “Apply” and “OK.”
Restart your PC for the changes to take effect. If you return to the “Advanced App Settings” page, you’ll see that the option is now grayed out and can’t be changed. Of course, if you need to re-enable it, you’ll need to undo the group policy edit you’ve just made.
3. Block Installing Executables Through Group Policy Editor
Although most executable files come in EXE format, you can at least block MSI files from being installed. It isn’t a cure-all, but it can complement other approaches to stopping app installations. As you can expect, its main drawback is that it doesn’t block installing EXE files.
Launch the Group Policy Editor and navigate to the following path. You’ll notice it’s very close to the one we navigated to in the aforementioned method.
Computer Configuration\Administrative Templates\Windows Components\Windows Installer
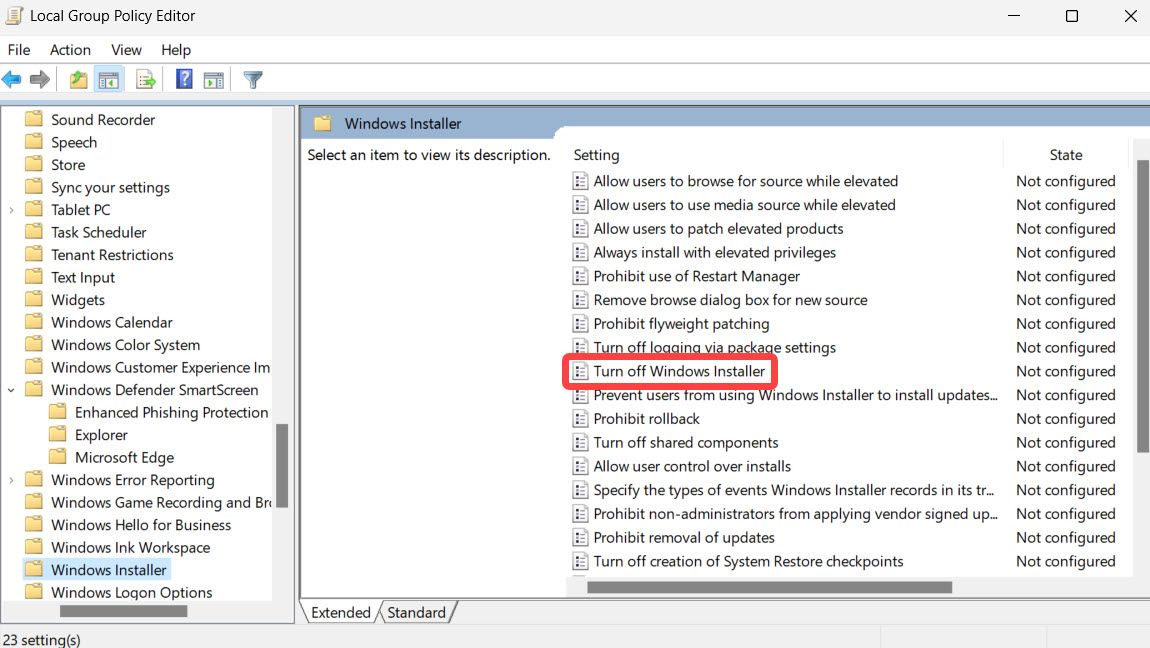
Just double-click the “Turn Off Windows Installer ” setting and choose “Enabled,” then set it to “Always.” Finally, click “Apply” and/or “OK.”
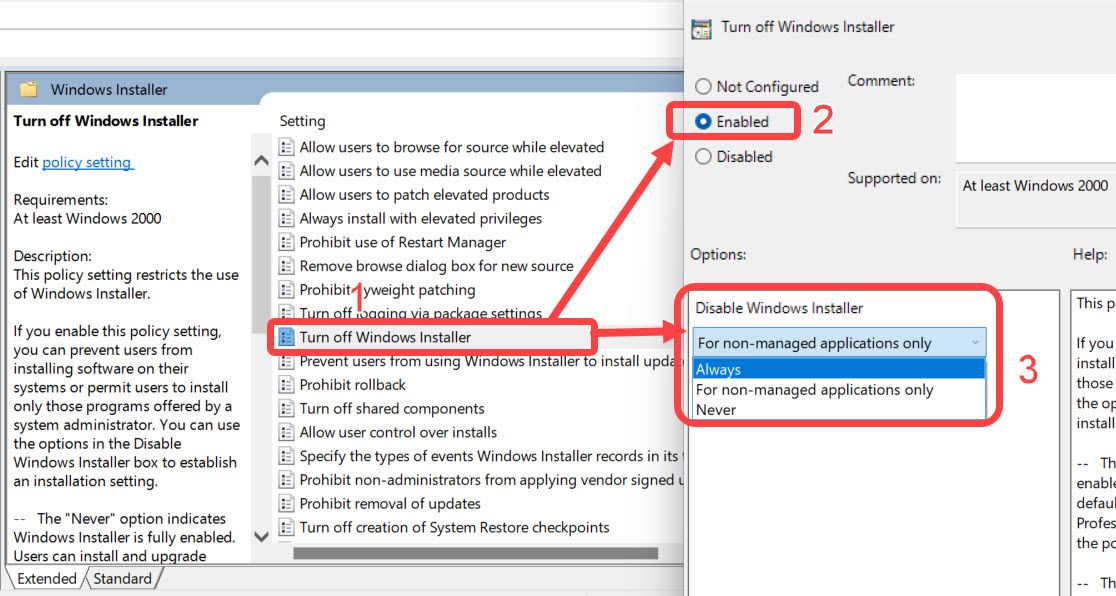
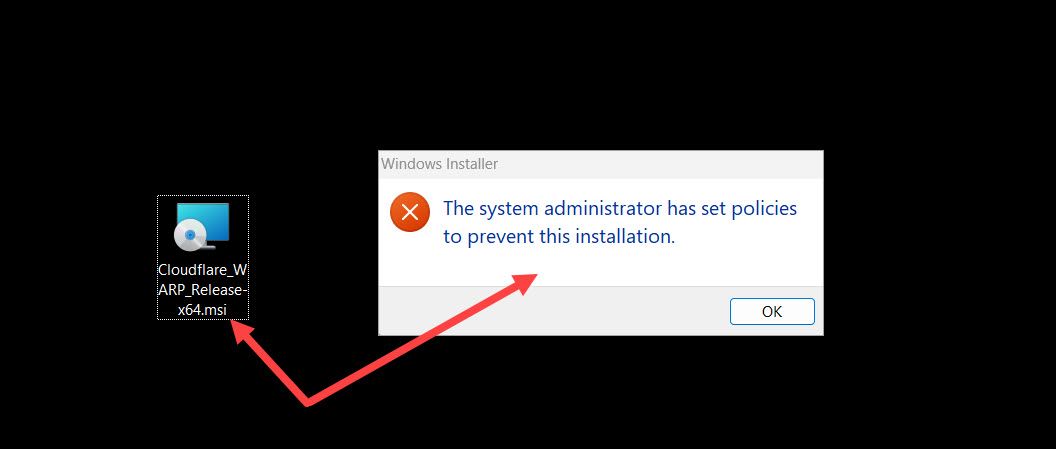
After doing this, you’ll see the message “The system administrator has set policies to prevent this installation” when you try to install any MSI executable. You need to restart your device for the changes to take effect.
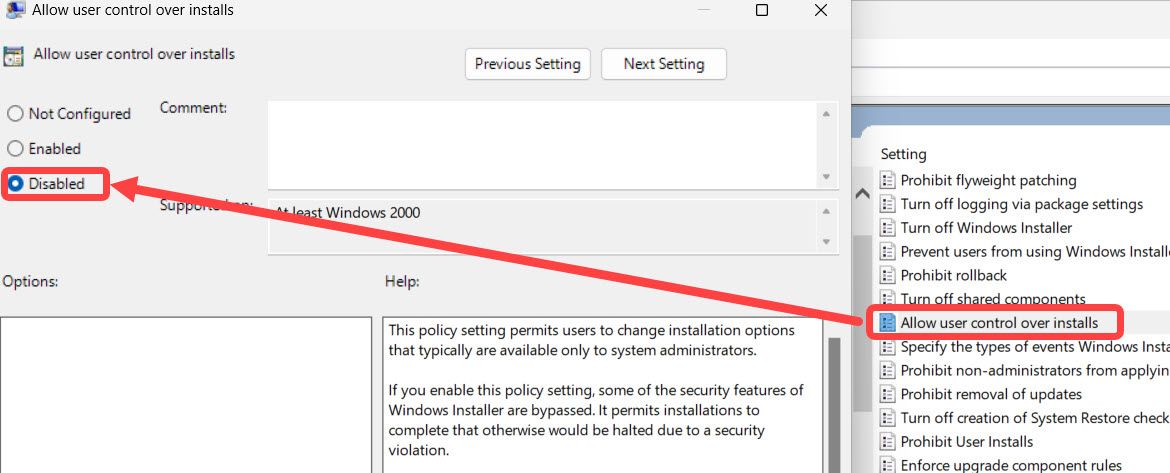
From the same “Windows Installer” folder you’re in, you can double-click the policy “Allow User Control Over Installs.” and choose “Disabled.” This will also prevent users from running installation files.
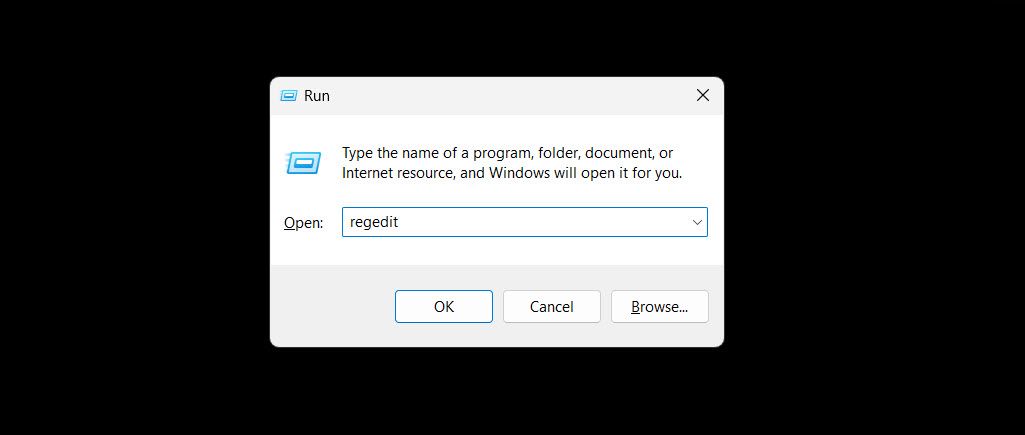
As mentioned above, Group Policy Editor is only available for the Pro versions of Windows. Alternatively, you can apply the same rule through the Registry Editor. Start by launching the Registry Editor by pressing Win+R, then type regedit and press Enter. Always remember to back up the registry before modifying it.
Then, navigate to the following path (or copy and paste it).
Computer\HKEY_LOCAL_MACHINE\SOFTWARE\Classes\Msi.Package
Finally, double-click the “Default” key, change the value data to
C:\Windows\System32\msiexec.exe,1
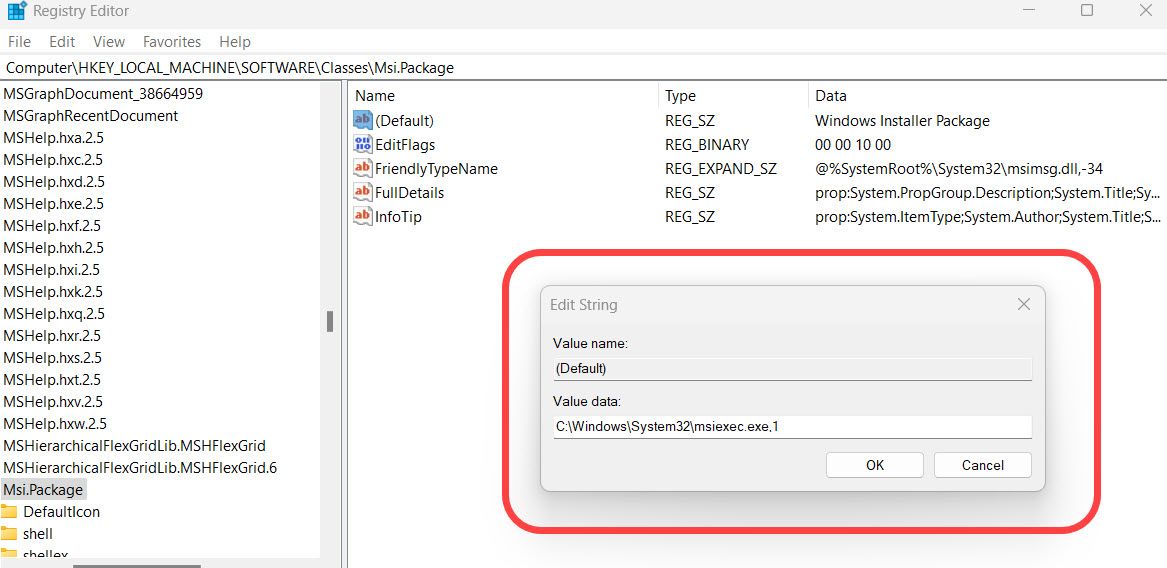
After that, restart your PC.
4. Try a Third-Party App to Block Installs
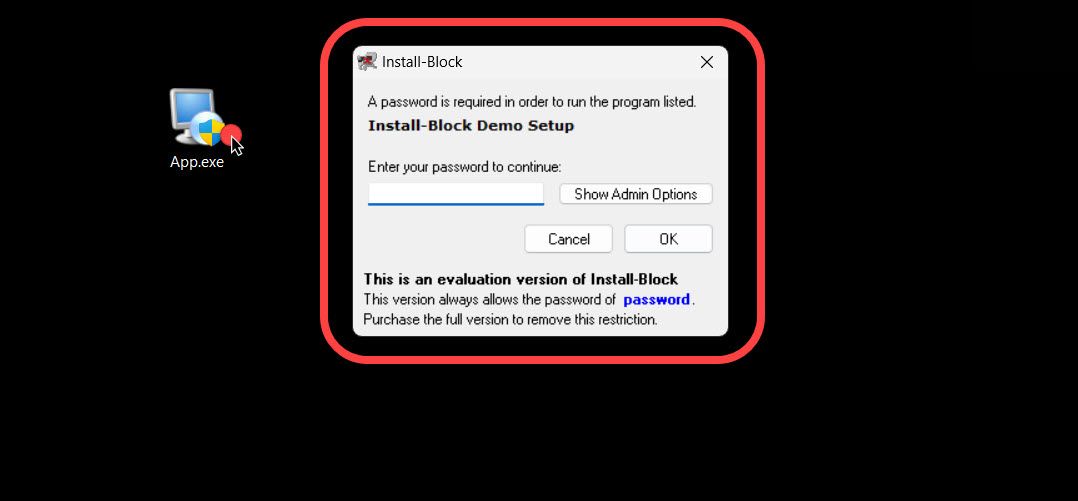
If you want to avoid going through system modifications, you can always rely on a third-party app that gets the job done. The best available option is Install-Block, a paid software that costs $19.95.
Install-Block simply searches for the keyword you set in the window titles, and once it finds it, it’ll block the window and ask for a password. For instance, you can choose “Install” as the keyword, as virtually every software installer has this word in its window name.
You can download the Install-Block demo and try it. Be warned, though, that this software takes things literally. For example, if you have a web page with the keyword opened (like this one), the app will block it because it will find the word “install” in the browser’s window! Still, you can manage exceptions in the app’s settings.
Alternatively, you can try Deep Freeze, which is also paid but with a 30-day trial. Unlike Install-Block, Deep Freeze actually allows users to install all the programs they want, but everything returns to its original condition once the device is restarted.
Now you’re good to go. Want to do more to protect your PC? Check out our guide about basic computer security to perfect your daily PC use!

