Don’t like seeing the menu bar on your Mac? Reclaim some space by hiding it!
Key Takeaways
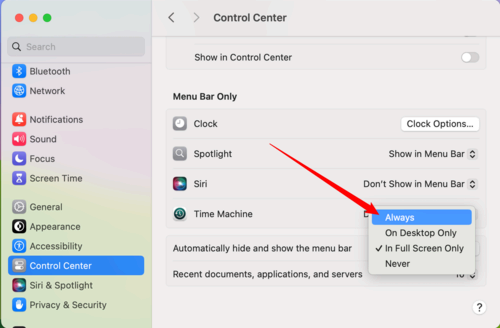
- Automatically hide the menu bar by going to System Preferences > Control Center, and choosing “Always” next to the “Automatically Hide and Show the Menu Bar.”
- To re-enable the menu bar, go back to System Preferences >Control Center and select “Never” or “In Full Screen Only” instead.
The Mac menu bar is constant. It’s always available at the top of the screen, with menus, Control Center, and utilities. But it doesn’t have to be. Here’s how to automatically hide or show the menu bar on Mac.
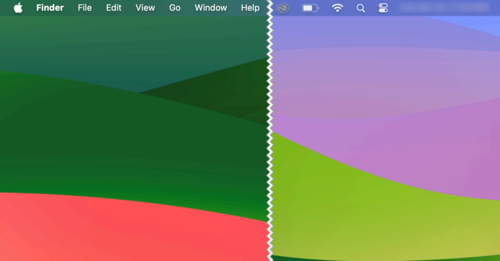
The easiest way to reclaim some screen space on your Mac screen (other than hiding the Dock) is to hide the menu bar itself. Once it’s hidden, you can still access it by moving your cursor to the top of the screen.
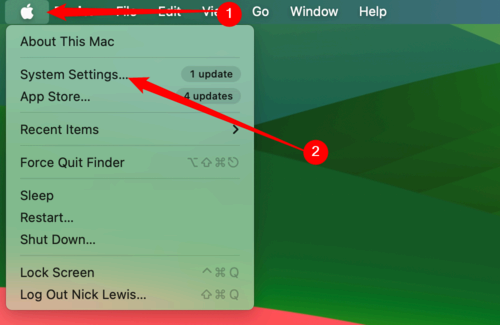
To enable the automatic menu bar-hiding feature, click the Apple icon, and then choose the “System Settings” option.
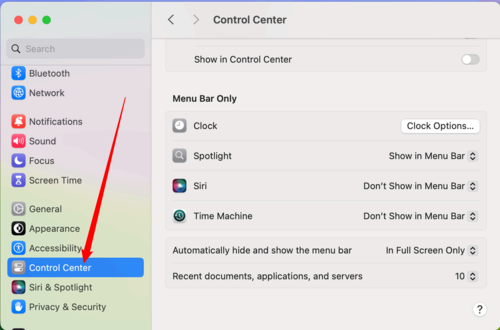
Scroll down in the left pane and select “Control Center.”
Click on the right-hand pane, then scroll down until you see “Automatically Hide and Show the Menu Bar.” Click the current setting (probably “In Full Screen Only”) and select “Always” instead.
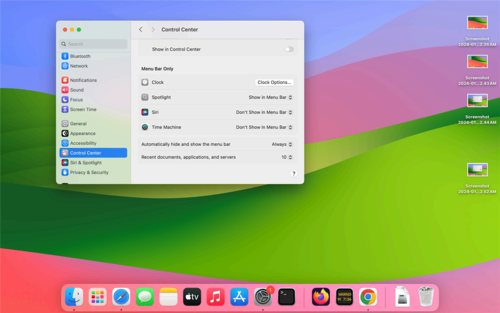
Now, the menu bar will disappear from your screen.
You can move your cursor to the top of the screen, or you can use the Fn+Control+F2 keyboard shortcut to temporarily show the menu bar. However, if you want to permanently show the menu bar, go back to the System Settings and change the setting back to “In Full Screen Only” or “Never” again.
Now that you have more screen space, here are seven Mac tweaks to boost your productivity.
