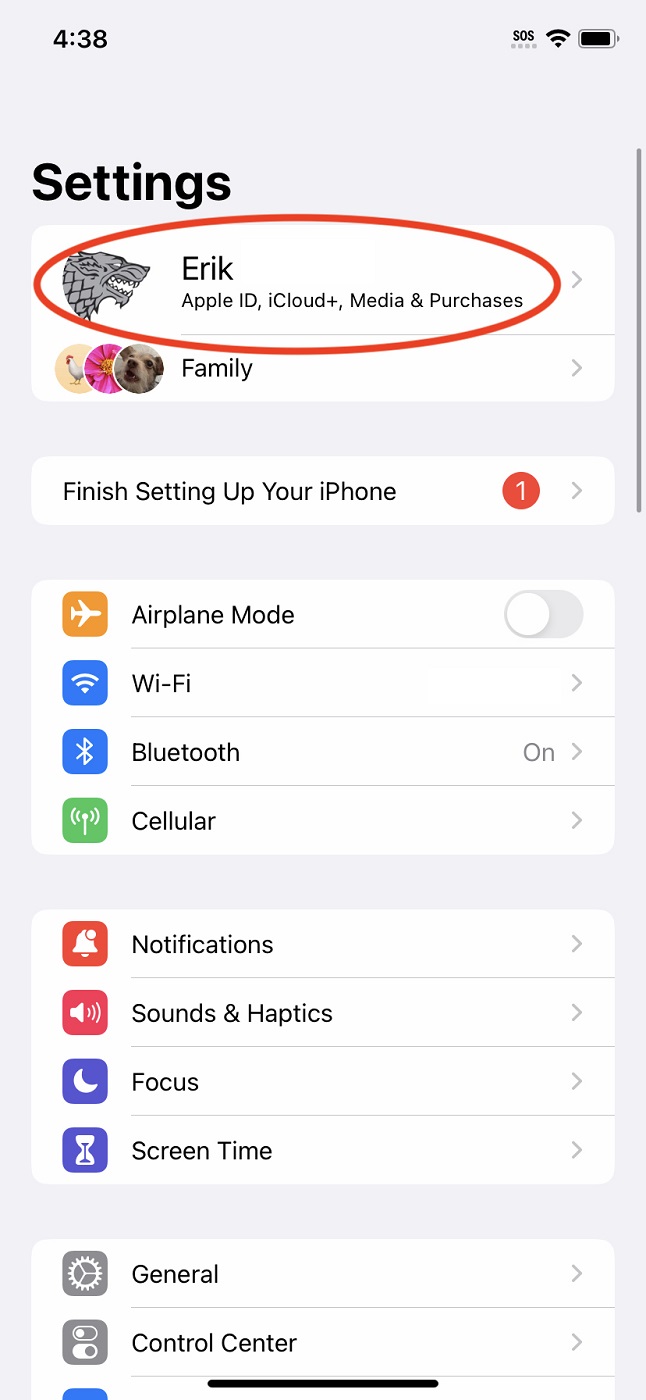
The steps in this guide describe the process of associating an iPhone with an Apple ID when using iOS 17 on both your first iPhone and a second iPhone.
There are many reasons you might associate your Apple ID with a second brand new iPhone or even an older iPhone that has been restored to the default factory settings. You might wish to connect your Apple account to the second smartphone to permit sharing your documents, contacts, calendar and other files with a partner, or you might wish to save a new iPhone for regular use and employ an older model when visiting physically unfriendly locations, such as a boat or construction site where the unit could be lost overboard or damaged.
Although the process of associating an iPhone with an Apple ID varies slightly depending on the version of iOS you’re using — most setups are supported using iOS 11 or later — these steps describe the specific process when using iOS 17 on both iPhones that you’re associating with your Apple ID. Upon starting a new iPhone or an older iPhone running iOS 17 that has been reset, you can associate your existing Apple ID with the second handset by completing the iPhone setup process on the second smartphone.
The typical iPhone setup starts by having you specify the language the device should use and your country or region. After those settings have been entered, you can proceed using the Quick Start setup in which you use Bluetooth to transfer information and data from your first iPhone. Alternatively, you can choose to set up the second iPhone by tapping Set Up Without Another Device to enable customizing the second iPhone’s configuration.
The Quick Start method
Proceed using the Quick Start method by placing your first iPhone — the device already associated with your Apple ID — next to the second iPhone — the one you wish to add to your Apple account. The Set Up New iPhone alert will appear on the existing phone (Figure A).
Figure A
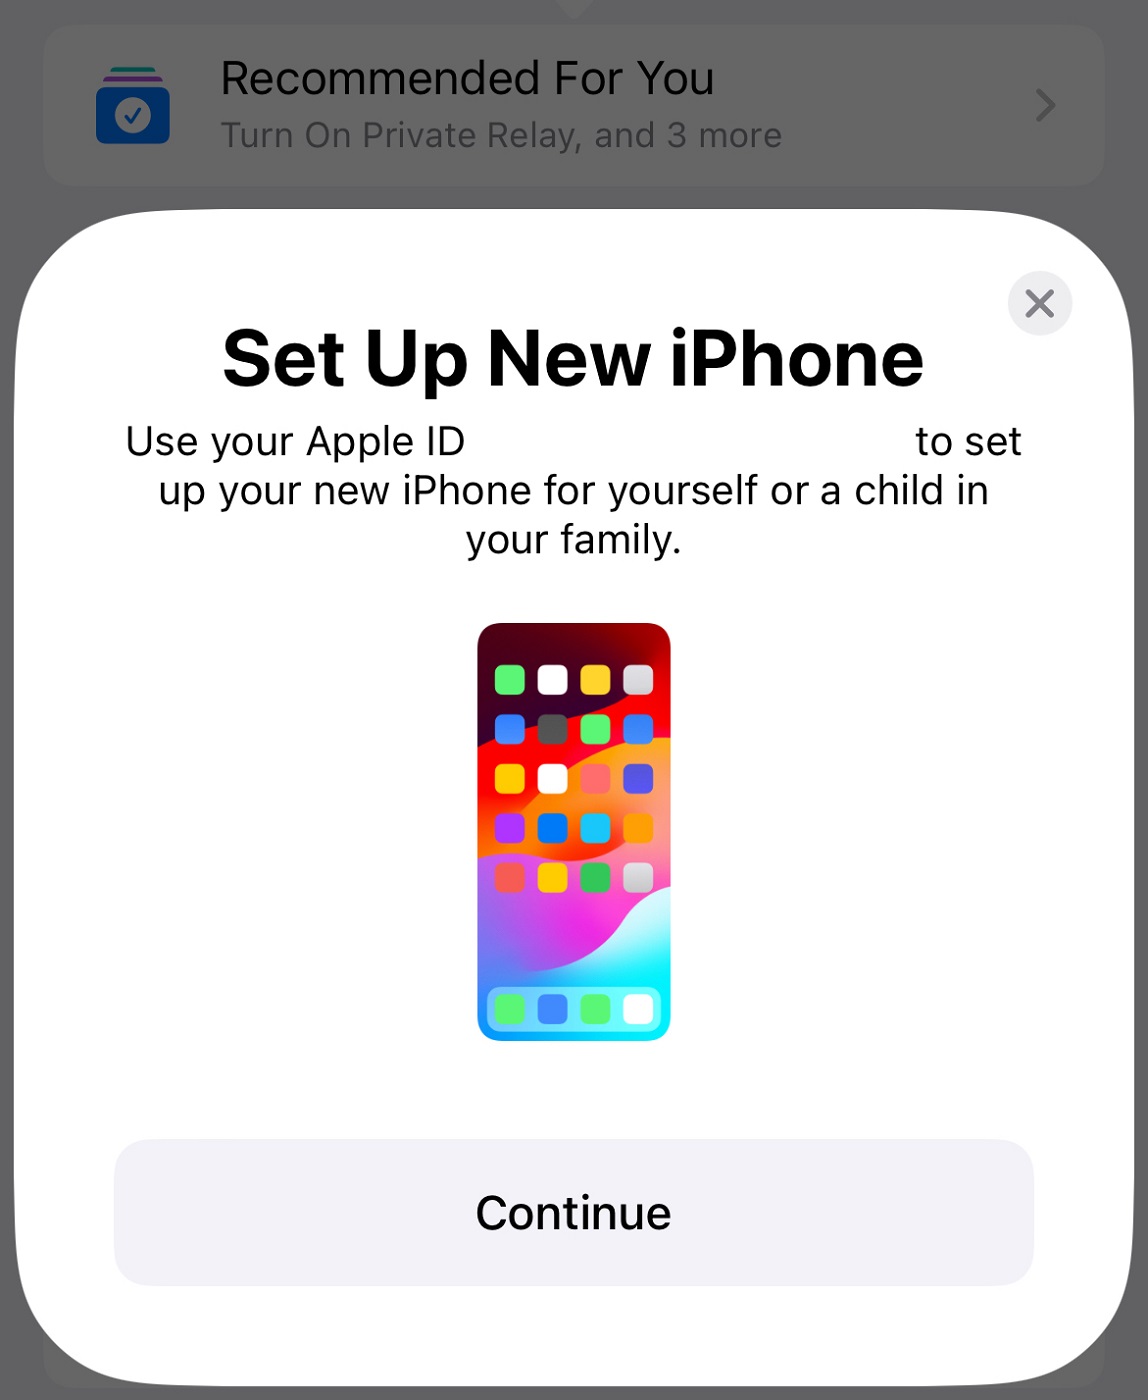
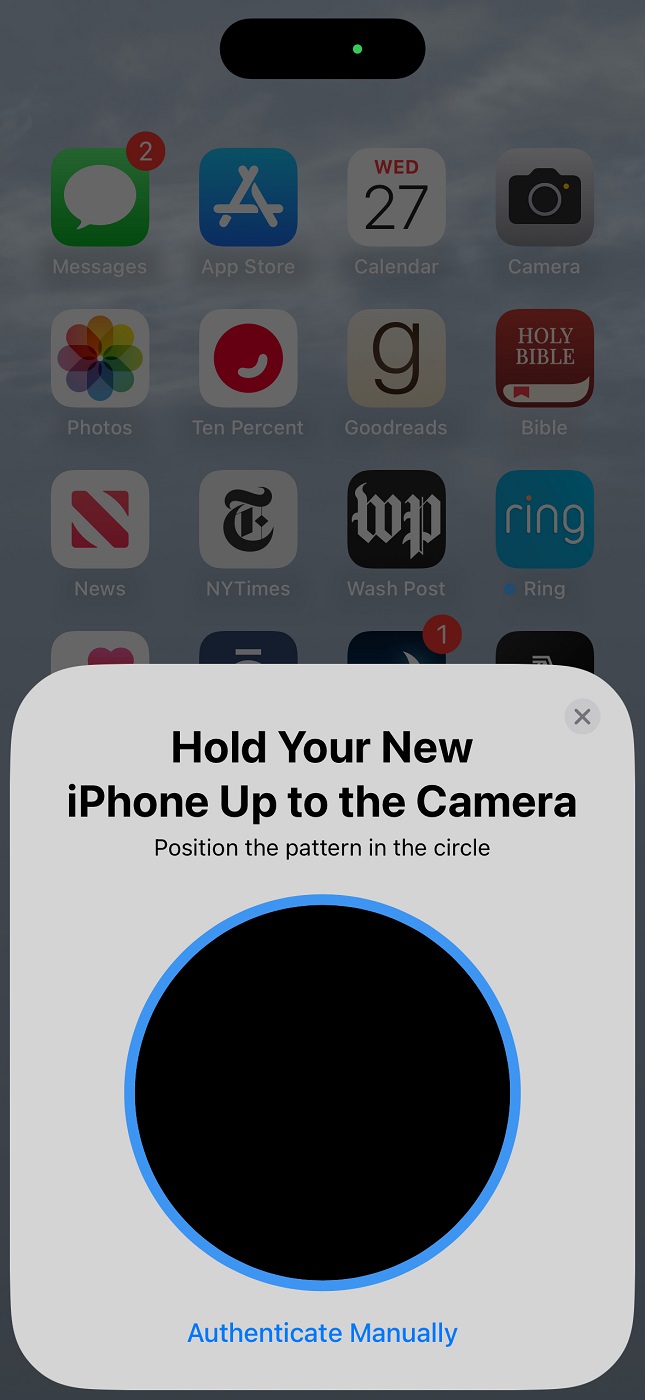
Tap Continue to proceed. The first iPhone will request you hold your new iPhone — the second iPhone you want to associate with your Apple ID — up to the first smartphone’s camera (Figure B). The second phone will simultaneously show a message stating it’s waiting for the other iPhone while also displaying a moving blue circular pattern.
Figure B
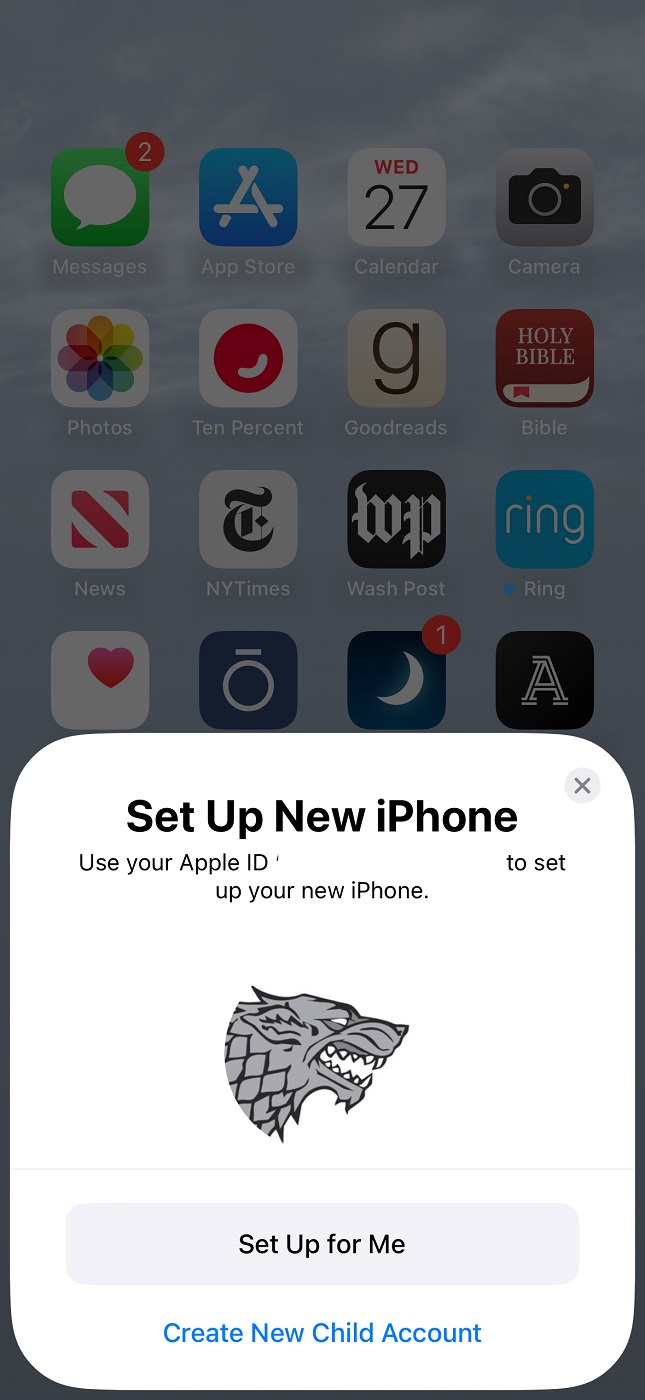
Once you place the second phone’s blue image within the first iPhone’s camera view, the Set Up New iPhone message will appear (Figure C) on the first iPhone. Tap Set Up For Me to continue.
Figure C
The setup routine will direct you to finish the process on the second (new) iPhone, where you will have to enter a verification code Apple sends to the first iPhone. The second iPhone will provide a screen for entering the Apple ID verification code sent to the first iPhone.
Then, after you enter the first phone’s passcode on the second handset and tap Next, the second iPhone will confirm it’s working to complete the setup process. Upon finishing the initial routine, the second phone will present several screens explaining Apple’s data and privacy practices and asking whether you wish to set up Face ID. Tap the Continue or Set Up Later buttons as you prefer for each option.
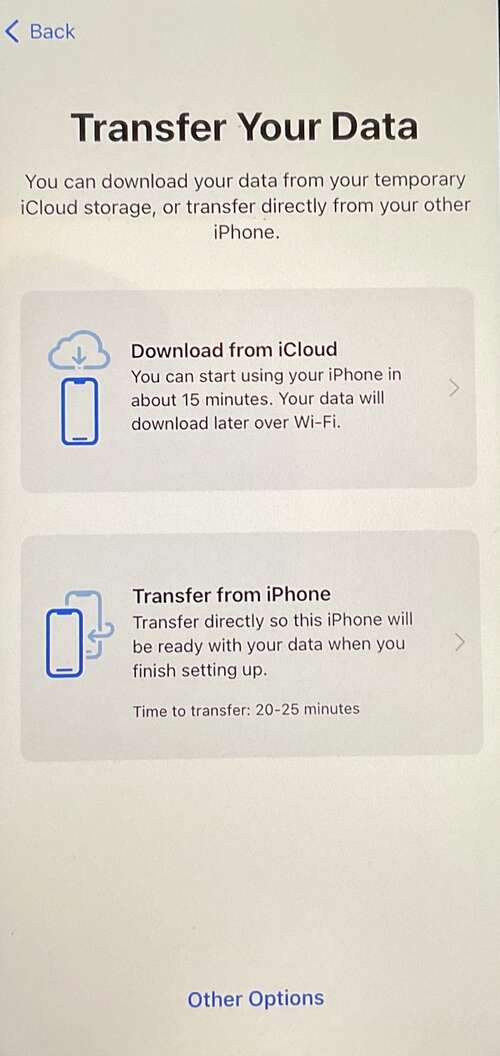
Next, the second iPhone will ask whether you wish to transfer your Apple account data from iCloud (Download From iCloud) or from another phone (Transfer From iPhone), among other options (Figure D). Downloading from iCloud is typically quicker; choosing that option sets up your Apple ID for you on the second phone after you agree to the terms and conditions.
Figure D
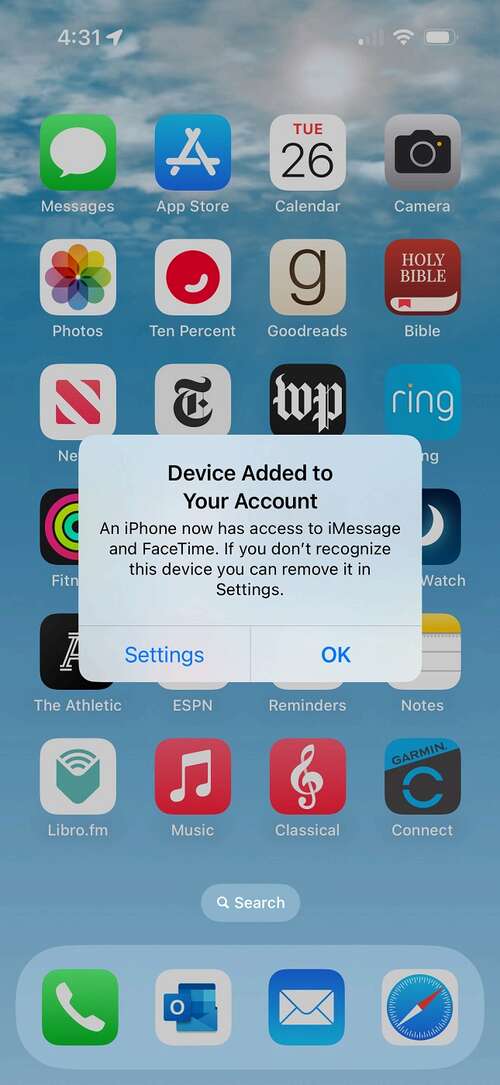
In my many tests and experiences, the iPhone setup process then associates your existing Apple ID from the first iPhone with the second iPhone. You should receive assurance in the form of notifications; these notifications appear automatically on the other Apple devices including Macs, iPads and iPhones associated with your Apple ID (Figure E). Those messages confirm the new device has been added to your Apple user account.
Figure E
Other steps the iPhone setup routine will walk you through include navigating setup screens providing the opportunity to install applications and data, configuration settings, Apple Wallet and connections to other devices, such as an Apple Watch previously backed up to your Apple iCloud account. You can proceed by tapping Continue, in which case the previously backed up information will be restored to the second iPhone or by selecting Customize. Proceed according to your preferences. Note: None of those elements are required to associate your Apple ID with the second iPhone.
The setup process then asks whether you wish to enable or disable Location Services and add a credit card to Apple Wallet. After specifying your preferences, the second iPhone will display a message stating it’s waiting for the first iPhone to complete its backup. When complete, you’ll see the Welcome to iPhone! screen on the second smartphone, which is then associated with your Apple ID (Figure F).
Figure F
