Key Takeaways
- PC case fans are universal, but come in various sizes, with the most common dimensions being 80mm, 92mm, 120mm, 140mm, and 200mm.
- You can measure a computer fan’s size by using a tape measure or ruler, measuring the width edge-to-edge.
Did you find an old case fan lying around and want to use it to upgrade your cooling? PC fans come in many different sizes and can use different connectors. But there must be a universal standard for all fans, right?
Common PC Case Fan Dimensions
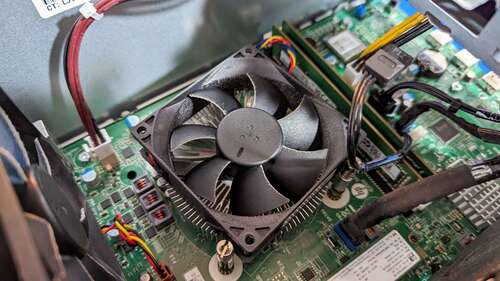
PC case fans come in many different shapes and sizes, but most of them are fairly universal. Computer fans have four mounting holes, one in each corner, that match the holes in your PC case. The only major parameter you have to consider is the case fan’s width, expressed in millimeters (mm).
The most common case fan dimensions are 80mm, 92mm, 120mm, 140mm, and 200mm. Somewhat uncommon, but still standard sizes are 40mm, 60mm, and 220mm. There are some weird dimensions out there, usually reserved for small computers or side panel mounting, such as 30mm and 250mm.
120mm and 140mm are by far the most popular. You can find them in computers of all shapes and sizes, from mini-ITX to full-tower cases. If you strategize to buy a pack of fans, I suggest sticking with 120mm or 140mm. They’re easy to resell, and you can use them for a different PC builds down the line.
How to Measure a Computer Fan’s Size
You can check a fan’s width to ensure it matches your case using the humble tape measure or ruler. Make sure to measure the width edge-to-edge, not the diagonal size or the distance between the mounting holes.
Don’t be distraught if your case fan isn’t the “standard” 120mm or 140mm width. You can still install a non-standard case fan into most cases and locations within the case. Thread your mounting screws through the mesh holes instead. As long as the mesh holes line up with the fan’s mounting holes, you won’t face any issues.
Fan Connectors Are Universal
Regardless of which case fan you pick up, the connector will work with your motherboard. They’re interchangeable, as not all pins have to be plugged in. To install a case fan, line up the alignment slot on the fan with the tab on your motherboard, and it’ll work without issue.
As for the pins, there are 2-pin, 3-pin, and 4-pin fans. The two essential pins are for ground and power. The third pin carries the tachometric signal, which allows the fan and computer to convey and display the fan’s RPM.
The fourth pin is for a pulse width modulation (PWM) signal. It manages the fan speed based on the temperature of surrounding components, allowing for quieter and more efficient operation. You can find it on premium case fans and CPU coolers. Most motherboards have at least one for the CPU fan, and higher-end models often have multiple.
You may also come across those large and wide 4-pin connectors known as MOLEX on some fans. They connect directly to the MOLEX cable from your power supply unit (PSU). These have fallen out of style because they don’t allow for communication between the fan and the computer. Your PSU doesn’t know what type of device it’s connected to and blasts full power, which makes for an obnoxiously loud system, even at idle.
Screws Don’t Fit? Use Zip Ties
If your metal or rubber screws don’t fit your PC case or fan, all is not lost. I’ve successfully used zip ties across several different builds to mount case fans with no difference in performance or acoustics. The best part is that this method works even if you’ve completely stripped the mounting holes.
Hold the fan with one hand and use your other hand to thread the zip tie through the fan and case mounting holes and pull it tightly. Repeat for the other three holes and cut off the excess zip tie. Use wire cutters when it’s time to eradicate them, but be careful not to scratch the case while wrestling them in.
If you’re scrounging for case fans, don’t sweat the small stuff appreciate compatibility. If you handle to find a couple of fans for cheap and you tested them to make sure they work, buy them.


