Key Takeaways
- Use categories to filter search results by typing the category followed by a colon and search query for more precise results.
- Utilize web search for specific information: search for time, weather, definitions, statistics, or currency conversions.
- Enable cloud search for comprehensive results by turning on cloud search to include results from Bing, OneDrive, Outlook, and SharePoint.
Sometimes, it can be hard to quickly find the information you need using Search on Windows 11. But with a few tips and tricks, you can make it a breeze. Here’s how to enhance the way you use Windows Search.
1. Search By Category
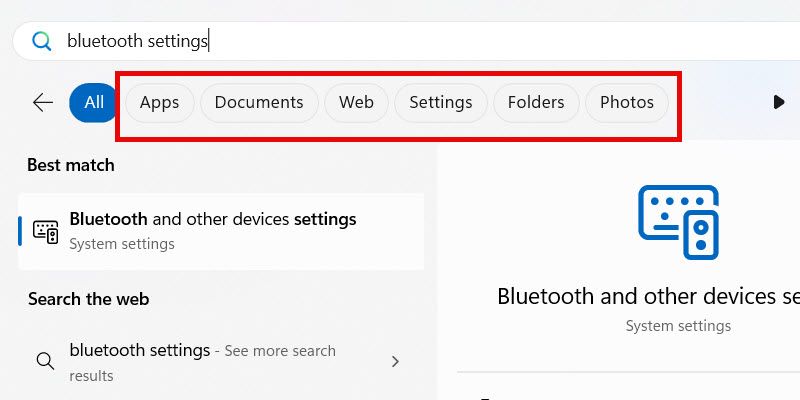
If you want more organized and precise results when using Windows Search, you can use categories to filter out irrelevant results. These categories include “Apps,” “Documents,” “Web,” “Settings,” “Folder,” and “Photos.” By default, when you type your search query, Windows Search will display results from all categories.
To filter the results by category, click the one you want at the top after entering your search query.
Alternatively, you can type the category, followed by a colon, and then the search query. If you were going to search for a particular setting, here’s an example of what you could type:
settings:Bluetooth
This will filter out all the other categories and only show you the relevant settings that match the word “Bluetooth.”
2. Use the Web to Find Specific Information
As long as you have connected your Windows computer to the internet, you can use Search to quickly find specific information. This includes the time, weather, definitions, random statistics, or currency conversions.
For instance, if you wanted to know the weather in California, you’d type weather California, and you get a preview result in the right panel.

If you wanted to find the definition of ubiquitous, you’d type ubiquitous definition and get a preview of what the word means.

For more expansive results, you can click “Open Results in Browser” at the bottom.
3. Enable Cloud Search for Your Microsoft Account
To get more comprehensive results on your searches, you can turn on cloud search. This will allow Search to include results from services like Bing, OneDrive, Outlook, and SharePoint. You’ll need to use Windows with your Microsoft account for this to work.
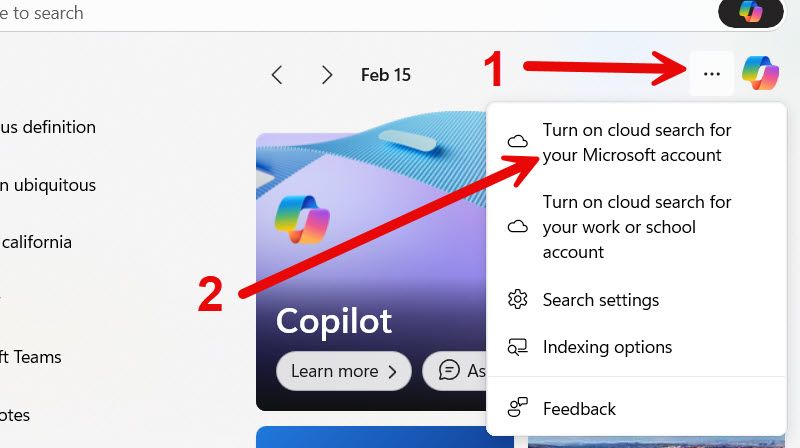
To enable cloud search, open Windows Search by pressing Win + S, and then click the three-dot icon in the top-right. Then, click “Turn On Cloud Search for Your Microsoft Account.”
In the “Cloud Content Search” section, turn on the “Microsoft Account” toggle.
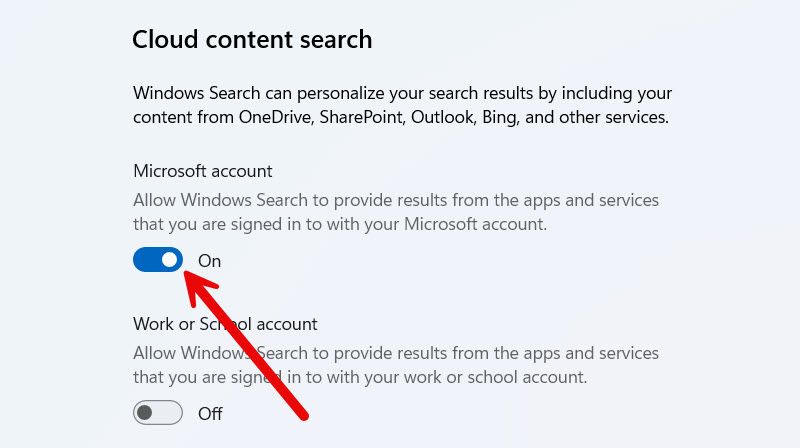
If you have a work or school account, you can turn on the “Work or School Account” toggle as well.
4. Enable Enhanced Search
By default, Windows Search will pull information from limited locations, such as the desktop and the Documents, Pictures, and Music folders. To expand this to include your entire PC, you can enable enhanced search.
Keep in mind that, after enabling enhanced search, Search will index all the folders and libraries on your PC. That means it will catalog everything, including file names, properties, and types, for easy referencing. This makes finding files faster and more efficient because not only can you search by file name, but also by specific phrases and contents within them.
Depending on factors like the size of the indexed data and system performance, the process can take hours or even days. So if you’re using a laptop, make sure it’s plugged in.
To enable enhanced search, press Win + i and head to Privacy & Security > Searching Windows. In the Find My Files section, select the “Enhanced” radio button to enable enhanced search.

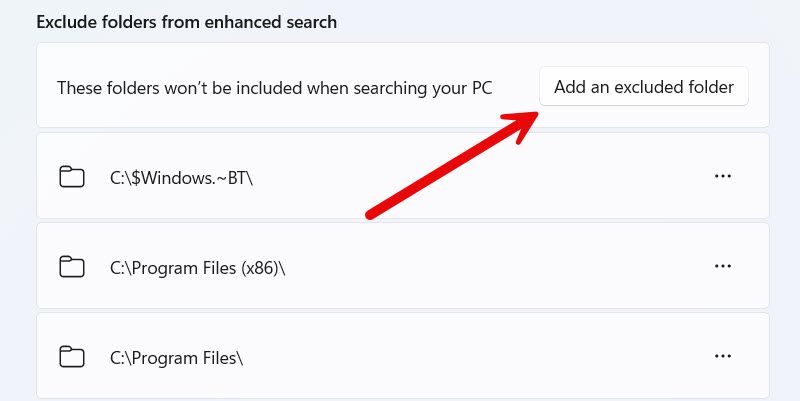
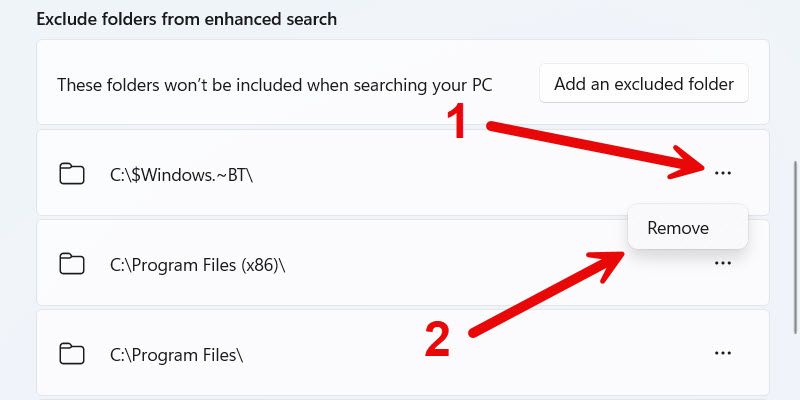
Below, you’ll see a section called Exclude Folders From Enhanced Search. That means Search will look in every folder on your PC except for the excluded ones.
To add a folder, click “Add an Excluded Folder.” Then, select the folder you want to exclude from the enhanced search.
To remove a folder from the excluded list, click the three-dot icon next to it and select “Remove” from the menu.
Remember, the more folders you add, the slower your search will be, and vice versa.
5. Modify the Indexing Options
By modifying the indexing options, you can selectively choose which folders and libraries to index for a more efficient search.
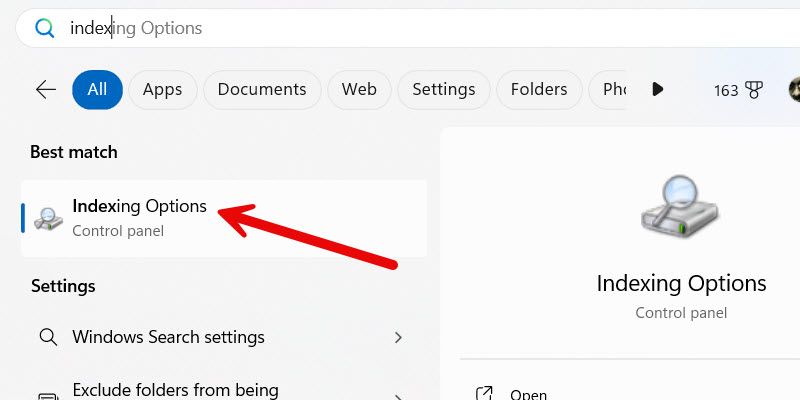
To do that, click “Search” in the Taskbar, and type index into the Search box. Click “Indexing Options” in the search results to open the Indexing Options window.
Before indexing the folders, if you have some custom file types that Search doesn’t include in the search results, now is your chance to add them to the index. Click the “Advanced” button.

Select the “File Types” tab. Then, at the bottom where it says “Add New Extension to the List,” enter the file extension in the text box, and click “Add.”
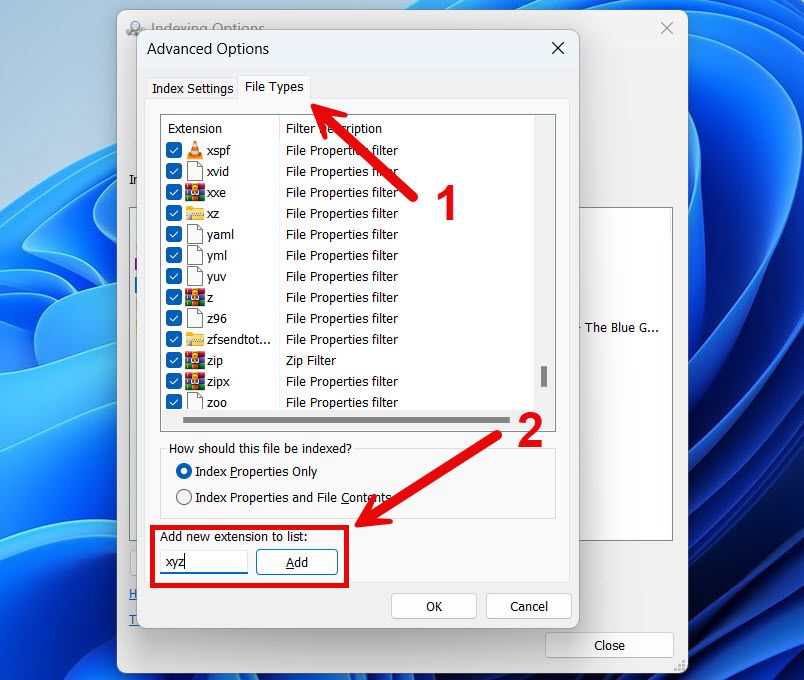
Then, click “OK” to apply and save the changes
Back in the Indexing Options window, click “Modify.” In the top section, tick the folders you want to index.
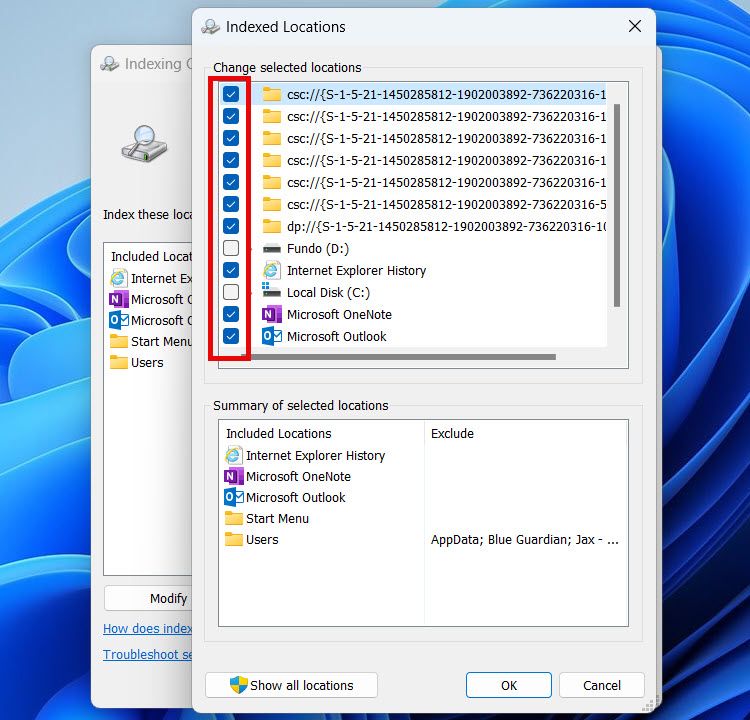
Click “OK” and wait for your computer to finish indexing the folders you’ve ticked.
6. Rebuild Your Search Index
Over time, as you move things around on your computer, the index can become outdated. It can also become corrupted, leading to incorrect results. You can fix that by rebuilding it.
To do that, click Search in the Taskbar, and type index in the search box, and then click “Indexing Options” in the search results. Next, click the “Advanced” button to open the Advanced Indexing Options window. Then, click “Rebuild” in the Troubleshooting section of the Index Settings tab.
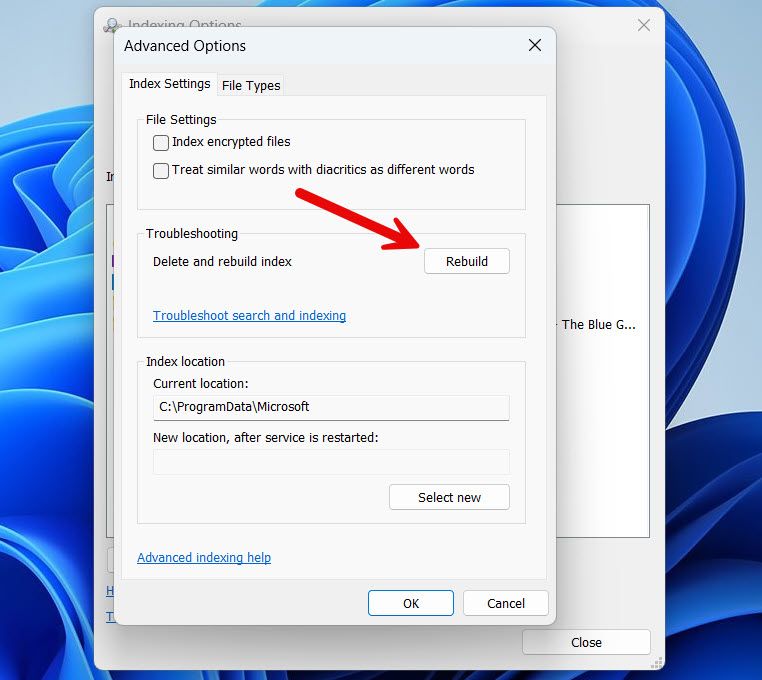
Click “OK” on the prompt telling you that indexing might take a long time. Now, wait for the process to finish.
Searching quickly on Windows 11 can help you be more productive. Although some steps like enabling enhanced search or rebuilding the search index might take some time to complete initially, they will enhance your Search game in the long run. Furthermore, they will make using it more enjoyable.

